Hmmm....


Started to work on the mirrors I really want to have on the car. This starts with creating an "adapter" that gets the mirror in the spot that I want it to be on. Once I have that, I can then work on modelling a much nicer looking part to join the mirror to the base. But first, the adapters. I wanted to have these sitting in the orientation shown, but about 2"(~50mm) closer to the body. Only problem? There isn't enough glass to see anything useful. If this was a stage rally car, it's "good enough" but on the street, unacceptable. We're going to have to rotate to an uglier 90deg fitment...

Orientated this way, I can actually see enough to make these useful (I think) in driving. I whipped up some mounts that are strong enough for street testing, and will wait until the snow subsides and I can road test the fitment. This will also give me enough time to learn how to "loft between two planes", a 3D modelling skill I don't yet have. I'm completely self taught, and this will be another fun mental skill to learn. But for now? "good enough".


I've been working on a foot plate solution that gives me enough heel clearance for my clutch foot. The raw plate looks a right-mess out of the car, but once fitted it's actually tight and square to everything. Sometimes, you just have to pull out the body hammer and work things until they fit right :P

Some quick black paint on it for now. I think I want to drive it for a bit and make sure it's useable before putting the final finish on it. I can't put it in the bender or effectively metal work it if I used my textured finish.

From here the project got a little stuck waiting for parts, and for snow to melt. And so, we started to work on the cosmetics. One of the things I love when looking at other peoples cars is the various event stickers from things they’ve participated on. The Rally Bug has always had this on the side glass, but over the years it’s gotten
really busy.
I’m not entirely opposed to it, but the car has looked so clean in my shop for months that I’m wary of redoing all the decals on the glass. So, I thought since race cars normally put their tech decal on the roll bar, maybe I’d try that out for this round? I’m not sure that I’m sold on this. It definitely breaks up the cleanliness of the car, but at least it doesn’t behind the glass? Each event
is an advertisement for my business, so I don’t want to get rid of them. But then, on the same token, how many photos of of California event stickers have I taken at things like Good Vibes Breakfast Club…and then never remembered to Google them when I get home?


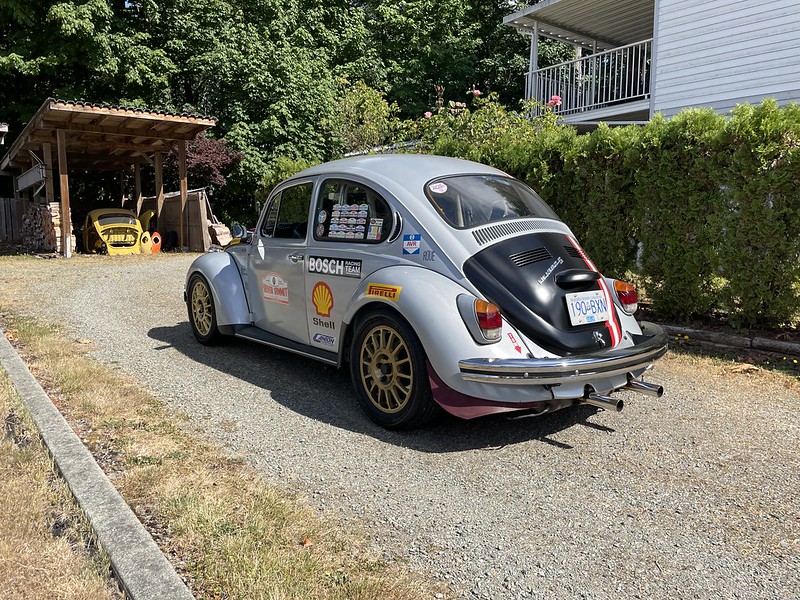
Okay. I’m not going lie. I like this. Ignore the “clear” hood handle gaskets. They are in the order along with the passenger wiper arm.

Turns out, I like this less. Maybe if the light covers were black?

At this stage I decided to put the stripe on, and now I’m really torn. My buddies are 50/50. Half say it absolutely needs the stripe, half say the stripe should go. I think I might hate it only because my vinyl cutter kept fritzing out, and in the end I had to hand cut 60” of red and white. But hey, I got it straight!

Now, the silver hood IS hanging on the garage wall, so I can go back at anytime (presuming I have a buddy to help me swap). I can’t
remove the stripe because it will damage the flat-black wrap, so I’ve decided to leave it until I can at least get the car outside for some proper photographs.
I also swapped the back lid on, which doesn’t match the front since this is semigloss paint and not a wrap. If I decide to stay with the black hoods I will paint or wrap one of the ends so that it matches.

I found a PIAA 540 light cover someone had modelled up with a Transformers theme, and used some of it to model up a PIAA 580 lamp cover. Fairly early into the test print I had a pretty significant error. 3D printing is awesome, until you’re trying to diagnose why something like this happens!

