Hmmm...been a while. Time for some updates :P Most of these are pulled from my Motorgeek.com thread, apologies as I jump from post-to-post here.
When I painted the car a couple of years back I knew it was going to be a temporary fix...basically a stop-gap from the body getting any worse. Unless you buy in California, and pay big money, you're not likely to find a rot free Bug. This one is no different, and while we patched up the body I never dealt with the pan or the heater channels. The pan is solid in the usual rust places (leading me to believe they were replaced in the 90's), but the tunnel has always concerned me, especially up front.
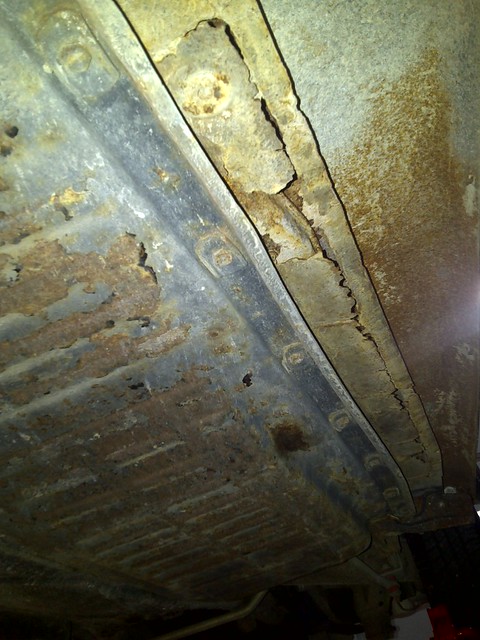
The other day I was moving some Audi bits out from under the car and noticed the undercoating was peeling up front. Hmmmm...not good. Out came the wire wheel tonight and whoa @#%&! do we have some issues!
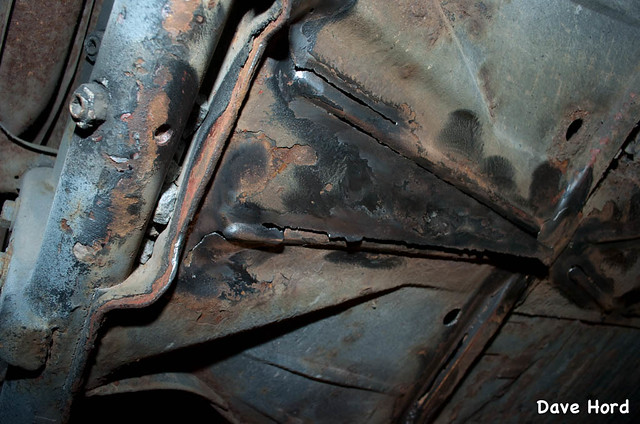
Now, the flash makes surface rust look a lot worse then it is, but still it's pretty bad. This is the front frame head, where the whole front end bolts on. It's a box-section design, and while the top is quite solid and even showing most of the factory paint inside, the bottom is obviously not! By the time I had ground out some of the rust that triangle shaped piece was hanging by the front edge only. Even scarier was the various cracks I found spiderwebbing across the frame head. Yeah, I somehow thing this puppy was in a fairly good hit with a previous owner!
There isn't really a *good* solution to this problem. The repair panels are available, but to do the fix properly (and OEM looking) I would need to take the body off and then remove the front end. Even before I bought the car I knew I'd eventually I'd need to prep a new pan and swap the body/fun bits over (that's the fastest way to do it with the least amount of downtime)...but that brings upon us the problem of the short-cut I took when painting the body. I didn't have the time or money to do the heater channels, which are essentially the structural rocker-panels for the body. At the time they were still "solid enough" and continue to be so for how I use the car. The problem, though, is that they are rough enough that trying to remove the body is sure to tear out a number of the body mounting bolts, which means they will need to be replaced.
Not sure what the long-term plan is going to be yet. I may end up looking for a dry California donor car to transfer all my goodies onto, but that's at least a full year or two away. In the meantime I started welding up the cracks, and patching all the holes. After that I'm skinning over the effected areas with a second layer of steel to add a bit of strength to it. It won't look OEM, but it will act as a band-aid solution for the summer months.
--------
My last week has been a whole lot of this...
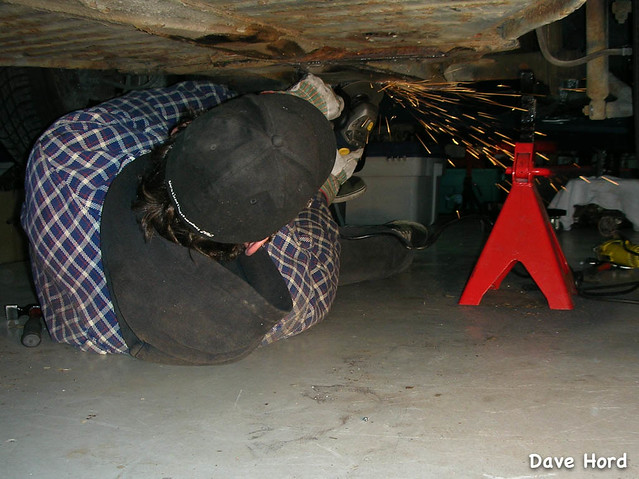
But I managed to stitch up what factory metal was there, ground down the welds and then put 14 or 16ga steel plates over top (whatever I had in the metal bin).
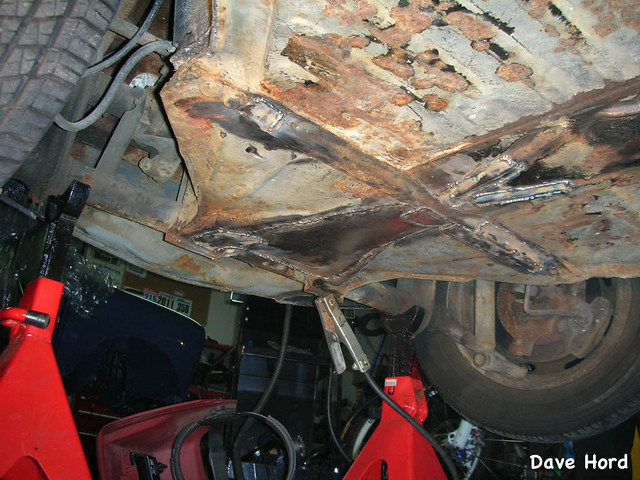
The flash, as usual, makes the surface rust really stand out. sigh.
Then I ground down all the damned welds again...man I hate grinding on my back...and now its got some factory Audi seam sealer over all my welds, just in case I missed a spot. Not sure why I had a tube of factory sealant, but I do!
Took the night off tonight, tired of working on my back under the car. With my shoulder I could manage almost an hour at the beginning of the week, but upwards of two hours by the end of the week before I needed a change of position. I'm sure my surgeon is going to yell at me tomorrow for working on the car...meh. Anyways, next up is wire-wheeling the rest of the frame head and pan, and then painting and/or undercoating the car. I was thinking POR15 followed by rubberized undercoat, but POR15 is so watery it's tough to paint upside down.
Even then I won't be done on the underside. The passenger side heater-channel is looking strong, and survived the screwdriver test. The driver's side, though, not so much.
Not sure yet how I'm going to repair this. The body bolts to the floorpan via the heater channel. In order to *properly* repair this, I have to pull the body off the pan. That's like opening pandora's box though, results in an avalanche of spending and a full restoration. Not at all what I can afford, nor the car I want to invest that into.
Thinking more and more I need to just patch this one up to enjoy it for a couple more years, and divert any funds over to my '75 (which is all factory original). Once I start on the '75, we'll start rallying this one in historic TSD's :-)
Since I wasn't lying on the ground tonight, figured I better put together a hit list for the car..only 19 more items I want to address, should make for a relaxing winter! 109 days until our Spring Thaw Classic Car Adventure...plenty of time to get it all done.
------
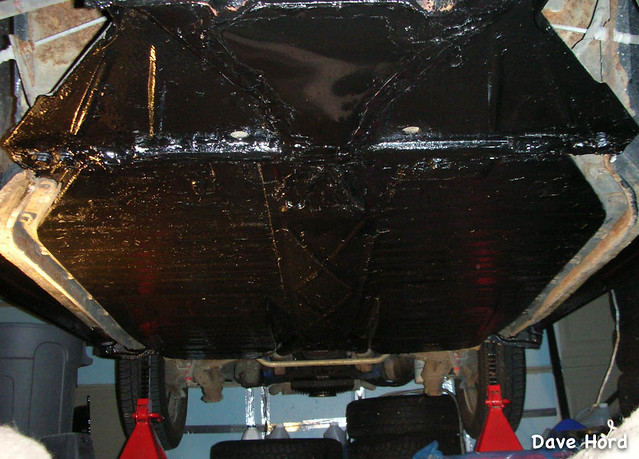
Well, nearing completion on the pan! First coat of POR-15 complete, and I should be able to get the second on at some point this week. After that, it's on to the driver's side heater channel.
-----
Well, started on the final floorpan repair that I need, the heater channel on drivers-side.
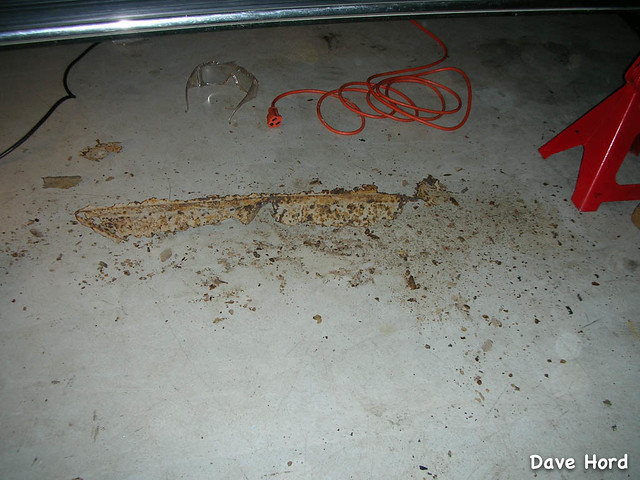
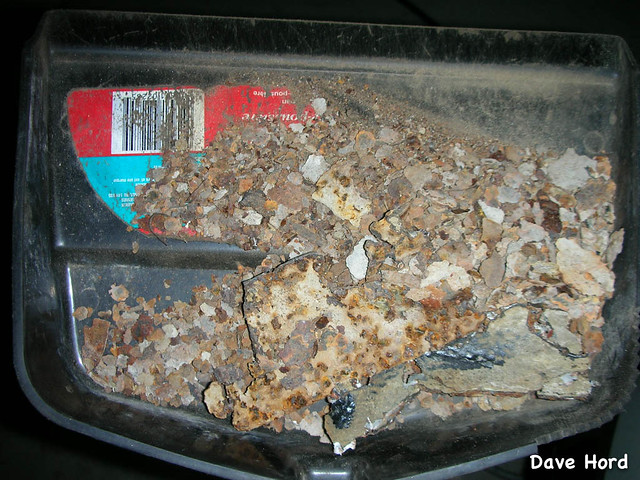
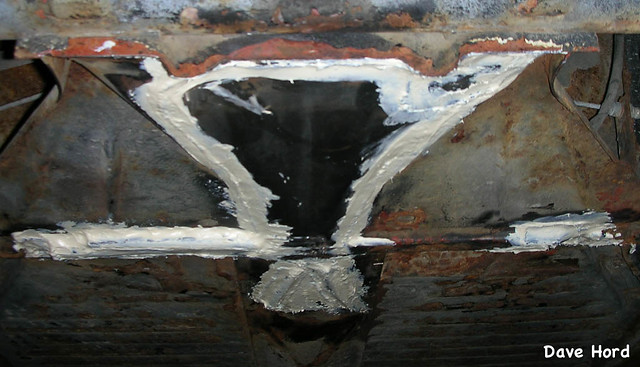
Those two images are what's left of the bottom panel. New panel is cut and drilled for spot welding, but I've got to wait until tomorrow to put it in. The inside of the channel, as well as the actual heater duct, have been coated in POR15. once that's dry I'll weld on the panel, seam seal it and then POR-15 the whole pan again.
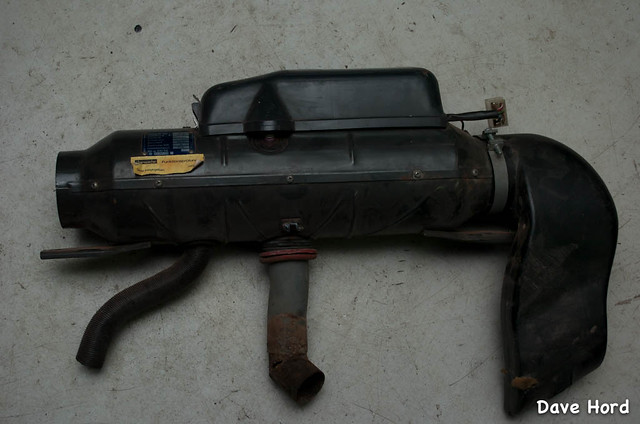
In the meantime, I've been working on getting my gas heater to work. These things are known to be rather dangerous if you don't keep them maintained, so needless to say I'm being rather careful to check it over before I start cutting my car for it to fit. Can't complain really, the thing is basically brand new. After cleaning the glow-plug and creating a new over-heat fuse holder, it was on to the fuel pump. Mine wasn't working, and you
have to use the matching pump to the heater. They put out less then 1L per hour, with slight adjustment available through an adjustable cone on the end. My pump, however, was dead as a doornail.
I've actually sat on the heater for two years looking for a pump. Turns out all mine needed was a few whacks with a body hammer. So now I've just got to figure out a gravity fuel tank and I can test it completely on my bench. Then we cut sheet metal and install real heat into the car.
-----
Well, the gas heater works like a charm now. Took me a couple of weeks to determine that you just can't buy a fuel pump for these things anymore, and the only option is to find a working used one. With nothing to lose, I followed a forum suggestion that said beat the crap out of it with a hammer. Well, sure enough it's clicking away and pumping fuel

Kind of interesting actually, the heater has points inside the motor assembly that send a 12v pulse to the fuel pump every thirty revolutions. The pump pushes a small squirt of fuel on each pulse. If you hold 12v to it, all you get is the initial pulse, nothing else. When the gas heater actually fires up, it sounds like a muffled Jet engine. The heat is so good, if I was able to duct an exhaust out of my garage I would seriously consider using one of these to heat my garage.
So now I'm on the lookout for the correct mounting brackets, exhaust and ducting to fit the thing to my car. There is a guy 40min away from me who has a complete set, but doesn't want to sell. Won't loan me the brackets for a week to copy, and so far won't agree to me coming by to take measurements and drawings for them. ARRGGG. The worst part is I'm missing both brackets AND ducting. If I had one or the other I could fabricate the missing bits. But with both missing there is no way for me to determine how the heater is supposed to sit in the trunk area. I can find photos to ball-park it, but when you have a gas burning appliance in the front of your car, you tend to want to be exact about it's placement

The floor pan and heater channel have been finished, and I did actually get the car out for a spin last weekend. Um, wow. Definitely a change from the 4000 quattro. Will take a day or two to get used to driving it again. In comparison I have the bug set up so it handles on a hair trigger, so you have to focus 110% otherwise it starts darting around on the highway! The ill-fitting hood also means that a winter drive feels like you're sitting in front of an air-conditioner. Geesh, I need those heater brackets!
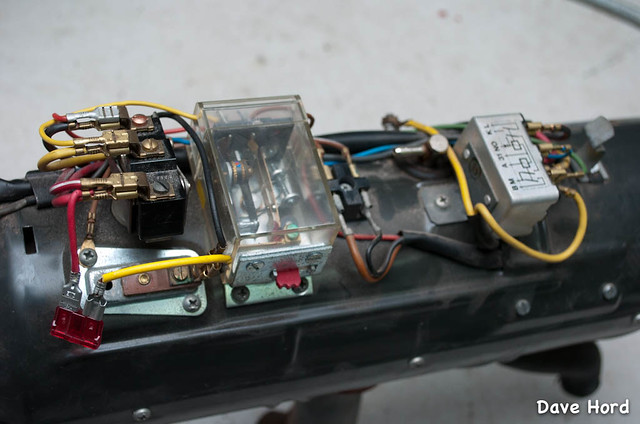
I've also gone back to working on the tuning. Part of my issue seems to be excessive or inconsistent fuel pressure causing a rich-running condition. The carbs I'm using require 1.5-2psi, and there isn't an 'easy' adjustment for the factory system. You can stack multiple gaskets to change the fuel pressure (which I've done), but I can't seem to get it to stay consistent. I was tempted to go with an electric fuel pump, makes the engine bay neater, but the Accusump is in conflict. Normally (in a carburetted setup) one would wire their electric fuel pump so that the relay is run off the oil-pressure switch. You start the car using the fuel in the bowls, and as soon as there is oil pressure the electric pump starts. With my Accusump, though, I have oil-pressure before the car is even running. It's not really a problem, but somewhat defeats the 'safety' switch. Couple that with a need to be running wires back and forth, and I wanted a different solution.
Enter the Holley Fuel Pressure Regulator. Initially I set it all up for proper pressure (2psi) and then tucked it in beside my left carburetor. I would have preferred to hide it behind the fan shroud, but with my shoulder surgery I can't drop the motor very easily.
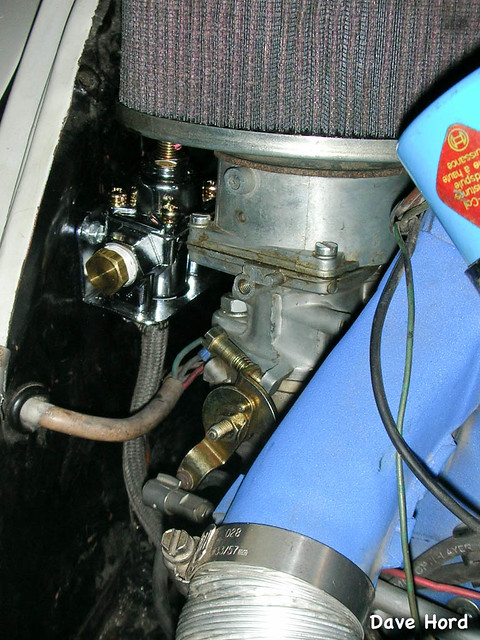
After a night to sleep on it though, I couldn't shake the nagging doubt that I can't _really_ be sure that the fuel pressure is correct in an instant. Still have to pop off the post-regulator line and attach my pressure gauge. After swearing for a few hours at whatever idiot created the NPT system, I have a nice pressure gauge tucked into the side of my engine bay.

I can't say I'm really confident about having it there 24/7. Between the cross-your-fingers sealing of NPT fittings, and the questionable lifetime of a $40 pressure gauge, I will likely keep the gauge in there just long enough to tune the engine and then remove it.

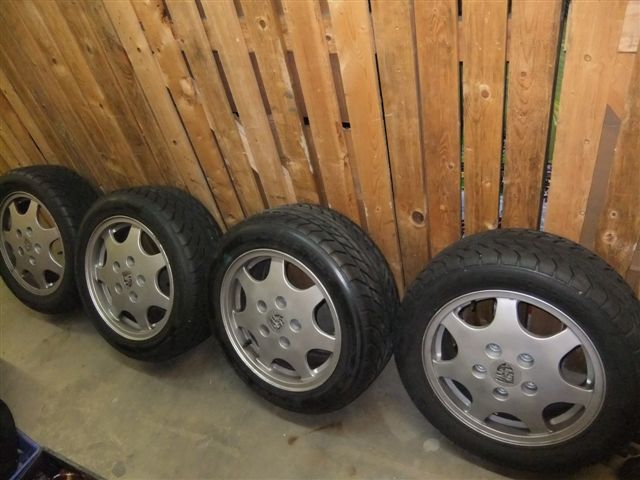
Geesh this thing needs a cleaning...
I'm also considering a switch to 5x130...and if I do, powdercoating these black:
-----
Well, back to the gas heater project...
Some buddies of mine were able to donate a few parts to the project. Rob had some ducting for the warm are I needed, and Andrew had a rotten, but mostly intact, exhaust pipe:
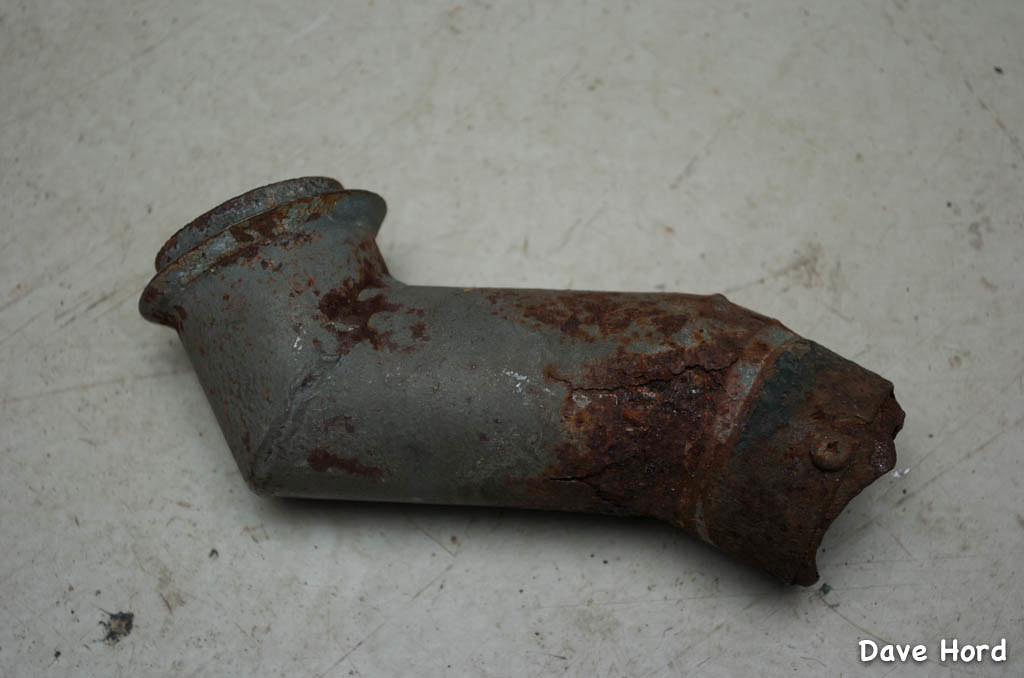
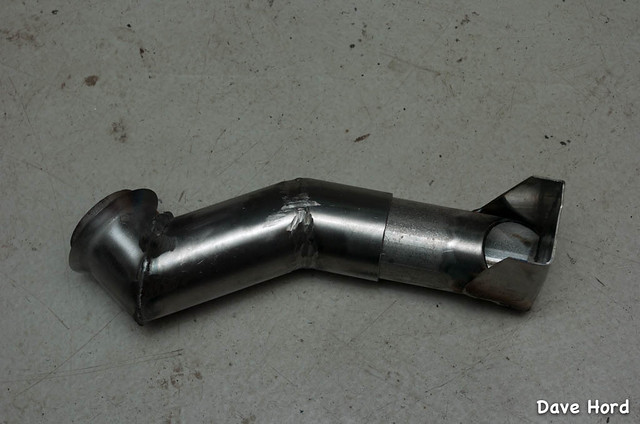
I was able to use the top section, and fab'd up the rest of it.
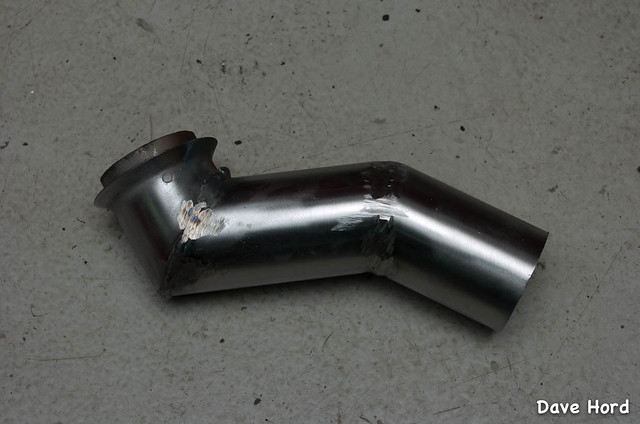
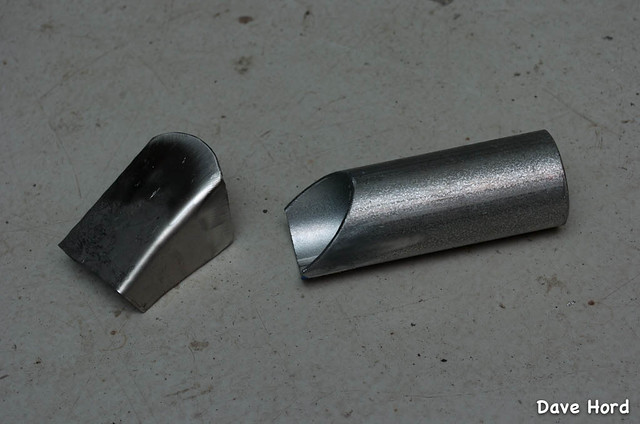
After the exhaust exits the front trunk area, there is a "foot" piece which I gather protects the front tire and ensures the exhaust isn't getting water pushed up it. This is typically missing, but one of the bug forums had directions on how to make one. Now I just need to coat it all in high-heat header paint. With the exhaust finished, and the interior duct pieces I have...I
think I have enough to make up some brackets from scratch.
Getting closer to real heat!
-----
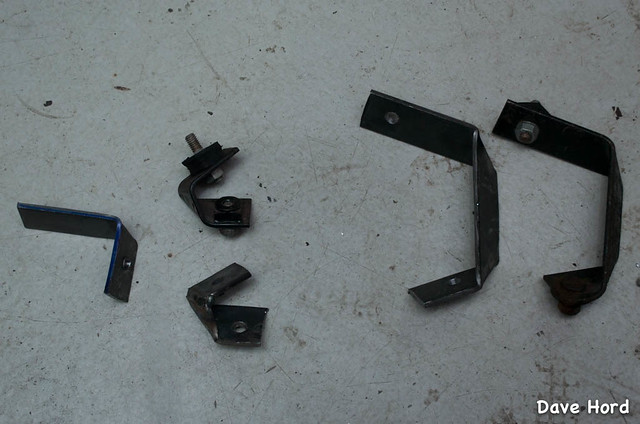
One of the biggest things slowing me down on the Gas Heater install has been a lack of mounting brackets or ducting. With one or the other I could probably manage to fabricate the other half. Efforts to buy the correct brackets proved fruitless, apparently I need the rarest ones available. I found a guy in Vancouver who owns two sets, but even my requests to come by and measure them went unanswered. Sigh.
Just as I was ready to give up, a buddy remembered that a mutual friend has one installed in his bug...just five minutes away! Ten minutes later and I had brackets. A little bit longer, and I had a duplicate set...
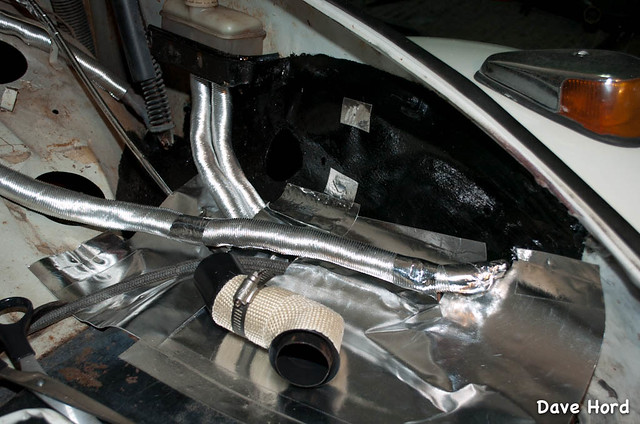
I then proceeded to go overboard with DEI heat shielding products. I highly doubt any of this is necessary (Volkswagen never used any), but my heater won't be in exactly the right place...and hey, why not? At least I went with the slightly-less blingy silver :P
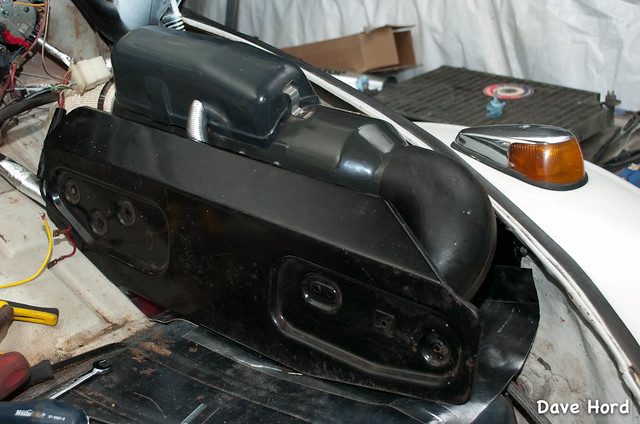
Combine gas heater with random bits found in garage...

...and then add the factory luggage shield so it all looks stock.
I've been working on tidying up the wiring under the trunk, and should have that job finished up with the heater by the weekend. The heater still needs the fuel pump installed, and wiring for the power. Then I'll get back to doing more performance related items. My pile of parts to install has been growing over the past couple of weeks.
-----
And now the GL forum is up to date :P
-Dave