
|
|
#1
 August 23rd 2013, 11:18
|
||||
|
||||
|
Creating a Holzapfel roof spoiler
At the start of 2013 I received an e-mail from Wally. He asked if I could create him an "Holzapfel" rear roof spoiler.
He wanted to participate in a Land Speed Record event, and a Holzapfel spoiler is probably very good for aerodynamics at high speed. The "Holzapfel-spoiler" is this rear spoiler:  (picture is from: veloce-gt.com ) This will be a small report on how I build it, maybe you can use it to build your own. This is a bit like open-source code.  I took some measurements from pictures (mainly the one above), and scaled them to the right size. That gave me the rough measurements. I used it to cut out a piece of cardboard and test fit the spoiler to my car. I had to trim the carboard several times to make it fit right. But this was the result: 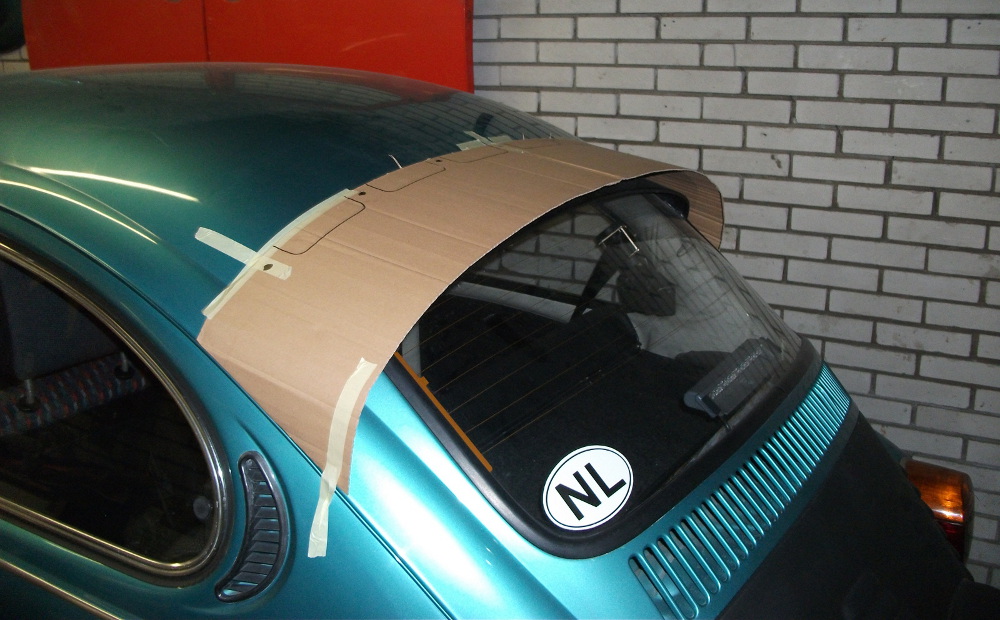 And these are the final measurements: 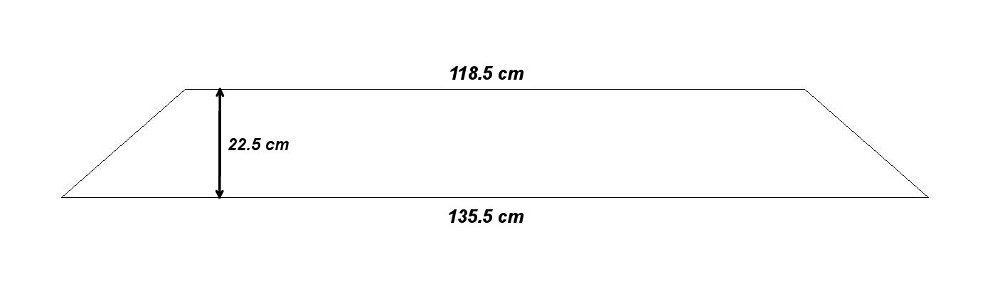 So, if you want to create your own, cut out a piece of cardboard with those measurements and test fit it to your car. IMPORTANT: The distance between the end of the spoiler to the end of the raingutter is 42 cm. Like this: 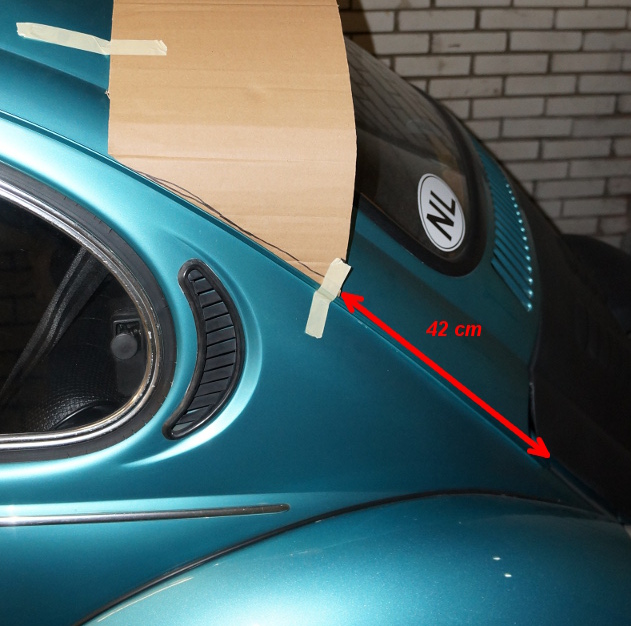 Then I orderd a huge sheet of plastic, it's 2000 by 1200 cm and 0.3 cm thick made of polystyreen. I used the piece of cardboard as a template and marked where I had to cut it. Because the plastic sheet is quite thin, it is difficult to cut. So I pre-drilled the mounting holes in the spoiler. These holes will be where the spoiler is screwed to the roof. But now I use them to attach the sheet to a piece of chipboard wood I had lying around. 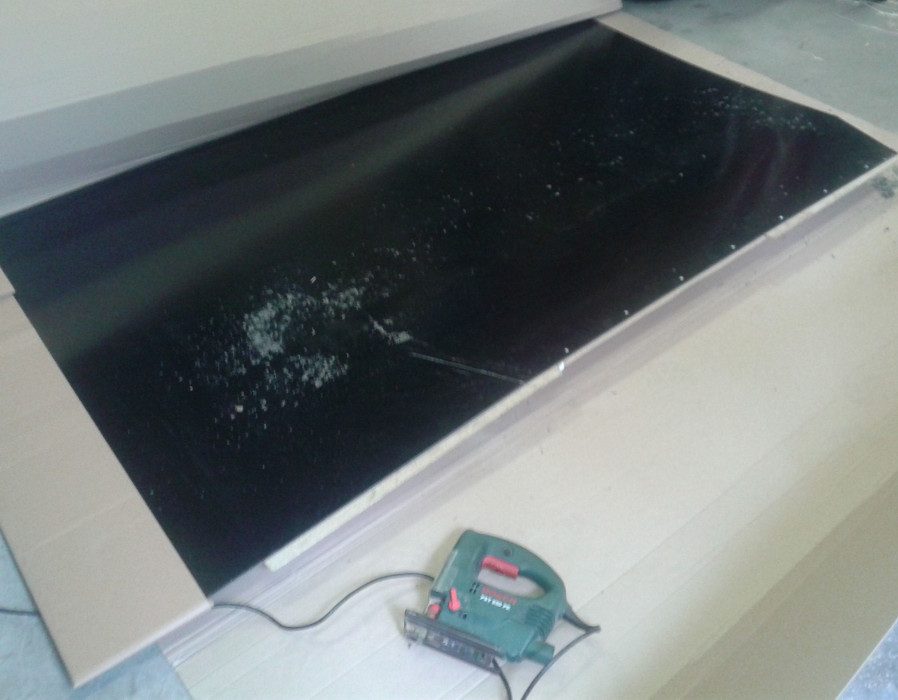 (crappy cellphone picture..) You can see the 7 screws I used to screw the sheet to the chipboard. After that I sawed the sheet together with the chipboard with a jig saw. A tip: if the plastic compagny can deliver the sheet pre-cut, order it in pieces of 22,5 cm. It will save you a lot of time. 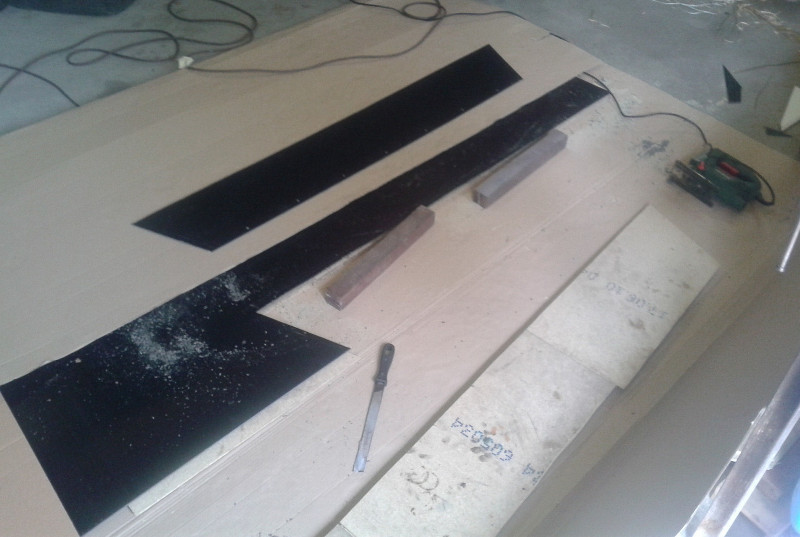 (another crappy cellphone picture..) Then I copied the shape of the left en rear corner of the spoiler, using the cardboard (the template) version of the spoiler mounted with tape on the car. I copied the roof (front) side and the rear (above rear window) side. I used another piece of cardboard on which I traced the shape with a marker on the rear. On the front I cut a piece of cardboard to match the shape of the roof. With that I made two molds that represented the shape of the spoiler ends. 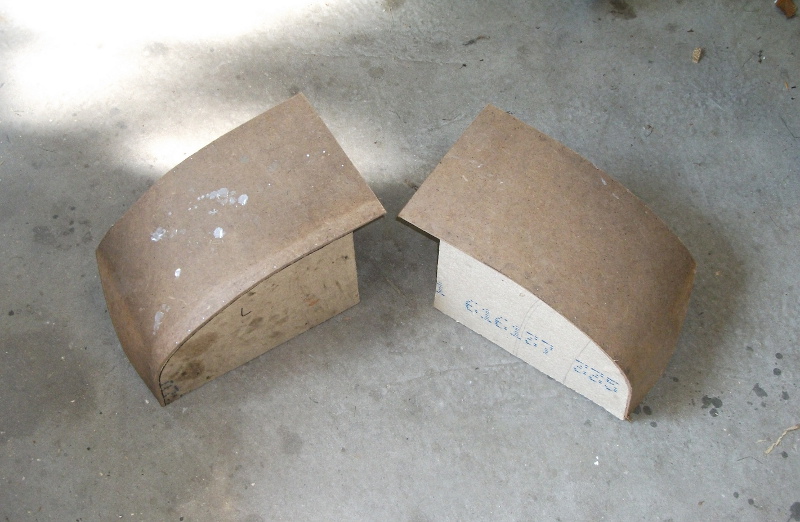 Because the plastic sheet is 0.3 cm, I made them 0.3 cm "smaller". Then I clamped one end of the cut out plastic to one of the molds and used a hot air gun to soften the plastic. This takes some patience, the plastic gets soft at around 100 degrees Celcius, so slowly move the hot air gun over the plastic staring at the top. Move it over the width of the spoiler until it falls into the shape and then proceed downwards until the plastic has the shape of the mold. Another, maybe better I don't know, is to use a cheap electric barbeque. Place the end of the plastic cut-out above the barbeque, and heat it until the backside is around 100 degrees or until it "feels" flexible enough. Then place it on the mold. Checking the temperature is best done with an infra red thermometer. The plastic can be re-heated several times, so problem areas can be corrected by re-heating. Now the spoiler can be mounted with screws through the roof in the front. But you will also have to fabricate some kind of brackets to hold the spoiler to the car at the rear, near the raingutters left and right. This is the finished spoiler mounted to Wally's car: 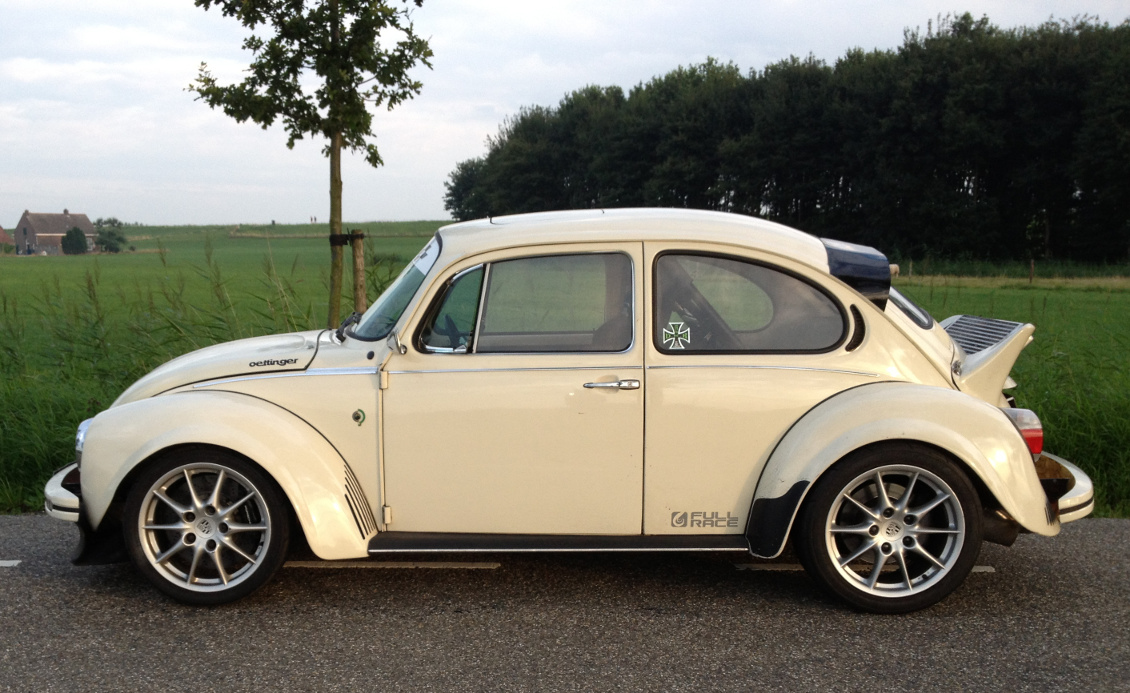
__________________
Greetings! ________Gerrelt ________homepage:gerrelt.nl __________________________________ 
|
|
#2
August 23rd 2013, 20:47
|
||||
|
||||
|
I think technically this could go in the Technical Articles section as a how-to!
Jason
__________________
If I could just get paid for my sleepless nights.... 1960 VW Bug UBRDUB Walkaround 1st Drag Run Dyno Run Oval Ragster-'57 Rag/'04 Boxster S
|
|
#4
August 24th 2013, 14:43
|
||||
|
||||
|
@Jason: Thanx!
@Wally: Thanx, it's great to see it on your car! I hope you do well next year.
__________________
Greetings! ________Gerrelt ________homepage:gerrelt.nl __________________________________
|
|
#5
August 29th 2013, 12:57
|
||||
|
||||
|
@ Gerrelt man id love one of these. effective and still clean looking. when i get my car up and running again, ill need to make one of these. when i do ill post up my project pics to this thread. great wright up btw. keep up the great work man.
|
 |
| Currently Active Users Viewing This Thread: 1 (0 members and 1 guests) | |
|
|


 Linear Mode

