
|
|
#1
 September 18th 2011, 02:40
|
||||
|
||||
|
Dave's 1971 1302 Not-So-Secret, Secret Project Build
I suppose it's time to start a project thread for my 1971 1302. The project has been called the "not so secret, secret project" for the past six months inside my circle of friends who have known about it. It's taken a while to get going, more then a couple of cars to find the right one, but I wanted to ensure I had a project thread which was moving forward at a rapid rate instead of sliding down the thread list for months at a time.
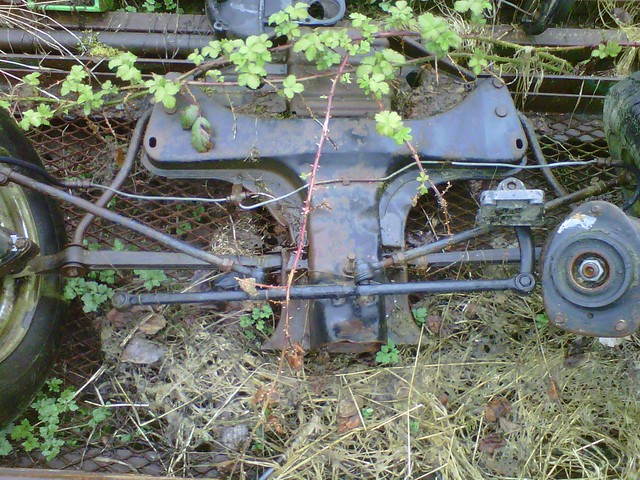
One of the biggest issues with my '69 project car (http://www.germanlook.net/forums/showthread.php?t=10319) was the fact that I essentially daily-drive the car, and thus could never set it aside for the time needed to really do it up properly. True, we had a tonne of fun with the car, but to get it to "the next stage" would have required taking it off the road for at least 6 months. Six months without driving an air-cooled? No way!! So, the hunt for a new model began. For reasons which will eventually become obvious, I needed to get a Super Beetle for the next step in my bug evolution. The 1303 had quite a number of positive elements which should have put it in the lead as "the car" to buy and indeed I looked a number of them but the truth is I cannot STAND that dashboard. I almost went for one of the fiberglass 911-style dashboards to make it passable, but in the end it just wouldn't work for me. It had to be flat dash, and thus a 1302 preferably a 1971 model! Since finding a solid example of a single year of beetle isn't the easiest of things to do, I naturally started by simply finding a floor pan. While re-doing the pan I figured I could look for a solid body. And hey, having a spare pan (if you can store it) is never a bad thing!  One spare '73 pan, ready to go under the knife. -Dave
__________________
'71 Type 1 - Rally Project '58 Type 1 - I bought an early!?! '73 Type 1 - Proper Germanlook project '68 Type 1 - Interm German 'look' project '75 Type 1 - Family Heirloom '93 Chevy 3500 pickup - Cummins Swap 
|
|
#2
September 18th 2011, 02:42
|
||||
|
||||
 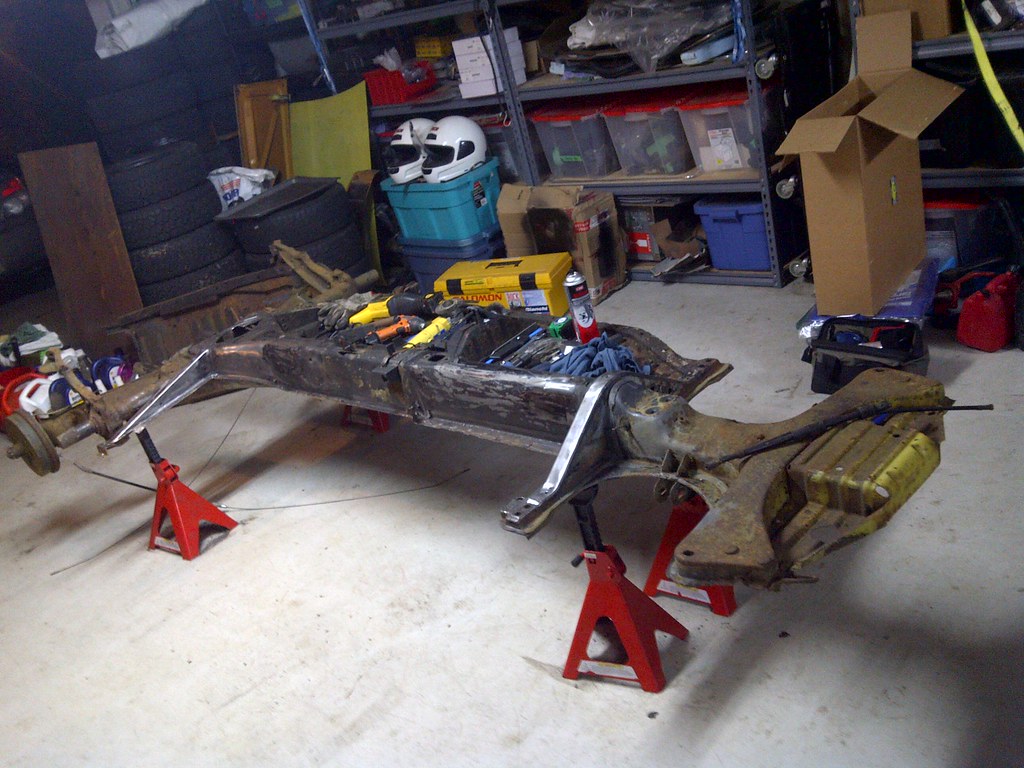 I truly hate spot welds but everyone likes photos. So while I complain about the detail work here's some photos     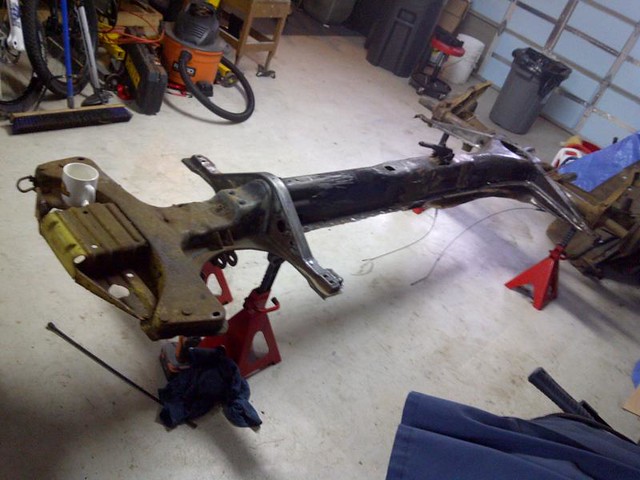
__________________
'71 Type 1 - Rally Project '58 Type 1 - I bought an early!?! '73 Type 1 - Proper Germanlook project '68 Type 1 - Interm German 'look' project '75 Type 1 - Family Heirloom '93 Chevy 3500 pickup - Cummins Swap
|
|
#3
September 18th 2011, 07:36
|
||||
|
||||
|
Hi
I agree the 1303 dash is a pain, but for any high speed work the curved windscreen model is much more slippery than a flat screen model. Steve
__________________
STI powered 1303 in the works.
|
|
#4
September 18th 2011, 23:09
|
||||
|
||||
 Well, that's a heck of lot easier! Sandblasting won't pull up the seam sealer unless you really work at it...thus, I simply took off the stuff I have to and left the seam sealer I don't _need_ to remove. 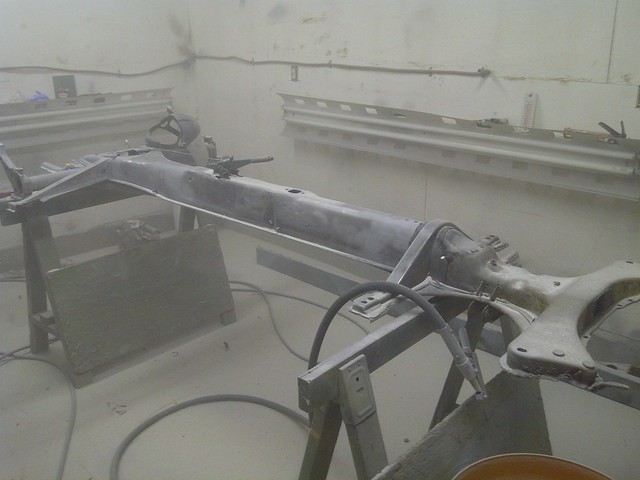 Four hours of blasting, 200lbs of crushed glass, and it's not quite finished yet! Pretty funny sweeping up an inch-thick layer of sand off the shop floor at the end of the night though. 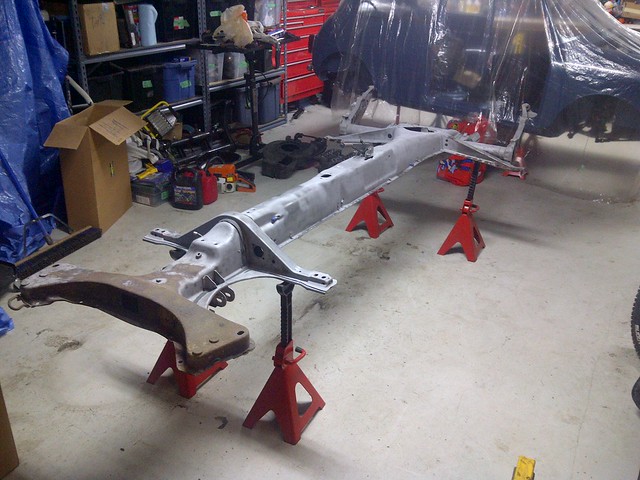 ...just in case, no I wasn't blasting it in the same garage as the '66 mini! -Dave
__________________
'71 Type 1 - Rally Project '58 Type 1 - I bought an early!?! '73 Type 1 - Proper Germanlook project '68 Type 1 - Interm German 'look' project '75 Type 1 - Family Heirloom '93 Chevy 3500 pickup - Cummins Swap
|
|
#6
September 20th 2011, 12:29
|
||||
|
||||
|
Thanks Joel! Good to finally "get it out" somewhere ;-)
Grinding and Sandblasting on the spine are now complete. I've started welding up the various holes and spots that require attention, but in doing so discovered a more significant problem. I knew the tow-hook area was rough when I started on the pan, but blasting and grinding revealed that the problem is deeper then I first thought.  To the right of the tow hook you can see two nut inserts, with a channel between them. For non Super people, those nut inserts are for the sway-bar brace, the channel for the sway bar. Simply patching the holes isn't enough, not to mention the channel should look straight, like the other side: 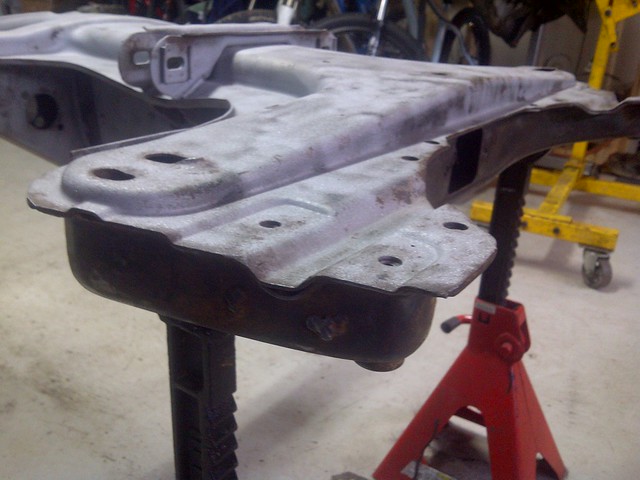 …No photos, yet, but I managed to source out a complete frame head. I think I'm going to section in just the corner/parts I need. If I was going to swap the full frame head I would likely go with a reproduction unit, but would still have to Jig the whole assembly before cutting it apart. In the meantime though, I couldn't resist doing a test fit...  Well, further progress on the pan. I gather this looks incredibly boring, but there is 4-8 hours of work between posts! haha. No photos of the various welded bits, but I did get around to cleaning the paint of the pans.  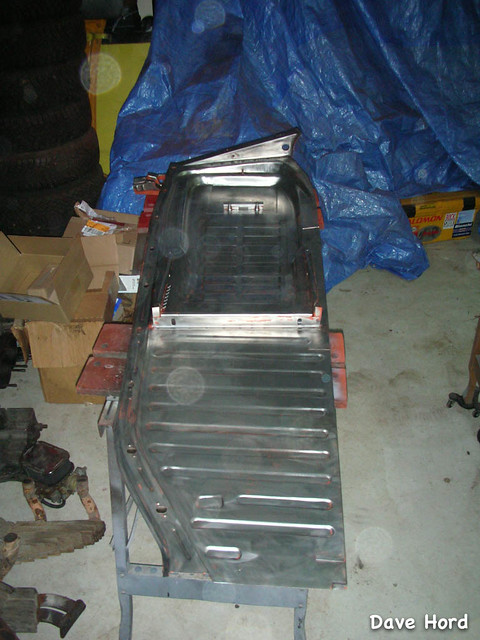 Started doing some fitting to get them to sit where they need to be. I'm actually quite happy, the front portion of each side is within 1/4" of where it needs to be, and the rear is within 1/2". A bit of trimming and tapping with the body hammers tomorrow and I should be welding them in. Once that's done, I have a few more tricks I need to worry about and then I will be able to paint the pan. 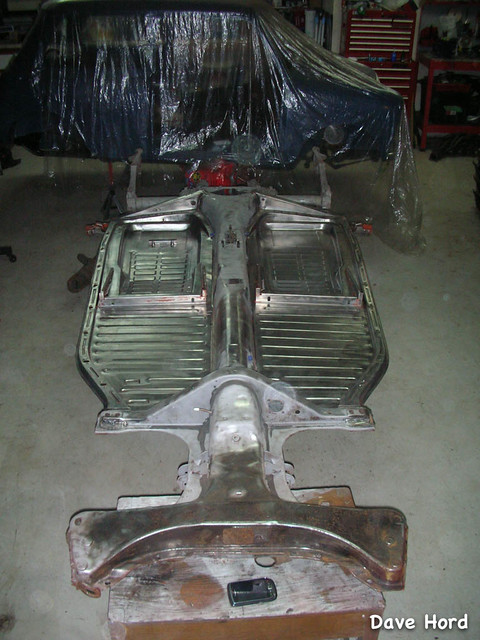 -Dave
__________________
'71 Type 1 - Rally Project '58 Type 1 - I bought an early!?! '73 Type 1 - Proper Germanlook project '68 Type 1 - Interm German 'look' project '75 Type 1 - Family Heirloom '93 Chevy 3500 pickup - Cummins Swap
|
|
#7
September 21st 2011, 00:15
|
||||
|
||||
|
well, back to the pan.
I love Cleco's...mind you, I should have bought 10 more and it would have been perfect.  Pans are now welded to the chassis...onto the next item! Only 64-billion more items to go :P 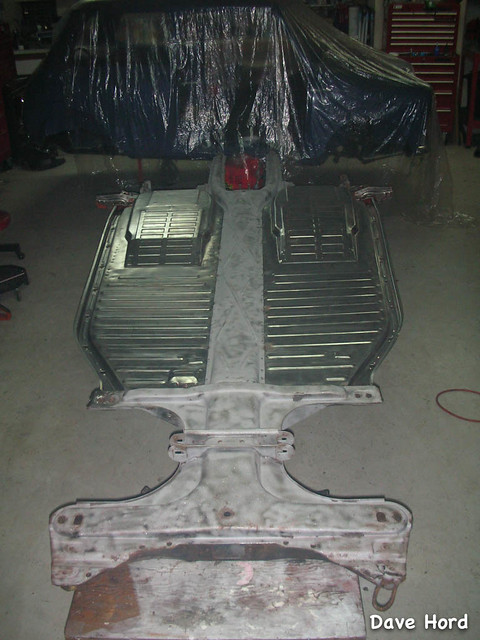 (Pan was flipped upside down for the final weld points) -Dave
__________________
'71 Type 1 - Rally Project '58 Type 1 - I bought an early!?! '73 Type 1 - Proper Germanlook project '68 Type 1 - Interm German 'look' project '75 Type 1 - Family Heirloom '93 Chevy 3500 pickup - Cummins Swap
|
|
#8
September 21st 2011, 13:33
|
||||
|
||||
|
nice work
|
|
#9
September 21st 2011, 14:14
|
||||
|
||||
|
You got my attention! Nice work on the pan so far. Are the 1302 and 1303 pan halves the same other than the seat mount?
__________________
Lucy: 73 super beetle sport bug edition, 944 turbo suspension, 930 turbo brakes, 2165 FI, dry sump, turbo
|
|
#10
September 21st 2011, 14:30
|
||||
|
||||
|
Yeah, this one is actually going to be quite a bit of fun. I decided I wasn't going to do another car that I was driving at the same time as building, and it definitely feels way better knowing I can take the time to do it right the first time. Kinda tough to stay motivated when you walk downstairs and see just a huge mountain of work and a list longer then my white boards can handle...but once you start cracking on an item the work tends to flow pretty easily.
Years ago while doing a rebuild on my Audi Rally car a friend of mine noticed I had stalled out and implemented what is now known around here as "the one hour rule". Every day you have to spend a minimum of one hour in the garage, and you can't 'bank hours' (ie two hours today, skip tomorrow). You don't even have to touch the car, but I can tell you that sweeping and just sitting there gets boring real quick. So you start on something small and then suddenly it's 1am and you've plugged away for 6 hours. 1302 and 1303 pan halves are exactly the same, except for the seat mounts. I'm not 100% sure what changed up front on the frame head with regards to the steering box vs. steering rack mounts, but the '73 pan I have is identical to the '72 and '71 pans I have with the exception of the seat mounts. -Dave
__________________
'71 Type 1 - Rally Project '58 Type 1 - I bought an early!?! '73 Type 1 - Proper Germanlook project '68 Type 1 - Interm German 'look' project '75 Type 1 - Family Heirloom '93 Chevy 3500 pickup - Cummins Swap
|
|
#11
September 21st 2011, 21:54
|
||||
|
||||
|
I acquired this donor front end...
 Well, turns out the donor frame head had one little problem, at some point one of the bolts must of snapped, and the fix was to simply weld the sway bar mount to the frame head. 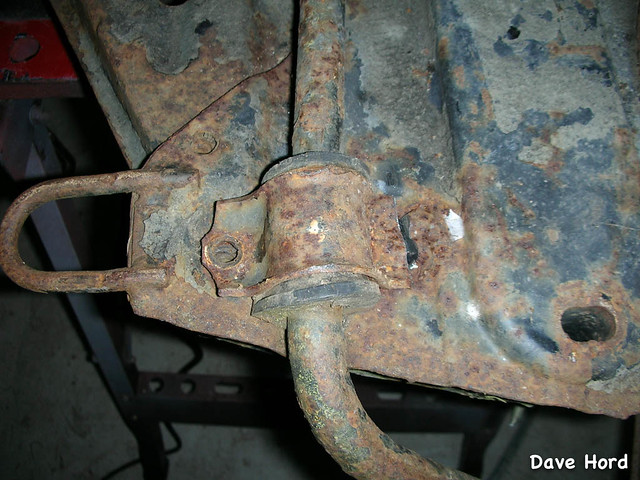 My original plan was to do a big section of the frame head, leaving me lots of mounting bolts and measuring points to work from. I assumed that I could just separate the halves at the spot welds, and weld in a nut from the back for the mount...but once I ground off the sway bar mount I discovered it was already hacked up pretty badly. Onto plan B! Well, truthfully I didn't really have a plan for how to get around it, and probably started cutting with the angle grinder far earlier then I should have. But sometimes you get lucky, or I'm just improving. It took me one big cut and two fine adjustments to get it to where I was happy.  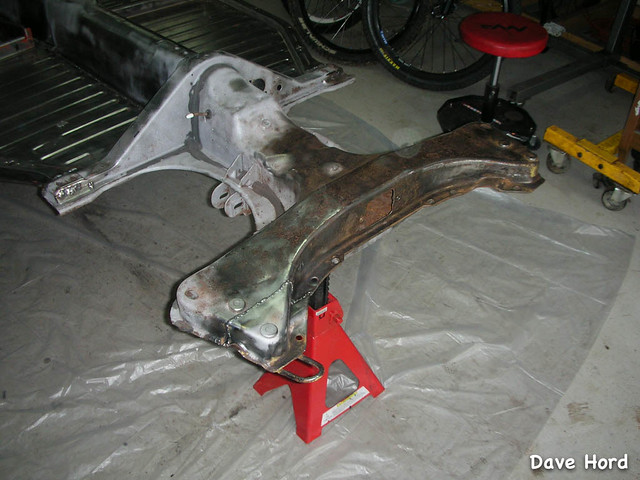 It's not perfect, but only because I had to leave a little bit of the crunched sheet metal on my pan in order to keep the mounting nut. As far as the front suspension should be concerned though, it's all lined up. Unfortunately, that's where the good news ends. Normally I use POR15 for projects like this, but a number of factors had me switch to Zero Rust for this pan. Brush marks with POR15 disappear and it dries with a hard glossy shine. Zero rust, it would seem, dries in a semi gloss, and with the worst brush marks I've ever seen. I only did the top of the frame head and rear suspension mounts, but I'm gutted. All that work for it to look like this: 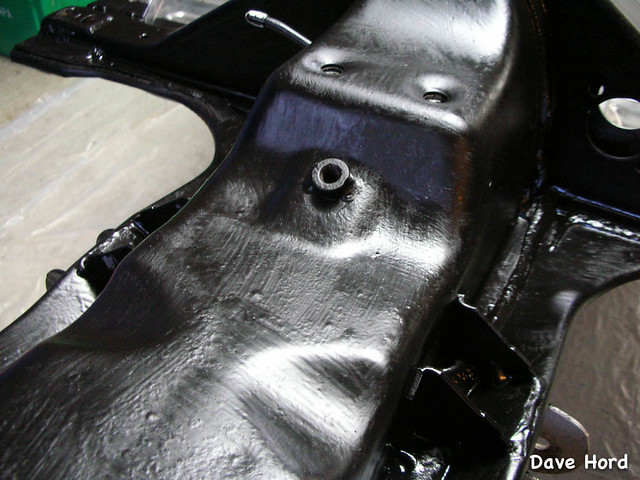 Really, once the car is together no one is going to see this stuff...but it's going to be a long while before that happens. With the hours I have in so far, it sucks to have it finish like this. …a few hours pass… So…Up at 8am, off to the parts store, and I'm happy before noon. Getting some pinholes with the POR15, which tells me the garage is too cold. But I've cranked the heat and it should smooth out enough to make me satisfied. Let that be a lesson...stick with what you know!  -Dave
__________________
'71 Type 1 - Rally Project '58 Type 1 - I bought an early!?! '73 Type 1 - Proper Germanlook project '68 Type 1 - Interm German 'look' project '75 Type 1 - Family Heirloom '93 Chevy 3500 pickup - Cummins Swap
|
|
#12
September 22nd 2011, 02:59
|
||||
|
||||
 ...and then back to the pan. With the semi-gloss black paint dry, I was able to seam seal the bottom of the pan.  And then tonight I laid down a coat of POR15 Silver. It's brushed on, and silver never looks good when it's brushed. Lots of track marks, brush marks and uneven silvering...but that's okay. I originally wanted to have the Pan finished in Silver, everyone does black, but realized with the first strokes that it wasn't going to work out. The main reason for the silver, though, was to ensure I get a full coat on everything. I started with bare metal, painted black and then went over the pan with a trouble light the next night. Any silver showed where I had missed with the black and I could touch up. Now that the pan is silver again, it's the same process tomorrow night...but this time looking for black areas. Once I'm convinced I've got a full two coats on the pan, I'll finish up with a third. I think I'm going to go Gloss Black. Three coats of POR15 should be damned near bulletproof.   -Dave
__________________
'71 Type 1 - Rally Project '58 Type 1 - I bought an early!?! '73 Type 1 - Proper Germanlook project '68 Type 1 - Interm German 'look' project '75 Type 1 - Family Heirloom '93 Chevy 3500 pickup - Cummins Swap
|
|
#15
September 22nd 2011, 16:34
|
||||
|
||||
|
Sigh. After I decide that really, a 901 box isn't in the budget equation for this year, and paint the pan...a buddy lets me know he has everything (box, shafts, mounts, shift linkage) available for me???
Probably still not "in the budget". But budget is also time related, so maybe I just don't drive as early as I'd like and go for 5 speeds... -Dave
__________________
'71 Type 1 - Rally Project '58 Type 1 - I bought an early!?! '73 Type 1 - Proper Germanlook project '68 Type 1 - Interm German 'look' project '75 Type 1 - Family Heirloom '93 Chevy 3500 pickup - Cummins Swap
|
 |
| Currently Active Users Viewing This Thread: 1 (0 members and 1 guests) | |
|
|


 Linear Mode

