
|
|
#106
 September 19th 2009, 14:42
|
||||
|
||||
|
Here's the trick I used when I notched my rollcage: Go find a toilet paper tube, a razor, and a sharpe. Take the tube and start by cutting two very shallow U's on one side so it looks like a notched pipe. Start shallow then slowly take away more until you get a nice fit. Once your cardboard template is ready you do a different angle or pipe on the other end of the tube. Only do a template for tubes on the right or left side not both sides. For instance the rear cage stay, and a door down bar on the drivers side. The reason is, you can slice the tube long ways and turn it inside out which gives you a mirrored template for the passenger side of the car. Once you have a line down just use a grinder to take off material, work slowly and test fit often, patience is invaluable with cage work.
Here's a couple pics of what I'm talking about.   
__________________
Lucy: 73 super beetle sport bug edition, 944 turbo suspension, 930 turbo brakes, 2165 FI, dry sump, turbo 
|
|
#107
September 21st 2009, 12:19
|
||||
|
||||
|
Thanks for the tip Humble. I did something similar. I made template from the existing notches.
I spent most of all Sunday trying to get my cage assembled. It's going to take longer than I thought, but It's getting there. I trimmed and notched about half of the bars. I did quite a bit of thinking and just figuring out exactly how I want this thing to fit. Now it's just making it happen. The main hoop didn't exactly go where I originally wanted it to so I'll be welding it into the body and the rest will be welded to the frame. I plan to gusset the cage to the body in various places just to stiffen the body up and so the cage and body become one unit that bolts to the frame. It doesn't look like I got much done, but It's kinda tough do this solo.    The die grinder worked great using the edge of disk to cut. So I got the main hoop and bar tacked.
|
|
#108
September 28th 2009, 10:47
|
||||
|
||||
|
Quick update.
I have been working on the cage all week. Everyday for a couple hours at a time and I'm almost finished. I just have to cut and fit the side / door bars. I've had a slight change of heart. I decided to just go ahead and weld the cage and body to the frame and to do away with the idea of being able to unbolt the body and cage so I can lift it off, whenever. Although I'm sure this cage is for a standard beetle, the cage fit pretty well. I wish I could have the dash bar closer to the dash / further away from the steering wheel, but there is plenty of clearance although it doesn't appear to be that way in the pic.  The roof hoop fit up pretty snug to the roof.   The plates did come in handy though. I was able to weld the lateral bar a little further out. Right about a 3/16 gusset I had welded in for strength.   I should have the cage finished and all welded up by the end of the week. On a side note, my hardened sprag and spring compressor tool came in. I'll finish tearing down the transmission after I'm finished with the cage so I'm not getting junk in it. More to come soon.
|
|
#109
September 29th 2009, 00:24
|
|||
|
|||
|
Great progress so far. do you have any specs on the cage. were did you buy it from? Outside diameter of the tubing? wall thickness? and type of material d.o.m. or chromoly that sort of thing. I'm planning a cage for my car right now and the outside diameter of your cage tubing looks right on. i dont want something to thick. thanks -John
|
|
#110
September 29th 2009, 16:52
|
||||
|
||||
|
Quote:
The cage is from S&W Race Cars. Here's a link to the cage. http://www.swracecars.com/store/10-P...8=11-5550.aspx The cage is 1-5/8 x .134" wall EWS Mild Steel tubing. It's $249.99 and shipping was just under $100. I was happy the shipping was as cheap as it was.
|
|
#111
September 30th 2009, 03:52
|
|||
|
|||
|
kool thanks alot
|
|
#112
October 5th 2009, 10:53
|
||||
|
||||
|
I finished the cage this weekend. I still need to weld in the seat belt tabs but that'll have to come later. I might do a couple gussets too for strength. Still debating that one.
I did have to cut out a section of the b-pillar and the roof to fully weld up the cage. So I'll have to weld those sections back in. Work, work, work, but fun nonetheless.        I'm working on tearing the tranny down and I'm hoping to have it rebuilt within the next two weeks. Also, I need to work on making mounts for the radiator.
|
|
#114
October 6th 2009, 13:04
|
||||
|
||||
|
Quote:
 thanks. Yeah, I think the grey primer makes it look beefier. Gotta have that NHRA approved cage ready just incase I decided I want this thing to run 9's one day. thanks. Yeah, I think the grey primer makes it look beefier. Gotta have that NHRA approved cage ready just incase I decided I want this thing to run 9's one day. 
|
|
#115
October 13th 2009, 13:26
|
||||
|
||||
|
Not a whole lot of progress was made this weekend, but some.
 I got the tranny completely taken apart and then found that the direct clutch piston spring, in the valve body, was broken. Probably the reason why the tranny was taken out of the car. It is a 5 clutch, heavy duty, th350, so that's good. I decided just to go ahead and take the tranny to a professional shop because they could get it put together quicker, I don't have much "clean room" where I can assemble the tranny, and I get a 6 month warranty with the guys who did the work, that is if I can get it all going with six months time. Haha. They did a really nice job and they were very informative about the parts I had and what to look out for. Basically the kit I had was a stock rebuilder kit repacked. Which is ok for my purposes. I dropped off the tranny Sat morning and they had it ready Monday after work. I installed the tranny crossmember.  The tranny is ready to go in. I'm thinking I'll put the motor, hook the tranny up, and then install it as a unit...? I could just have someone help me pull it through the door rather than remove the engine. Hmmm...dunno which was would be easiest. Either way it wont be as bad as installing it in a car with a firewall and floor. Also, I have a new radiator, fan, mounting hardware, etc. on their way. I bought a 22"w x 19"h aluminum radiator. I'm pretty sure I figured out a way to put my radiator up front. It'll be mounted low but wont be sticking out of the bottom of the body. Hopefully. The only way I see this working is I'll have to use a rack and pinion setup, which I'll have to buy. Any advice on which rack to use for the S10 frame?
|
|
#116
October 14th 2009, 12:43
|
||||
|
||||
|
Another quicky update. I got the transmission installed last night. Torque converter seated all the way down and it spins freely with the bell housing completely bolted up. Now I just need to crawl under the car and bolt the converter to the flex plate.
Believe it or not, I got the tranny in all by myself. I lifted it and sat it on my floor supports, got out a jack with a block of wood, raised the jack, instead the converter (after a quart of ATF), slid the tranny forward until it sat down on the jack / wood, then roll the tranny forward and mated them up. Easier said than done, but it worked. Sorry, the night shots on my camera phone suck. I still need to adjust the crossmember. It needs to go in the most forward mount holes so it'll bolt up.
|
|
#117
October 20th 2009, 12:51
|
||||
|
||||
|
Small update. I didn't get as much time to work on the bug as I thought I would this weekend.
My low mount alternator bracket came in and seems it wont work either. The steering box is in the way. I'm not sure what my options are now for an alt bracket. I might just have to make one. My radiator and fan came in so I started mocking it up to see if I can get it up front. I trimmed more of the front clip sheet metal away and squeezed it in, so to speak.   As you can see it goes in, but I don't think I'll have room to close the hood unless the radiator is sticking out the bottom by about 3". Even a little more so than in the picture. Also, from the looks of it, another problem is there's not enough room to squeeze in the electric fan. I'm going to see what I can do the make it work, but it's looking like it would be best and easier to set up the radiator in the back. Any thoughts, suggestions?
|
|
#119
October 21st 2009, 12:09
|
||||
|
||||
|
Quote:

|
|
#120
October 21st 2009, 12:09
|
||||
|
||||
|
Did a little work last night. Mainly mocking up trying to figure things out which hopefully you guys can help.
I mounted the fan to the radiator. Do you think I'll need a shroud if I'll have a duct drawing air from under the car? See duct explanation below.   I picked up a manual rack from Matt, whom is building a V8 bug out of a S10 chassis believe it or not, and I'm going to see if I can't make it work. Seems like it might. Cross your fingers. Thanks, Matt!  With the steering box out of the way, in hopes the rack works out, I had enough room to mount my alternator with the low mount bracket I recently bought. High five!  Next, I mocked up the placement of the radiator out back. I'd like to mount it like the last picture, on an incline, so I can make the duct work better, I think. Also, what do you guys think about mounting it inclined and having an inline radiator filler neck in the engine compartment close by the top water neck that comes from the intake? Like the one pictured below. Do you think that would create any problems just keeping the rear cap on and filling the radiator using the inline neck? If I mount it at angle it'll be hard to access the radiator filler neck. If worse comes to worse I'll mount it like the other picture.    The duct work will look like this, somewhat. Less boxy looking though. 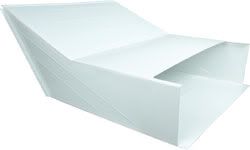 All thoughts and opinions are welcome.
|
 |
| Currently Active Users Viewing This Thread: 2 (0 members and 2 guests) | |
| Thread Tools | |
| Display Modes | |
|
|


 Linear Mode

