
|
|
#452
 October 1st 2013, 15:24
|
||||
|
||||
|
Alex,
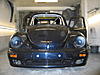
The QA1 work great and if I had to guess, I think I have about 2.5-3" of bump and 1.5-1" of droop. Took a long weekend to work on the bug, the big task on hand was pulling the motor/trans to replace the leaking axle seal. Surprisingly, I was able to pull the motor/trans very quickly by leaving the trans mount and engine cradle in place. Not that I plan to make use of that feature very often, but it is handy. The longest part of the job was running down to the subaru dealership to get parts. I sent more time in traffic than I did on the whole axle seal job. So here's a shot of a beautiful, not-leaking, reversed R&P 5spd (the stain is from the previously munged axle seal)  I also got an email from the folks over at subarugears.com regarding the oil level and potential future leaks. Since the center diff housing is cut in half, and the trans doesn't sit at the same angle it does in the subaru, it's necessary to put the full amount of gear oil in to get good coverage on 5th gear. This does put the oil level about 1/3 up the axle seal and while it's okay for street use, under race conditions I'll need to vent the case to prevent oil from blowing out. I'll probably use the whole I accidentally ground through the case for the breather which should be above the oil level. They did mention not to use the dipstick tube because the bottom of that is below the oil level and could cause problems. I spent a little time upgrading my toolbox this weekend too. Yes, it's a cheapy harbor freight box, because I'd rather put 10k into my drivetrain and not my toolbox. I was using a 26" craftsman roller and top box but I out grew it a long time ago. The new 42" box can hold most of my tools plus my electrical/wiring tools, and a later side addition can hold the engine building and precision tools. I got some tool organizers as well so everything is easier to find which is part of what started this upgrade in the first place. I was just getting tired of having to search in 3 or 4 places to find the tools I needed. No toolbox is complete without some bling so I put a bunch of stickers on it to make it faster   Spent Saturday striping the wiring out of the bug and separating the harnesses. I put the dash in so I could figure out the new fusebox mount and wire routing. So far the chassis harness is ready to go (lights, wipers, horn, starter), and I got the engine ready for power wiring (alternator+, starter+, and battery+). Spent some time that night pouring over the subaru wiring diagrams to figure out alternator and coolant sensor wiring. Once the dash went in I realized how much the cage intruded into driver/passenger space, I can't wait until the new cage goes in this winter.   On Monday I dragged my laptop out into the garage and did a lot of measuring, head scratching and ordering parts. I ran out of, or didn't have the right AN fittings for the fuel system so I ordered those and moved on to coolant plumbing. I used some cut up radiator hoses for mock up and ordered the necessary silicone bends. I have some industrial gates hose I could use under the car but I would rather get some stainless 1.5" pipe for looks/lightness. A new throttle body, air/air intercooler, and intake/exhaust plumbing are all on order too. I'm in a rush now to finish everything up before the rainy season starts, and last weekends storm was a reminder it's just around the corner.
__________________
Lucy: 73 super beetle sport bug edition, 944 turbo suspension, 930 turbo brakes, 2165 FI, dry sump, turbo 
|
|
#453
October 16th 2013, 15:35
|
||||
|
||||
|
Slow progress on the bug, a lot of hurry-up-and-wait. I'm working on wiring, plumbing, and exhaust at the same time as I run into blockages.
Wiring: Fascinating and tedious, I love and hate wiring. I'm using the existing engine harness to create a new one using a couple weatherpak 22-pin connectors for quick disconnect. I'm on the first part of this which is simply figuring out what needs to be on the engine side of the bulkhead connectors and getting the ends terminated. COPs, injectors, cam angle sensors and crank angle sensor are done at the moment. Also related to wiring, I found a good deal on an open box Aim MXL Pista so I'll be using that for the dash. I like that it's compatible with the MS3X can-bus, a big factor in the decision, and I'm wondering if I can feed sensor data back to the MS3X from the Pista. Plumbing: I ordered a handful of 1.5" silicon bends and couplers for the cooling system, so those are ready and waiting. I want to pick up some stainless 1.5" pipe and get it bent to hug the underside of the bug, that will be lighter than the reinforced gates hydraulic hose I have I need to find a good diagram of the engine coolant routes to make sure the swirl pot and turbo are plumbed correctly. I've been waiting on a fuel surge tank, which finally arrived yesterday, to finish plumbing the fuel system. Now that it's here I can finish the AN hoses and be done with it. I've been on the lookout for ideas on how to plumb an accusump into the ej25 but still keep the oil/water cooler. Everything I see just replaces the oil cooler with a sandwich plate for the accusump. Exhaust: I bought way more than I need so I have plenty of materials to screw things up a couple times. Turbo back, the exhaust will only be about 2 ft. long at most. I got a 3" v-band output flange for the turbo, some 180 and 45 degree 3" pipe, a couple 3" v-band clamps, and a 3" Borla xr-1 oval muffler which hopefully takes some bite out of the exhaust volume. If not I think I might have a 3" supertrapp floating around which should do the job. Ideally, I need to be below 92db to run at Lagua Seca in my back yard, or shell out for no-limit days. In racing news I had a great event a week ago Sunday. Event #8 autoxing with NorCalUFO in Marina, and it was a fairly fast but technical course that wasn't easy to read. I've been in a heated points battle with my nemesis all year, and this was his last chance to take the championship away from me. We ran in the afternoon and since we had a 2 driver car our tires were getting pretty hot. Ian (nemesis), on the other hand got screwed by the grid master, a newbie cutting in line, and the karts, so all his runs were basically on cold tires. I pulled a 48.1 to his 49.0 cinching the OSP championship points race. I'm currently 3rd overall with 2 races to go, not sure I can swing 2nd overall but it's worth a shot. The downside to this, is that the Cayman has killed my poor tires, so after this season it's time for another set. http://www.youtube.com/watch?v=H0qXe9IpJjg
__________________
Lucy: 73 super beetle sport bug edition, 944 turbo suspension, 930 turbo brakes, 2165 FI, dry sump, turbo
|
|
#454
October 17th 2013, 00:46
|
||||
|
||||
|
Quote:
Regards Graham http://www.rjes.com/html/material_choice.html
__________________
gee dub
|
|
#455
October 17th 2013, 03:53
|
|||
|
|||
|
Guys, its possible to scare yourself shirtless reading about coolant pipe Galvanic corrosion etc, back in 'the day' plumbing hardware was almost universally used by everyone, and i mean works teams too, not back street cars, its very common still today, together with stainless pipework, and with the huge classic racing scene growing bigger and bigger, i was pleased to see a replica of the BTCC winning Imp of George Bevan recently, complete with copper coolant pipes to the alloy screamer in the back, Georges son and the cars engineer said they never had any such problems back in the '70's, and wanted the replica to be authentic in detail to the original car. not my choice by any means, mine are alloy and rubber/silicon where necessary, just some more input to the subject.. cheers Johnny.
|
|
#456
October 17th 2013, 06:21
|
|||
|
|||
|
Isn't there a lot to be said about modern coolant helpign keep it at bay too? G12+ is meant to be a good choice at a reasonable price.
Pretty sure Ricola uses stainless with his Subaru and Iain Ambrose uses it with his WBX with no ill effects at present
|
|
#457
October 17th 2013, 09:29
|
||||
|
||||
|
Well I feel like a hack I guess... LOL. But I just used all galvanized steel for mine and have had zero problems at all. I had an exhaust shop just bent me a bunch of 90* bends, then I went to home Depot and bought 2 10ft. Sticks of 1 1/2" galvanized steel electrical conduit for the whopping price of $15 a stick. It's worked great for me thus far. I chose the steel route cause I didn't have the means to weld aluminum, nor even get it here in the small town that I live in.
@humble with the wiring I can feel your pain cause I've ditched the OE fuse block in favor for a much more updated unit. Vw used the same fuse block in water-cooled cars from 89'-99' called CE2 (central electric 2). I've been happy since I switched over to a newer unit.
|
|
#458
October 17th 2013, 10:53
|
|||
|
|||
|
Quote:
Isn't there a lot to be said about modern coolant helpign keep it at bay too? G12+ is meant to be a good choice at a reasonable price. Pretty sure Ricola uses stainless with his Subaru and Iain Ambrose uses it with his WBX with no ill effects at present October 17th 2013 ^^^^^^^^^ this too. Yes, G12plus is good, and there are many even higher spec brands available.
|
|
#460
October 21st 2013, 15:18
|
||||
|
||||
|
Good notes on the galvanic corrosion, I'll keep that in mind. I chose stainless steel for it's corrosion resistance to the elements but as others mentioned, with modern coolant it shouldn't be too much of an issue. I've followed a number of other race/kit/street car builds that made use of stainless pipe without issue so I figured it's a good choice.
Didn't get to work on a few things that I wanted to this weekend. Our road was closed for resurfacing, so no mail/ups/fedex deliveries, and no parts I was expecting. On Friday I started on the fuel system, which meant lots of fittings, and finding a good place for the fuel surge tank. I also needed to find a spot for 2 fuel pumps that is easily reachable and good for plumbing. I ended up putting the walbro lift pump on the wheel well next to the tank, and the 044 below the surge tank and mounted to the lower radiator support. I also started running the fuel return from the fpr to the surge tank but I need to wait for the coolant lines to determine the route.   I was going to try and use the subaru sensors but the outputs needed conditioning for use in the ms3x. It was much easier to drill and tap for GM sensors which work out of the box with the ms3x. I already had the sensors, 9/16" drill and 3/8" npt tap laying around from a previous project so it was a quick job. I also clearanced the intake for the cable throttle body and bolted it into place. Since it's an ebay find I took the time to check and lock-tite the butterfly screws which were barely finger tight. The throttle plate area seals okay but the idle valve port doesn't, so I'll just make a block off plate for that.   I lied, apparently my IAT sensor went missing :P Ordered a new one and a knock sensor mod kit for the ms3x from diyautotune.com. I've been getting all my megasquirt parts from them since forever and I have never been disappointed.  I finished the weekend by making this poorly welded masterpiece. It took most of the day of fit-measure-cut-tack etc. to sort out the exhaust path. It's a little close to the truss bar but it clears just fine and there's about an inch clearance on the axle and spring perch at full droop. I hacked the bellmouth off an old downpipe and welded a v-band to it, then used some 3" stainless bends to put the muffler between the tire and valve cover. There's about 2" clearance on the tire, 1" on the header and it doesn't hang any lower the the engine cradle. The welding could be better, but you can only do so well welding outside with a slight breeze. What you can't see is the O2 sensor bung in the 90*downturn next to the transmission. There's one near the tail pipe exit because that was some scrap 3" I had laying around :P I just need to make a bracket to support the end of the muffler and the exhaust is done!    
__________________
Lucy: 73 super beetle sport bug edition, 944 turbo suspension, 930 turbo brakes, 2165 FI, dry sump, turbo
|
|
#461
November 13th 2013, 15:19
|
||||
|
||||
|
I'm not making as much progress as I'd like, just too much going on with work, weekend meetings and finishing the racing season. Speaking of race season, we had our last race on sunday and I borrowed David's Cayman S again. It was surprisingly warm in Marina and we over heated the tires, slowing us down by over a second. I came in 2nd in class, but had I run in the correct class for the car I would have been 1st in pax by .3 seconds. I think I need to get a cayman s soon! The good news is that I am now officially the 2013 OSP class champion, and I finished 3rd in points overall for the year. Woohoo!
I've been doing some work on the dash, both digital and physical. I picked up an AIM MXL Pista dash after a great deal came up on it. I took over the dining room table and setup a test bench with the ms3x and the MXL Pista talking via can-bus. I was able to read everything but calculated gear and vss from the ms3x. I shot an email off to AIM but haven't heard anything back from them. The dash is very nice, but the back light is kinda dim, so I'm wondering how well I'll be able to see it in the car. Another concern is oil pressure and temp sensors. I'm not sure if I can add those to the ms3x then read them into the Pista, or if I have to just use the AIM sensors for the dash.   As for the actual dash in the car I started hacking up the foam and steel to clearance for the new dash using the template. I want to put the gas gauge and switches in the center, then put the fuse box and relays where the glove box was.   Using poster board and tape as a base I started doing a very poor job of fiberglassing. I mean it's really bad.  This is only the 2nd time I've used fiberglass so I'm learning quite a bit in the process. It is a bit of a pain to do outside and on your own, the wind didn't make it easier. I did try a few different types of cloth in different areas so I can see how it differs on a non-structural part. The goal is to be comfortable enough to do my splitter and radiator ducting soon.  It really does look awful but I'm going to do my best to clean it up and make it serviceable. It's a race car not a show queen, I just need it to hold gauges and hide wiring. Moving on! While I was hacking things up I decided I'd make whats left of the roll cage look presentable. I ground off the stubs for the door bars and the forward down bars. I shot it with a little paint afterwards and it's all pretty again. I still need to cut off the rear plates and trim the rear cage stays to meet the new raised floor in the back.  Another check box on the list was to test fit pedals and modify the shifter. The pedals are a tilton 3 pedal set I had lying around from a previous car, and they almost fit. the MCs push the pedals to far back if i try to fit it all in the footwell. If I try to mount it flush, the body/pan mating surface gets in the way. I've wanted this setup for a long time, because once you've driven with properly setup pedals that's all you want. I did find a reverse floor mount pedal set from OBP so I'll probably pickup one of those to test fit, and it should work with the standard tilton/wilwood MCs. With the move to triple MCs I'll probably re-plumb the brakes with -3 ptfe line, and use the same stuff for the clutch as well. Ironically, it should take longer to remove the old setup than putting in the new one. As far as the shifter goes, it's an empi hurst knock-off and I've always loved the way it felt. Unfortunately, the vw reverse lock out was effectively 1-2 lock out on the subaru 5sp. I pulled it apart and modified it so the lock out can no longer work. I tried it in the car and all gears engage perfectly. I really want a bug-tech shifter (omg so bad) but I just can't justify $460 for one. I've started to cad up a similar design with an adjustable pivot and more stick height. That way you can adjust the throw to your liking and it puts the shift knob in a race friendly position. I've already had a couple design iterations (one of them was even on purpose!) and I'll put it up soon enough. 
__________________
Lucy: 73 super beetle sport bug edition, 944 turbo suspension, 930 turbo brakes, 2165 FI, dry sump, turbo
|
|
#462
December 29th 2013, 22:54
|
||||
|
||||
|
The build is slowing down a bit because Nov-Feb is my busy season. I visited a very cold Chicago for a week and a very warm LA for a week. We had a small Thanksgiving with fried turkey for about a dozen people, and did it again over Christmas. I finally got some time to work on the car over the Christmas break so I've done what I can with the nice but short days.
I swapped the intake out for a dbw wrx intake. I need to widen a few of the mounting holes to make it work, but it seems like that is a common mod. I also picked up some wrinkle finish paint to pretty it up, but it hasn't been warm enough to use it yet.  The intercooler mount is half done, the lower support is in place but it needs to come out again for paint. I'm not sure how I'm going to brace the top yet but it'll probably use the wing stantions for support. The intercooler sticks out more than I thought it would but it should work pretty well as a result.    I got the new OBP pedals in the car as far back as I could mount them. The beetle footwell narrows down too much to put them against the "firewall" so they sit forward about an inch or two. Once the pedals were mounted I could start measuring hose and assembling a dozen fittings. 
__________________
Lucy: 73 super beetle sport bug edition, 944 turbo suspension, 930 turbo brakes, 2165 FI, dry sump, turbo
|
|
#463
December 30th 2013, 00:08
|
||||
|
||||
|
I didn't find any decent guides on ptfe fittings, which are different from aluminum compression fittings I've used elsewhere on the build. So here's a quick write up for the curious.
I started with all my tools in one place: lubricating oil, dowel, wrenches, cutter, and a small flathead screwdriver. I highly recommend leather or thick rubber lined gloves to keep the frayed stainless steel wires out of your skin.  First step is to pull apart the fitting and ready the ptfe hose. The hose has a dumb end and a smart end. You put the first fitting on the dumb end then check/mark the hose length you need in the car. Finally, you cut the hose and assemble the smart end you just cut and you should have a perfect fit. Here's the steel -3 an ptfe fitting in all it's glory. From the left, the collar, the ferrule, and the main fitting.  Take your dumb end and slip the collar over and push it down out of the way.  Then take your small screwdriver and peel the braided wire away from the teflon core. Be careful around the opening otherwise you'll have trouble getting the ferrule on.  Take your ptfe dowel, or carefully use the screwdriver, to round out the opening of the teflon hose, but try not to flower it outward, again the ferrule is a tight fit.  Now slip the ferrule over the end of the teflon hose but make sure it's inside the braids you separated. Push the ferrule all the way down until it seats fully, you should be able to see in the opening if the teflon seated correctly. Some I could do by hand and others I would need to use the table to force it in.  Push the main fitting down through the ferrule and pull the collar up to about where it is in the pic. It should get to that point fairly easy by hand.  Finally, add a little lube on the braids and threads and start winding the collar up to the main fitting. This is a pain and after a dozen of these you'll really start to feel it in your hands. I used a wrench to help spin the collars up to the fittings and a little lube goes a long way here. Once you get the threads started go slow to avoid stripping the fitting or collar. Don't expect the collar to fully seat on the fitting, if it does good, if it doesn't then don't force it. If you want to be really trick you can pre-intall the line to clock the fitting so its facing the correct way. Once they are threaded these fittings don't really swivel.  There you have it, 1 fitting down and 19 more to go!  A couple tips if you want unmarred fittings. Wrap the collar and main fitting in vinyl or teflon tape before you wrench on them or put them in the vice. Lube is super important! I stripped 2 fittings thinking I could do without. A couple tips if you want unmarred fittings. Wrap the collar and main fitting in vinyl or teflon tape before you wrench on them or put them in the vice. Lube is super important! I stripped 2 fittings thinking I could do without.
__________________
Lucy: 73 super beetle sport bug edition, 944 turbo suspension, 930 turbo brakes, 2165 FI, dry sump, turbo
|
|
#464
December 30th 2013, 00:40
|
||||
|
||||
|
Let the hydraulic plumbing begin! First off, the clutch system with a new banjo bolt (10mm x 1mm) and the master cylinder is 3/4" (19mm) to match the subaru slave.
 Next was the rear brakes, 10mm x 1mm to -3 AN adapters for the porsche calipers and a tee fitting by the trans going forward to the MC. For front and back circuits I went with 15/16" (23.8mm) to match the porsche 930 master cylinder I was using before.     The finished OBP pedal setup with all the master cylinders mounted, and lines run. the low pressure lines run up through the old heater channel and the reservoirs will sit next to the gas tank.  I'm going to use pieces of leather to keep the stainless hoses from wearing through the low pressure feed lines and to keep the cover plate dimples from digging into them.  I'm still working on the front circuit which gets an aim brake pressure sensor and a brake light switch. I'm just trying to figure out how/where to mount them. I also set the dash and seat in place while working on the pedals, which was nice for me to see. It reminded me that it is in fact a bug and that there's still a few important things on my checklist. 
__________________
Lucy: 73 super beetle sport bug edition, 944 turbo suspension, 930 turbo brakes, 2165 FI, dry sump, turbo
|
 |
| Currently Active Users Viewing This Thread: 1 (0 members and 1 guests) | |
| Thread Tools | |
| Display Modes | |
|
|


 Linear Mode

