
 |
|
#46
|
||||
|
||||
|
Well, won't be a full cage...just a rear hoop, harness bar and likely a cross-brace (undecided). We started talking about door bars, but that just leads into the question of "why aren't you fully caging it". I've done the daily-driver with a full cage, and just want to avoid it for now. So, 4pt hoop and if I decide later to build into a full cage we'll do that down the road.
...sigh, gotta wait until 5pm to move the car. The anticipation of having the shell out of my garage is awesome, like the first big stage complete. Of course, I still have to prep the fenders, so not totally finished the body portion. -Dave
__________________
'71 Type 1 - Rally Project '58 Type 1 - I bought an early!?! '73 Type 1 - Proper Germanlook project '68 Type 1 - Interm German 'look' project '75 Type 1 - Family Heirloom '93 Chevy 3500 pickup - Cummins Swap |
|
#47
|
||||
|
||||
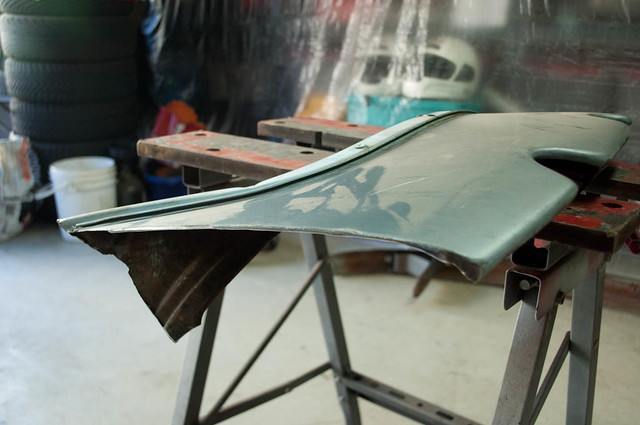 Well, I decided to get aggressive on the apron cut...here's hoping it works out :P hahaha. Also worked on the engine decklid a little bit, adding some cooling. 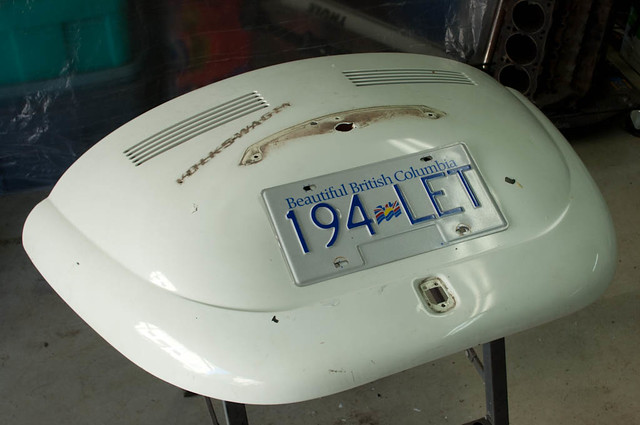 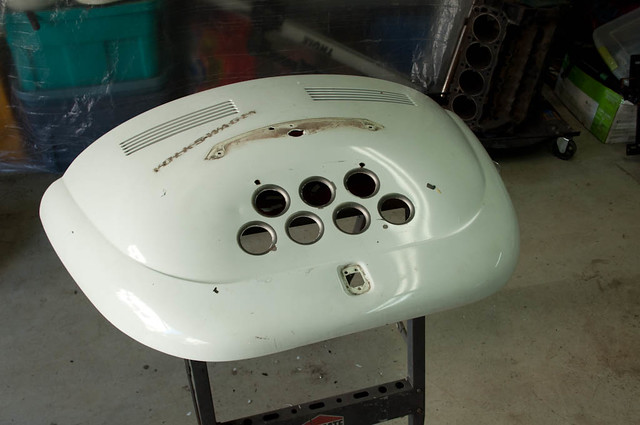 ...but really, I was most excited to find out that my roll bar was done before noon today! 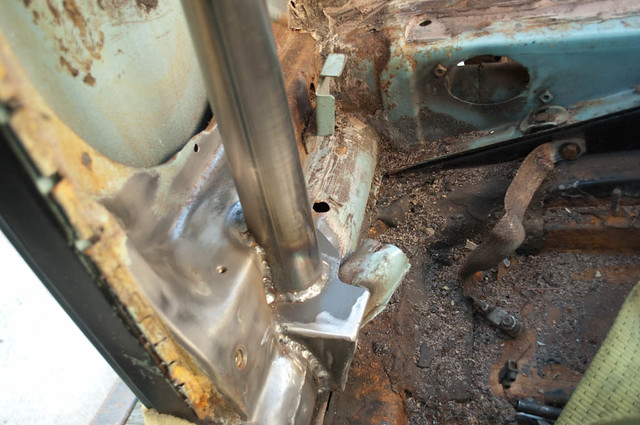 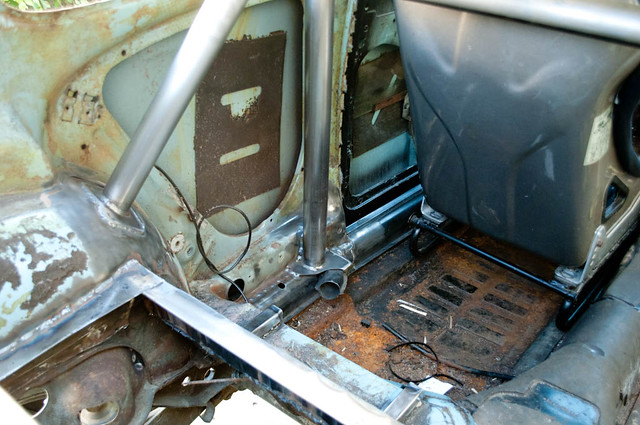 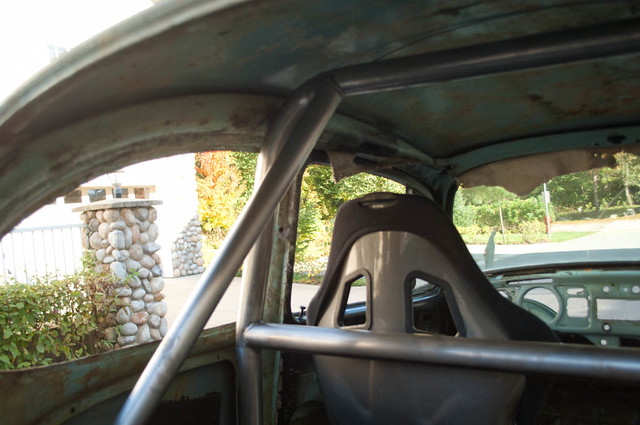 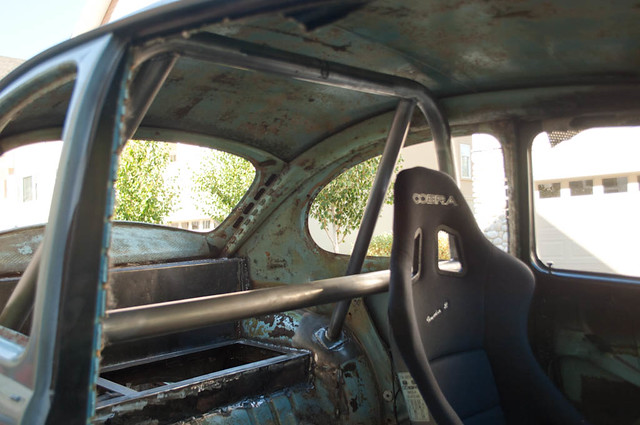 and now I'm off to trailer the car to the media blasting spot... -Dave
__________________
'71 Type 1 - Rally Project '58 Type 1 - I bought an early!?! '73 Type 1 - Proper Germanlook project '68 Type 1 - Interm German 'look' project '75 Type 1 - Family Heirloom '93 Chevy 3500 pickup - Cummins Swap |
|
#48
|
||||
|
||||
|
Whew...lots of driving this weekend. I've moved the shell about 2hours away from my house, where I'll be doing the sand blasting and then the guys will be painting the car for me. Normally I would just crash on a couch, but ended up driving back and forth for the weekend. Got a fair bit of blasting done on the shell. All four wheel wells are done, got the first pass on the front trunk area and most of the engine bay done. Will need to go back on the engine bay with a bit more light so I can see what I missed. Still have to do the inside of the car, which is going to suck.
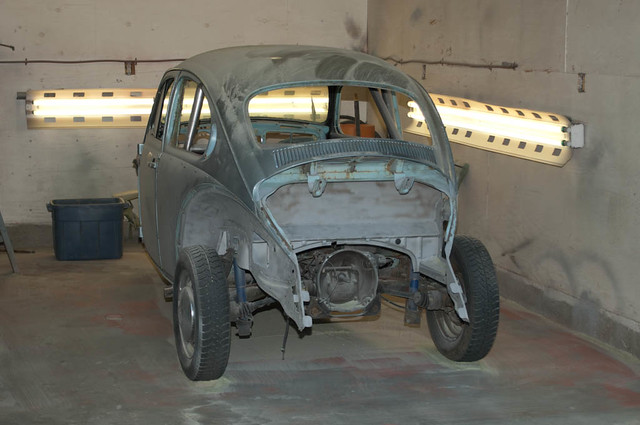 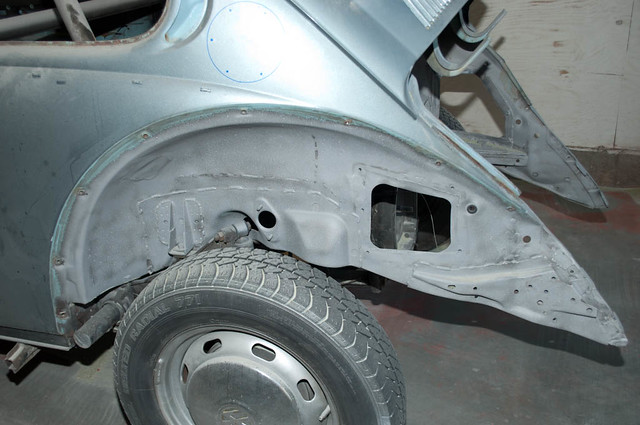 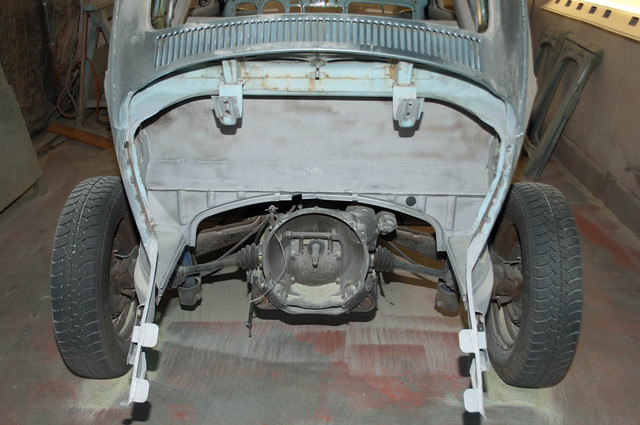 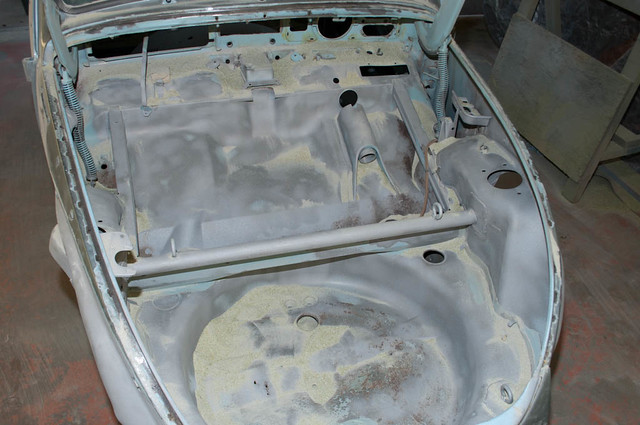 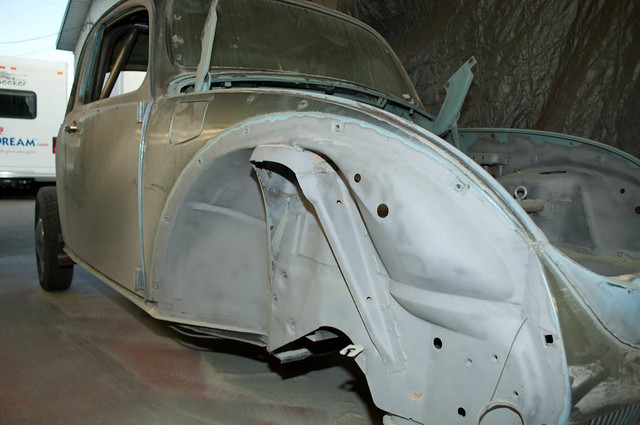 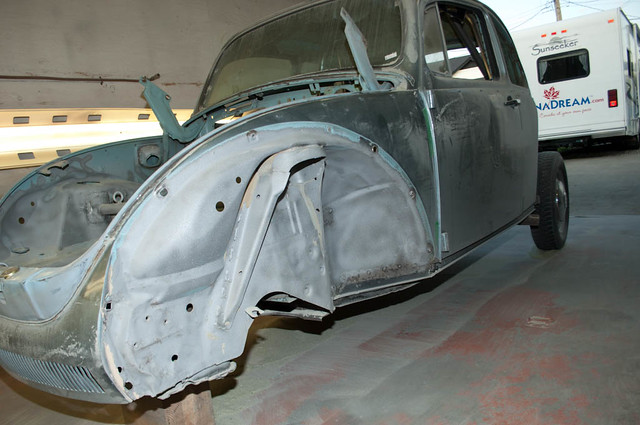 I've got glass in my eyes, my hair, my ears...ahhh the fun of it all. -Dave
__________________
'71 Type 1 - Rally Project '58 Type 1 - I bought an early!?! '73 Type 1 - Proper Germanlook project '68 Type 1 - Interm German 'look' project '75 Type 1 - Family Heirloom '93 Chevy 3500 pickup - Cummins Swap |
|
#49
|
||||
|
||||
|
The front apron on my 71 is actually in poor shape, and not really replaced well. We debated about swapping it, multiple times, but have (for the moment) decided to leave it. A show judge would dock me marks, but if the hood is closed you can't actually see the damage. Probably a shame not to just buy the part and put it in there, considering all the work I'm doing, but I can almost bet money on the fact that I'll be damaging and repainting the front apron within the first 6mo anyways. Might as well wreck this one before replacing it. (from experience, I've done the '69 one twice...and I don't even gravel rally it!)
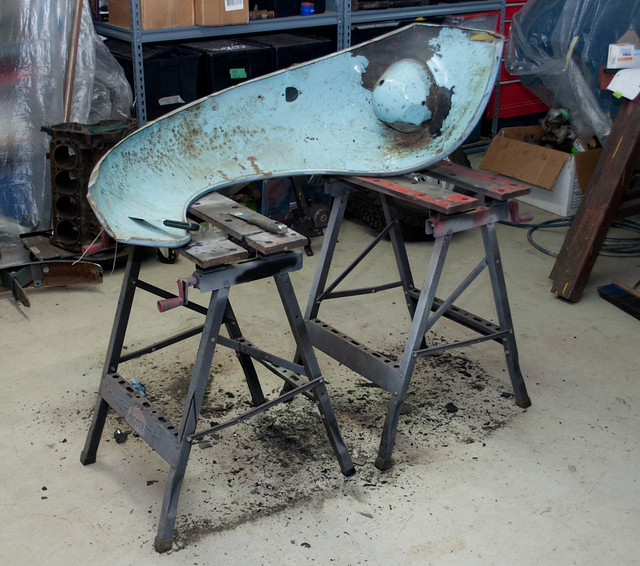 First day back in the garage, after lying on my back for a week. Last weekend while unloading the car for sandblasting I pulled all my lower back muscles. Normally I don't complain, and just work through it, but this time was bad enough that I couldn't sleep and ended up at the Doctors for some pretty hefty pain meds. A week spent lying on my living room floor and working upside down on my iPad has been interesting... My back is still recovering, so I haven't picked up my floorpan from storage yet. Instead I'm scraping the gravel guard out of the inside of my four fenders. FUN! haha. One of the front's has been hit and has some damage, one of the rears has been hit. The other two seem clean. The repairs are pretty well done, and I expect we can improve upon them even more so. I'll run these fenders as I believe them to be original German units. Managed to get 3 of 4 fenders done before I started feeling it in my back and decided to call it quits. Gotta save up my healing points for this weekend...when I have to go and sandblast more :P -Dave
__________________
'71 Type 1 - Rally Project '58 Type 1 - I bought an early!?! '73 Type 1 - Proper Germanlook project '68 Type 1 - Interm German 'look' project '75 Type 1 - Family Heirloom '93 Chevy 3500 pickup - Cummins Swap |
|
#50
|
||||
|
||||
|
Back was feeling ok on Friday night, so I finished the last of the fenders, then drove down to the shell on Saturday morning. After a day and a half of blasting, sweeping, sifting, blasting, sifting, sweeping, etc. etc. (repeat, at nausea)...anyways, the shell is DONE! Everything else is now the responsibility of the painters
 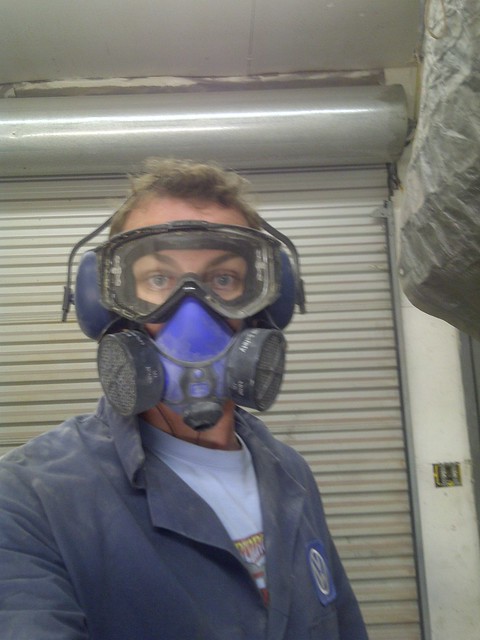 Gear up for safety! :P 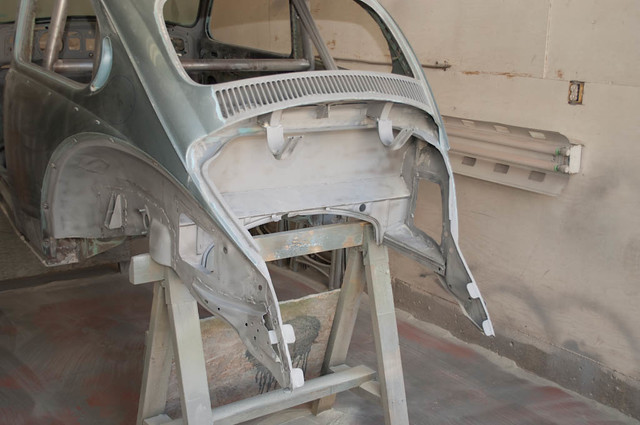 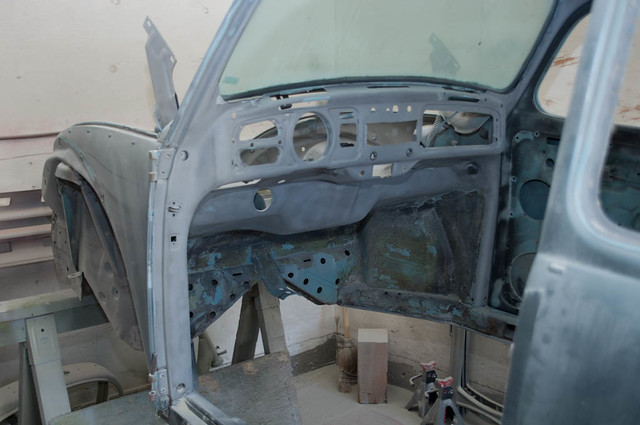 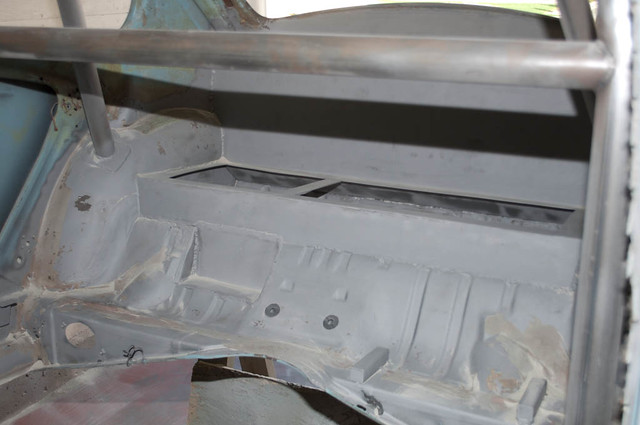 Looking a little cleaner now eh? 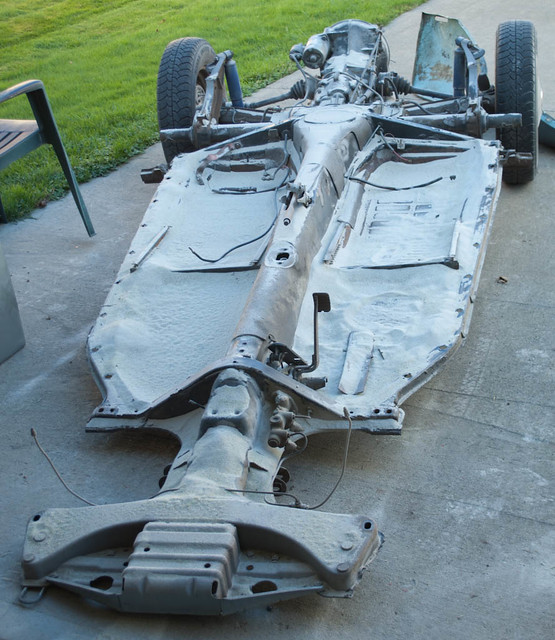 But have no doubt, this is messy, messy work. I'll paint a car in my own garage, but I am so darned glad I didn't have to blast the car in my garage ;-) Don't expect the paint to be done too quickly, it's a friend deal and there are customer cars in front of mine. They'll be tidying up the things I revealed through blasting, and getting the rest of the car ready as their able. In the meantime, I've got a more then enough work to do on the pan and engine. -Dave
__________________
'71 Type 1 - Rally Project '58 Type 1 - I bought an early!?! '73 Type 1 - Proper Germanlook project '68 Type 1 - Interm German 'look' project '75 Type 1 - Family Heirloom '93 Chevy 3500 pickup - Cummins Swap |
|
#51
|
||||
|
||||
|
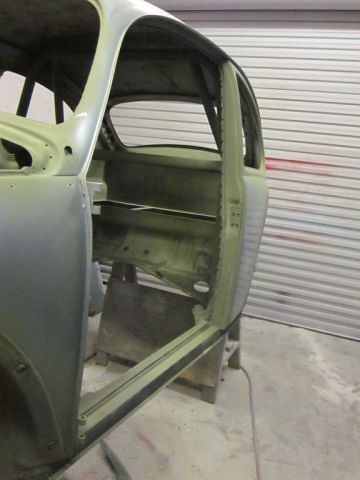
Had to take a couple of weeks off for travel, but will be back at it this weekend. The paint guys etch-primed the bare metal shortly after I posted the pics above, to keep it from flash rusting. Apparently the shell is getting sanded and seam sealed today, as well as spraying the undercoat inside the fender wells. Guess I really need to get my pan out of storage and get cracking!
 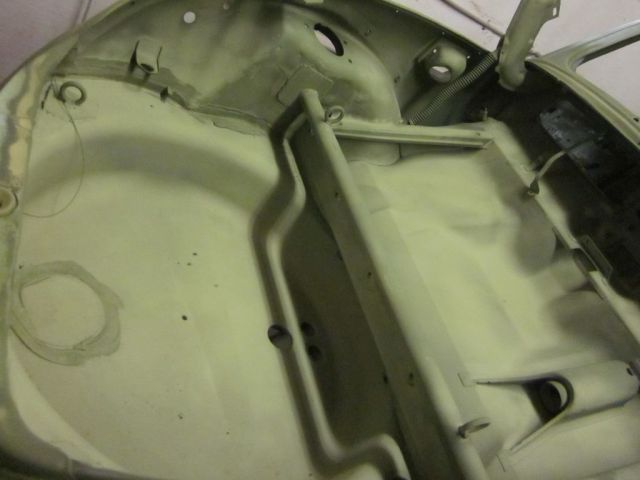 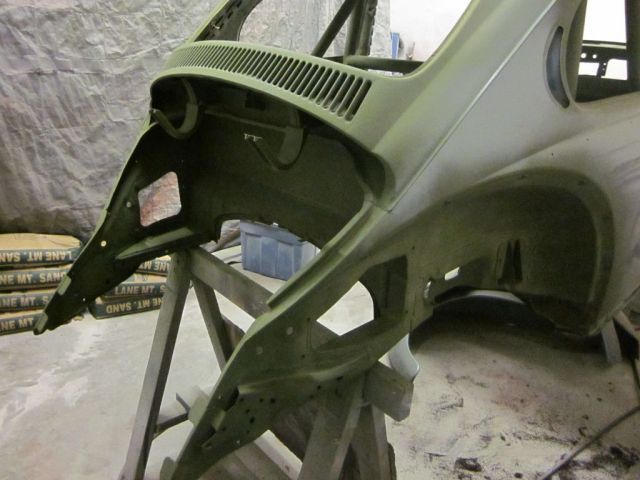 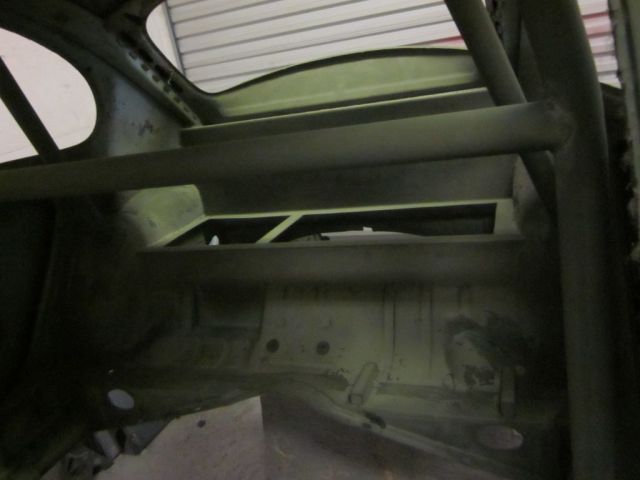 -Dave
__________________
'71 Type 1 - Rally Project '58 Type 1 - I bought an early!?! '73 Type 1 - Proper Germanlook project '68 Type 1 - Interm German 'look' project '75 Type 1 - Family Heirloom '93 Chevy 3500 pickup - Cummins Swap |
|
#52
|
||||
|
||||
|
The boys were working hard today and managed to seam seal the whole body, weld up any spots I opened up sandblasting and sprayed the gravel-guard undercoat in the fender wells. Sounds like they managed to give most of the body its first sanding as well.
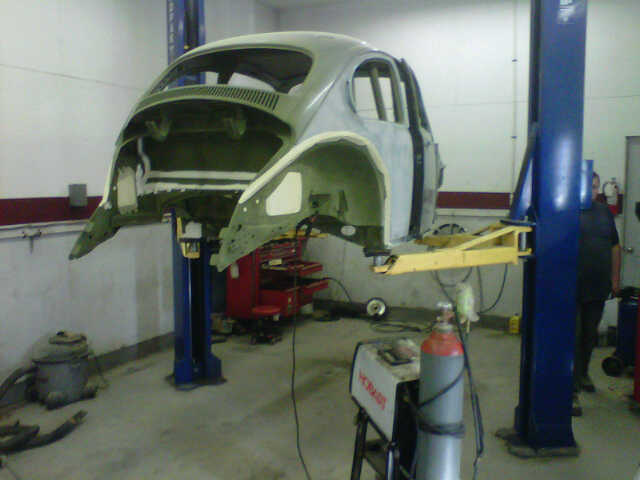 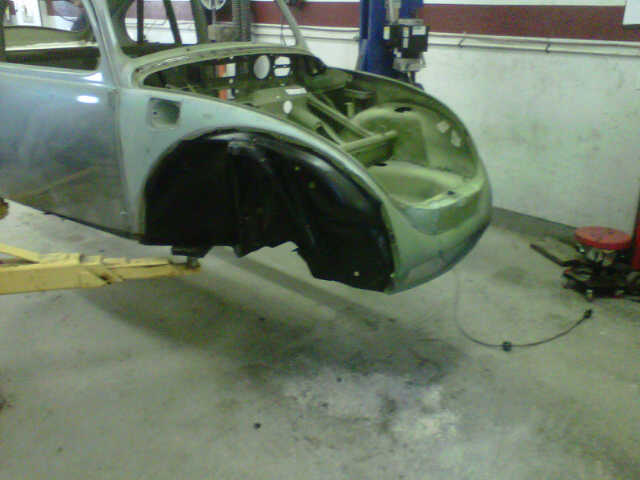 Based on their emails I figured I'd better get cracking on the pan, so a buddy and I picked it up from storage today. Amazing how quickly the mess happens. Started planning on how I'm going to fit the 901, and will probably end up with a tonne of questions. 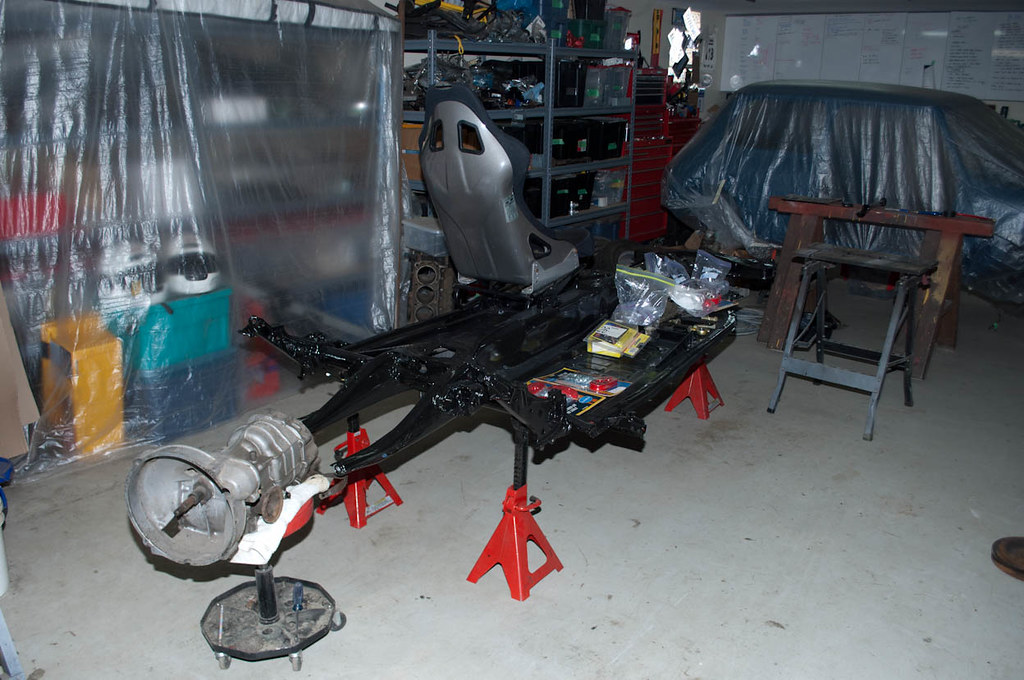 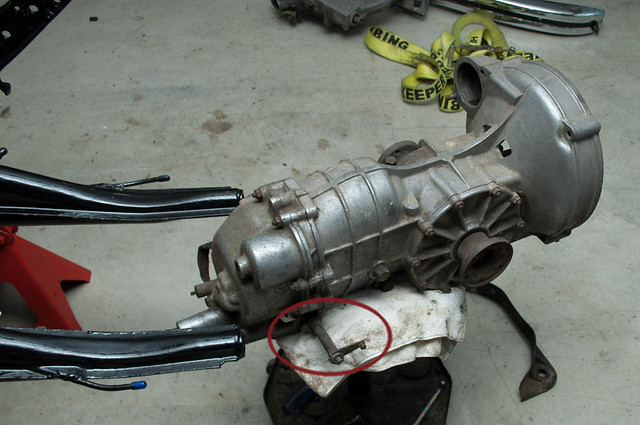 First off, none of the 901 threads show this piece attached to the side of the trans. What is it, how do I remove it? 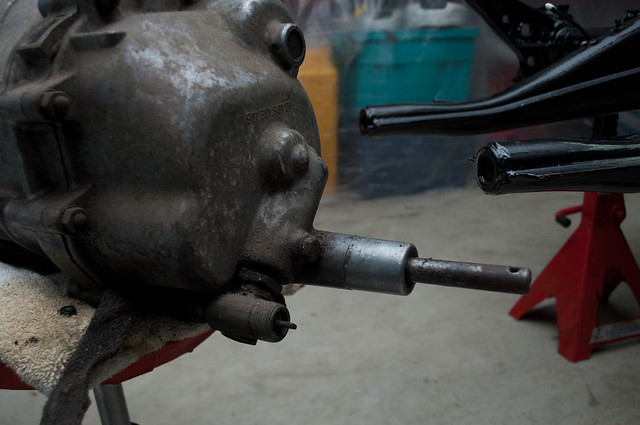 Will probably remove the angle adapter, but leave the gear inside...just in case I need it later for speedo or rally computers. Selector shaft seal needs to be replaced though. 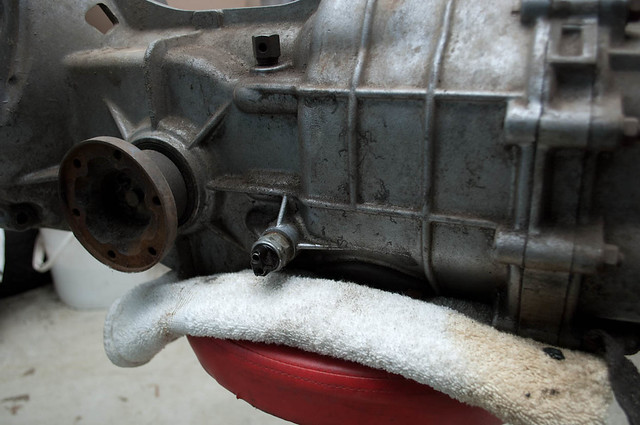 Are there any options for the reverse switch besides a $90 Porsche part? -Dave
__________________
'71 Type 1 - Rally Project '58 Type 1 - I bought an early!?! '73 Type 1 - Proper Germanlook project '68 Type 1 - Interm German 'look' project '75 Type 1 - Family Heirloom '93 Chevy 3500 pickup - Cummins Swap Last edited by owdlvr; November 5th 2011 at 23:56. |
|
#53
|
||||
|
||||
|
That's an intermediate piece for the accelerator cable I believe. Just remove it and plug the hole in the case with a bolt and suitable sealing washer...
__________________
http://www.ricola.co.uk |
|
#54
|
||||
|
||||
|
Ah, perfect! Thank you.
More photos of the shell... 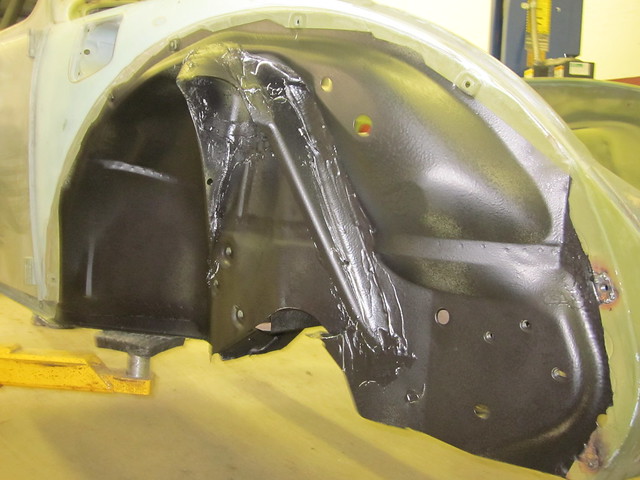 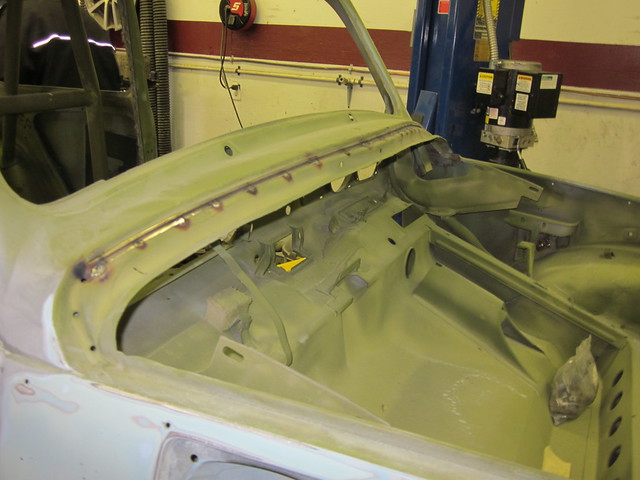 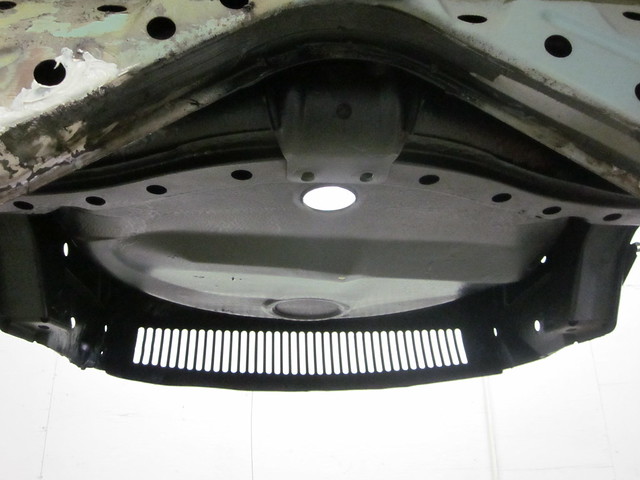  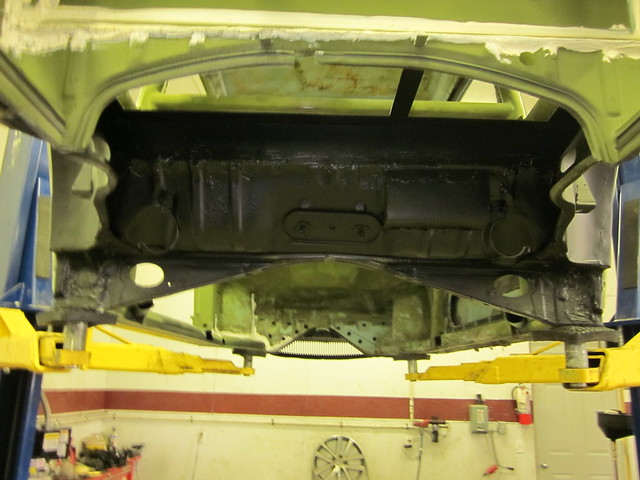 -Dave
__________________
'71 Type 1 - Rally Project '58 Type 1 - I bought an early!?! '73 Type 1 - Proper Germanlook project '68 Type 1 - Interm German 'look' project '75 Type 1 - Family Heirloom '93 Chevy 3500 pickup - Cummins Swap |
|
#55
|
||||
|
||||
|
Frustrating day with the Porsche Trans, but I'll get it figured it out. I've read the various "how-to's" that are out there, but have found them to be somewhat lacking in details. Surely the Bug5atspeed products would make this quite a bit easier, but it's well outside the budget I have left to complete this. I'll try and detail out my solutions should someone in future be looking for threads on 901 installs.
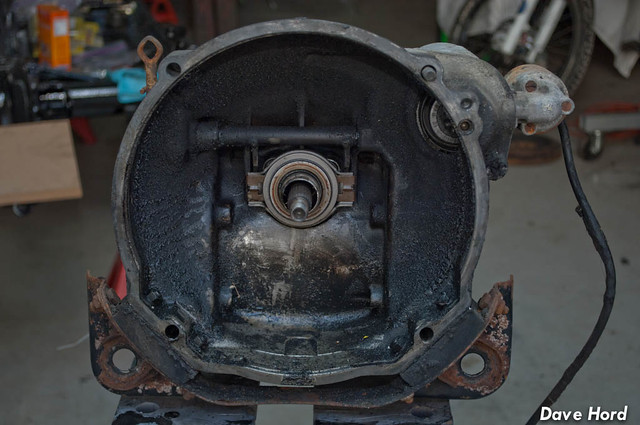 Factory VW transmission (and, I believe, the Porsche 915) has some flat sections in the lower corners for the motor mount bolts. The 901 Porsche trans? No dice... 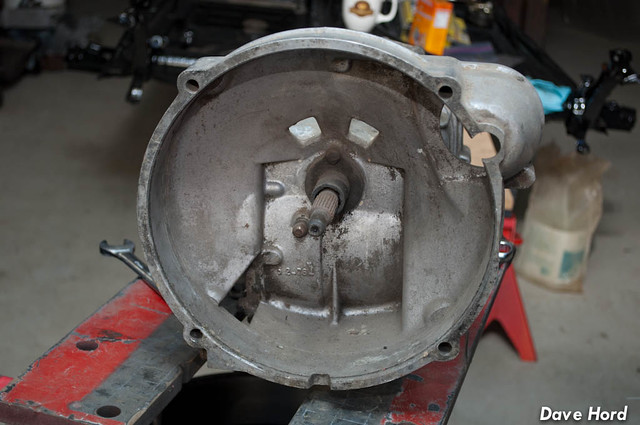 I've flipped the transmission upside down in this next shot to show the Beetle transmission mount on the Porsche Transmission...will need to adapt the beetle Urethane mounts to fit to the metal mount. 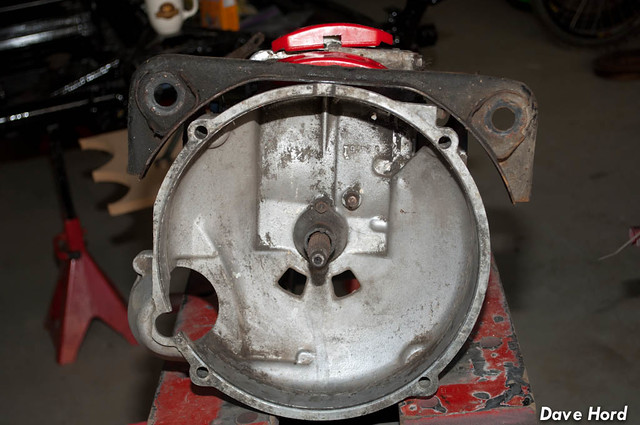 First up is removing this piece off the bell-housing. I suspect, but have no real idea, that it's for a clutch release spring. Regardless, it's in the way and gets removed. Didn't bother taking a photo of it all cleaned up, but basically you need to remove all the material from the rib to the bolt hole, leaving the lip around the bell housing like the rest of the transmission. 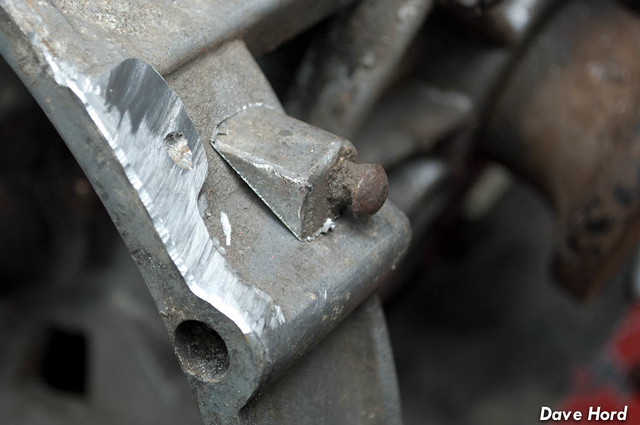 From there, it was onto modifying the Urethane mounts. This stuff flies everywhere with a carbide cutter, and melts and drips when you use a metal cut-off wheel. Sure hurts when it lands on a pant leg! 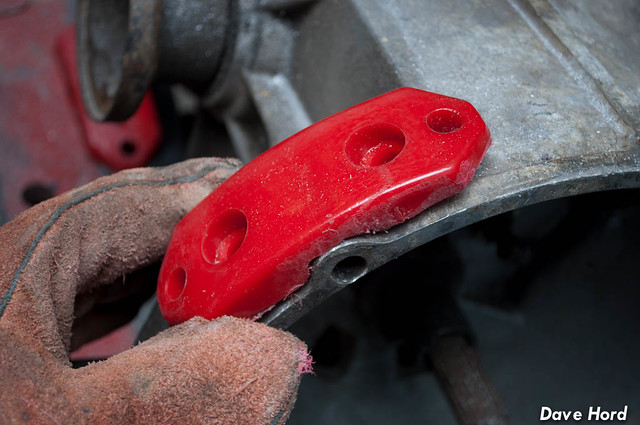 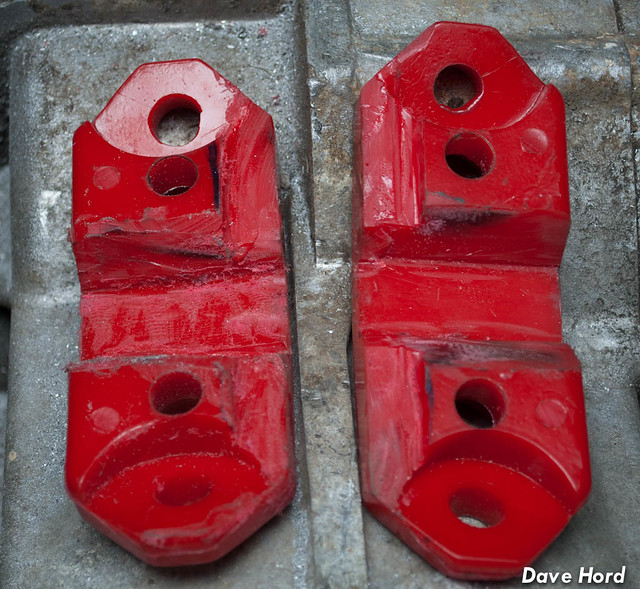 ...and now the scary part. Drilling the case of a Porsche Transmission. 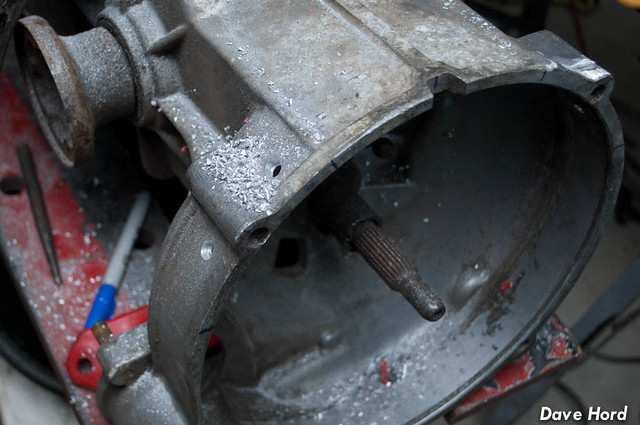 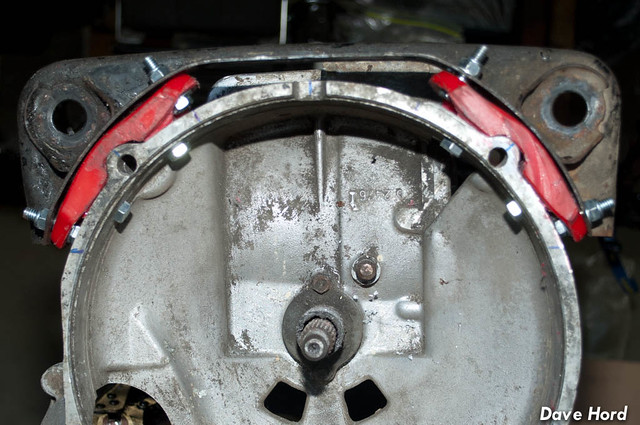 ...eventually you end up with this, which isn't perfect. Ironically I can't seem to find a photo of anyone else's 901 install, so I'm not sure if other people run with the mounts stressed like this, or came up with an entirely different solution. I can't, however, leave it like this as I know it will fail prematurely. I'll have to pick up some sheet urethane and start working out a spacer-type solution. Ideally the urethane would run along the metal mount touching for the complete radius...but I don't think I can set it up for this to happen. It's really driving me nuts that I also won't have an "off the shelf" solution if the mounts fail or wear out. Once I solve the mount shape issue, I'll have to then sort out the bolt-heads inside the bellhousing. The bolt heads interfere with the ring gear, so the common solution is countersunk allen head bolts. I'd like to see if I can come up with something a little stronger, but I'm not quite sure what yet. The current thought is a metal strip inside the bottom of the bellhousing, to which studs will be welded to. Need to talk to a buddy at the rally shop to see what he thinks. -Dave
__________________
'71 Type 1 - Rally Project '58 Type 1 - I bought an early!?! '73 Type 1 - Proper Germanlook project '68 Type 1 - Interm German 'look' project '75 Type 1 - Family Heirloom '93 Chevy 3500 pickup - Cummins Swap |
|
#56
|
||||
|
||||
|
...and minutes later.
Might have found the solution in dub_crazee's build thread (http://www.germanlook.net/forums/showthread.php?t=10377). Also made me realize I wasn't thinking about the outer diameter of the bellhousing. Once mine was all bolted up the bolt spacing on the mount tightened slightly, but was still okay. In the example below, there are aluminum spacers between bellhousing and urethane mount, which I think would allow me to keep the spacing 100% correct. Hmph, makes me kinda wish I hadn't ground up those mounts.  -Dave
__________________
'71 Type 1 - Rally Project '58 Type 1 - I bought an early!?! '73 Type 1 - Proper Germanlook project '68 Type 1 - Interm German 'look' project '75 Type 1 - Family Heirloom '93 Chevy 3500 pickup - Cummins Swap |
|
#57
|
||||
|
||||
|
Dave
This alex from bugat5speed Send me an email, may have some alum blocks laying around VR Alex
__________________
Alex Olaverri Sales Associate for Bug@5-Speed (US) Email: Bugat5speed@yahoo.com Tele: 973 204-5463 |
|
#58
|
||||
|
||||
|
__________________
VW 1976 |
|
#59
|
||||
|
||||
|
Those are 1.75" holes. I would have preferred smaller, but a buddy owned the tool in that size. Price one out, and you quickly decide to use the one that's free!
Alex: You'll have mail momentarily. -Dave
__________________
'71 Type 1 - Rally Project '58 Type 1 - I bought an early!?! '73 Type 1 - Proper Germanlook project '68 Type 1 - Interm German 'look' project '75 Type 1 - Family Heirloom '93 Chevy 3500 pickup - Cummins Swap |
|
#60
|
|||
|
|||
|
Here is another article on the conversion. It appears they used heavy duty VW mounts...
http://www.aircooled.net/gnrlsite/re...he5spdconv.htm
__________________
Kafer_Mike Build 'em fast...or let 'em sit. |
 |
| Currently Active Users Viewing This Thread: 3 (0 members and 3 guests) | |
|
|