
|
|
#76
 November 20th 2011, 00:24
|
||||
|
||||
|
Quote:
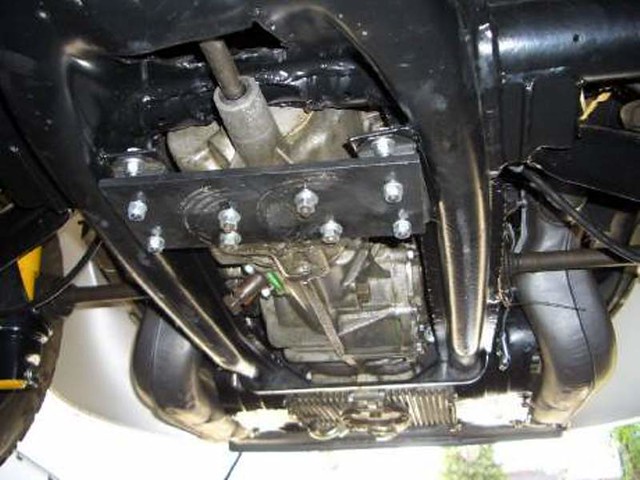 I wonder if the factory rubber mounts will be stronger? I can't think of a good reason why I wouldn't be able to just swap them in. The urethane mounts for my nosecone are unmolested thus the dimensions should be identical. ...so what do we think? Stick with the urethane or switch to rubber? -Dave
__________________
'71 Type 1 - Rally Project '58 Type 1 - I bought an early!?! '73 Type 1 - Proper Germanlook project '68 Type 1 - Interm German 'look' project '75 Type 1 - Family Heirloom '93 Chevy 3500 pickup - Cummins Swap 
|
|
#77
November 20th 2011, 06:03
|
||||
|
||||
|
I'd go with stock factry mounts, they tend to be the best. Don't worry about your install, they ARE the correct way around. Acceleration causes a torque reaction that lifts the nose of the trans putting them into compression, plus you will have the weight of the engine balancing them out statically.
__________________
http://www.ricola.co.uk
|
|
#78
November 20th 2011, 06:14
|
||||
|
||||
|
Sweet! Good to hear. Will order up some factory mounts and swap them.
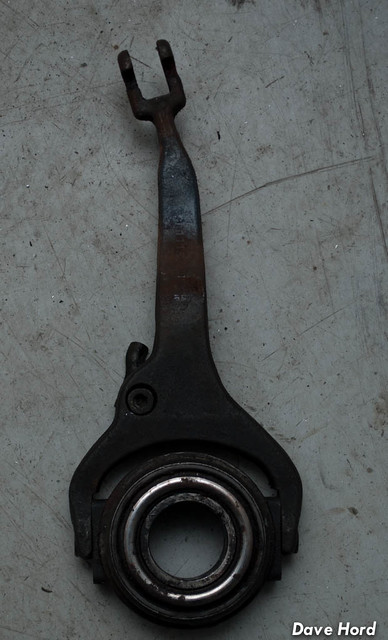
So the last step on the transmission was to determine how I was going to hold the bellhousing mounts in. Initially I wanted to avoid the countersunk screws, but after considering a few options determined that they really are the way to go. Only problem? My countersink bit was broken on the last job. Small town Squamish doesn't have a whole lot available at ten to six on a saturday...but Home Depot did have these... 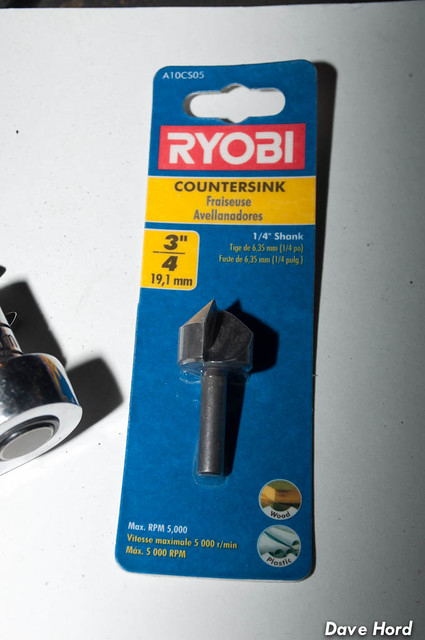 ...yes, that does say wood and plastic. Aluminum is soft, right? :P A bit ugly on the first go, but after cleaning up with a stone they worked fine. 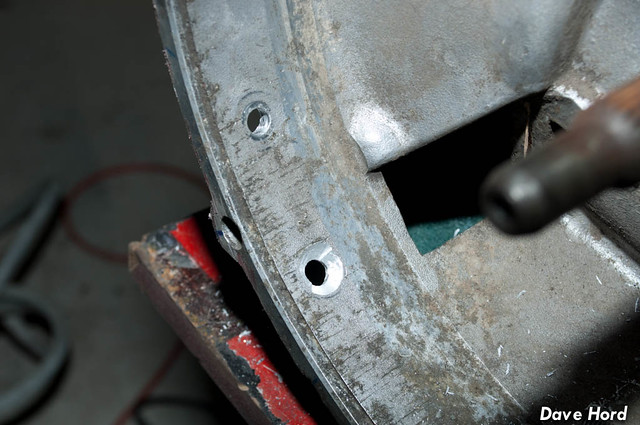 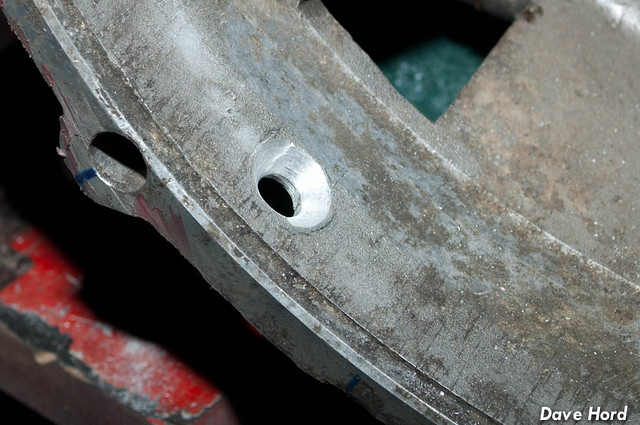 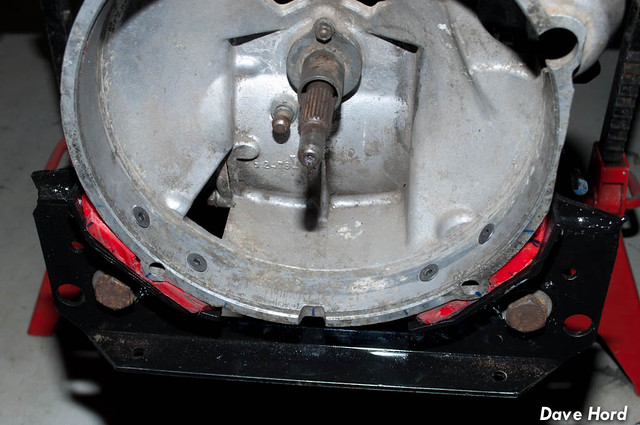 And with that, the pan is right side up and ready for me to move on. From here on out most of this post is for archive purposes...should someone be searching for help on their own 901 install. 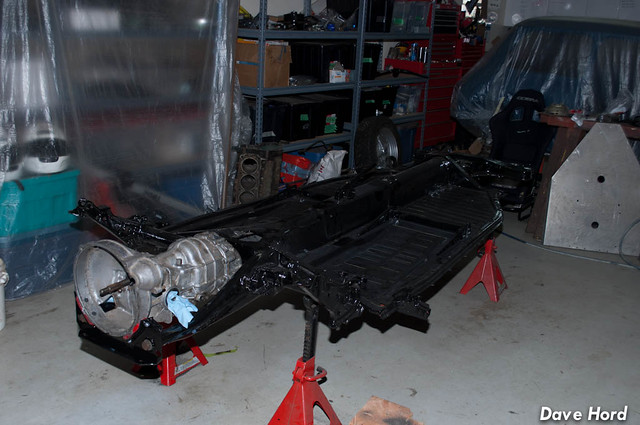  One of the things I was finding tough to plan was how I was going to do the shift rod. This isn't a well documented part of the swap, I suspect because everyone's transmission is going to end up in slightly different location fore-aft. The transmission I bought came with a modified 911 shift rod which was in a notchback (supposedly), but the bends were way off for a beetle pan. I also really wanted to use the Beetle shift rod as I'd have better (and more affordable) shifter options. So with that in mind I started off on the shifter. I knew I needed to remove the bushing mount temporarily for setup, which means grinding off the pan finish. If I have to grind a bit, might as well grind some more...so I cut a big access hole to make life easier. 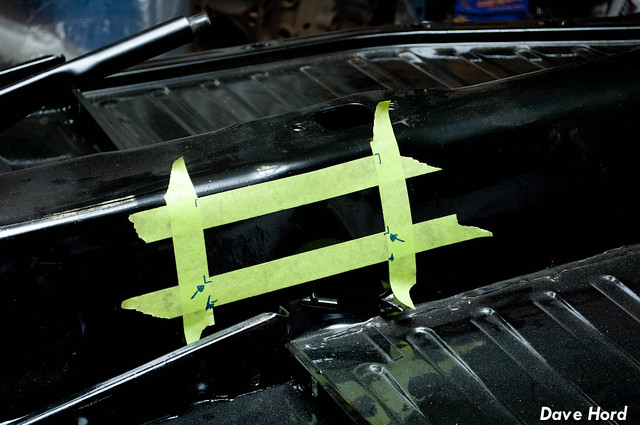 There are six spot welds holding in the bushing bracket / shifter mount  From there I propped the beetle shift rod up in place, and then measured how much "drop" I would need at the back of the shift rod. To bend the rod I used a propane torch to heat it until it was red hot, and bent it over a section of exhaust tubing. The shift rod will still crimp, as you can see in the photo, but I just welded tabs over top when I was done. If I had a second factory shift rod, I actually would have started again, putting the bends closer to the middle of the rod. with the bend as far back as I have them the rod was hitting the heater flap cable tubes. With the bends correct, I moved onto the length. You'll need to decide if you're going with the Porsche shift coupling, or the beetle shift coupling. I actually think the Porsche one is a better unit, but with my transmission pushed as far forward as I have it, I'd need to cut out the VIN to be able to put the one I have in. Thus, I went beetle. A quick weld on the end, and I was done...ish. I could get 2/3rd no problem, and while I could get into 4/5 it was binding against something. Turns out it was the tubes for the heater flaps under the rear seat. Well, I'm not planning on using those...so out came the tubes, which in itself was a royal pain the ***. 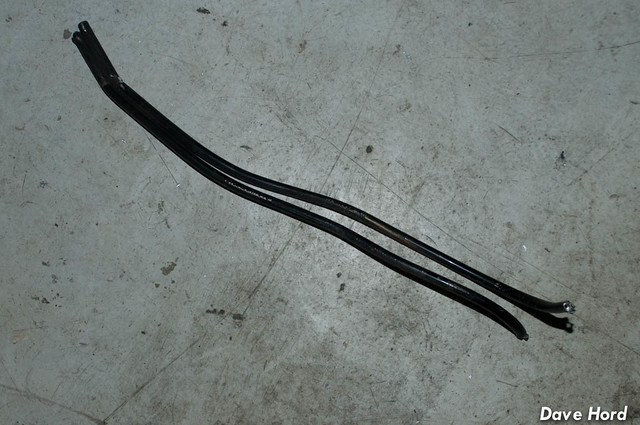 following the tube removal, I still couldn't get 1st or reverse. Something was hitting the shifter...and when I finally found it, well lets just say incredible. How did I by chance just happen to leave this little tab? My cut and sheet metal work went through half the welds holding it in. Ever try and use a die grinder inside a tunnel? Not fun! 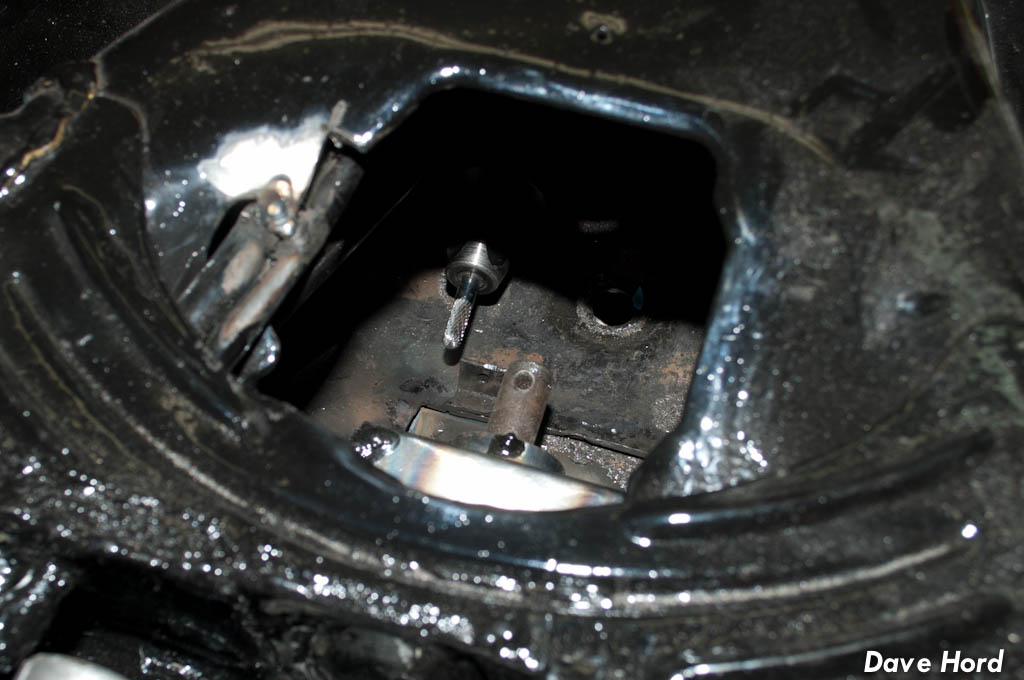 Thankfully I can now hit all the gears...though it did seem to require a bit too much muscle for my taste, using the stock beetle shifter. Tomorrow I'll work out what else is binding in my setup. ...porsche trans, not a 'quick' project! -Dave
__________________
'71 Type 1 - Rally Project '58 Type 1 - I bought an early!?! '73 Type 1 - Proper Germanlook project '68 Type 1 - Interm German 'look' project '75 Type 1 - Family Heirloom '93 Chevy 3500 pickup - Cummins Swap Last edited by owdlvr; November 21st 2011 at 05:38.
|
|
#79
November 20th 2011, 09:14
|
||||
|
||||
|
Great progress - you're not hanging around! nice front mount system you have there - not seen somone use stock mounts before! keep the pics coming!
|
|
#80
November 21st 2011, 05:38
|
||||
|
||||
  Ugh, what a frustrating day. It started off well enough, modified the clutch release fork to fit the car...and got that dialed, but from there, it all went downhill. I knew there was something binding up in the shifting, and figured it would be a relatively straight forward process for eliminating the issues. The weird part was I could get 1st, 3rd and 5th no problem, but reverse, 2nd and 4th were binding something fierce. I tried a stock VW shifter, my 'proto' short shifter and then made up a handle that I could attach right to the end of the transmission to use my hand. At one point, I was soooooo close... 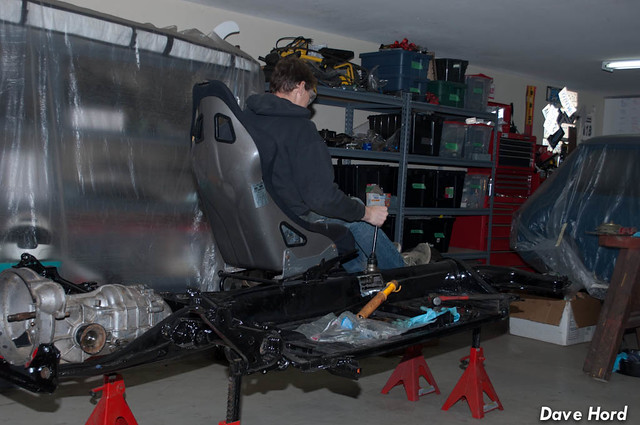 But 20 minutes later, this was my garage: 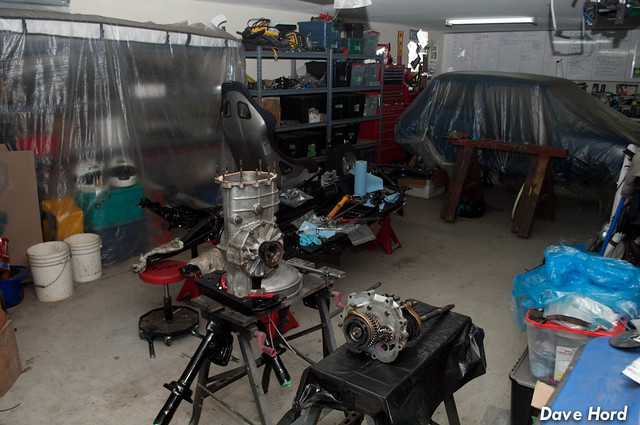 yup, tore the transmission down a second time...and confirmed the problem: 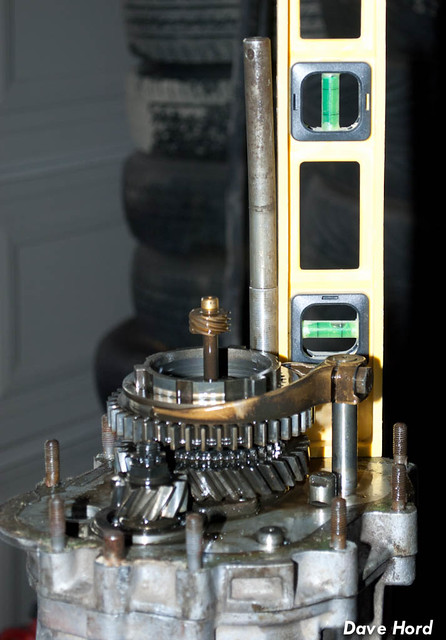 We didn't actually measure how bad it was out, but after the first big pull to straighten it we measured it at 80 thou out. No wonder it was binding. Guess this gearbox was dropped at some point! Anyways, with that fixed and the transmission back together I spent the evening resetting the shift linkage, re-welding the bushing support in and confirming that it was all dialed. I'm was actually about 1/4" short with my shift rod, but that was easy enough to deal with since I was welding a bunch of the stuff in. Got it all done around 8pm, just in time for a late dinner. Just one last job, the shift rod bushing below the shifter. Oh crap. Complete brainfart. That bushing is replaceable with the stock setup, you simply pull out the shift rod, slide the bushing in and replace the shift rod. However, once you put a Z bend in the shift rod for a Porsche trans...no dice. That left me with a major dilemma. Leave the bushing missing, and deal with a rattling shifter...or yank it all out and start over. Can you guess what I did?  Of course, putting the bushing in meant the assembly didn't move around enough to actually slide it into the tunnel. One more heater control tube sacrificed itself in the name of progress, and I could just get the assembly in through my large access hole. Then it was back to testing, adjusting, testing, adjusting, and finally welding. My transmission tunnel has suffered badly, and I'll need to run either carpet or the rubber mats (kind of my plan anyways)...but I can now say that I have all the gears and a reverse lookout. An entire day spend on shift linkage!!! -Dave
__________________
'71 Type 1 - Rally Project '58 Type 1 - I bought an early!?! '73 Type 1 - Proper Germanlook project '68 Type 1 - Interm German 'look' project '75 Type 1 - Family Heirloom '93 Chevy 3500 pickup - Cummins Swap
|
|
#81
November 21st 2011, 22:47
|
||||
|
||||
|
Quote:
 The rear mounts were only designed to "cradle" the trans, there is no internal metal "lock" , only rubber... you know what happens to rubber when you stretch it back and forth enough. Even the stock vertical nose cone mount fails after a while. hate to see the nose hanging on by just the shiftrod... I went through this with my front mount... which is why it took me three tries The rear mounts were only designed to "cradle" the trans, there is no internal metal "lock" , only rubber... you know what happens to rubber when you stretch it back and forth enough. Even the stock vertical nose cone mount fails after a while. hate to see the nose hanging on by just the shiftrod... I went through this with my front mount... which is why it took me three tries 
__________________
1970 T1 W/MassIVe 2913cc RAT/?EFI? w/direct fire (very soon) and 915 trans  1962 SC 1776cc SP 944NA brakes, 993 wheels VKG
|
|
#82
November 21st 2011, 23:18
|
||||
|
||||
|
Dave,
Looks like you got the inside shift rod sorted, but if you need a replacement, let me know as we carry that item as part of the conversion. VR ALex
__________________
Alex Olaverri Sales Associate for Bug@5-Speed (US) Email: Bugat5speed@yahoo.com Tele: 973 204-5463
|
|
#83
November 22nd 2011, 04:53
|
||||
|
||||
|
Thanks Alex! We'll see how it does when driving...but for the moment it "feels" good.
----- Ever have one of those nights where you want to throw the whole project against the wall? Sigh. Tomorrow is a new day. -Dave
__________________
'71 Type 1 - Rally Project '58 Type 1 - I bought an early!?! '73 Type 1 - Proper Germanlook project '68 Type 1 - Interm German 'look' project '75 Type 1 - Family Heirloom '93 Chevy 3500 pickup - Cummins Swap
|
|
#84
November 22nd 2011, 22:36
|
||||
|
||||
|
Quote:
(which is why mine is not done)
__________________
1970 T1 W/MassIVe 2913cc RAT/?EFI? w/direct fire (very soon) and 915 trans 1962 SC 1776cc SP 944NA brakes, 993 wheels VKG
|
|
#85
November 23rd 2011, 06:52
|
|||
|
|||
|
What a fight with the shift rod!
My plan is to fit two shift rod bushes. The stock one at the front and another (stock) at the rear end of the tunnel, set at the correct height for the gearbox selector rod. Then cut the shift rod in two places (between the bush locations) and fit two universal joints. This would give a more accurate shift without a bent rod flapping about inside the tunnel. A bit late for that suggestion but if the current set up doesn't work that might be an option. I think the front bush setup is worth a try as I agree with Ricola's analysis and so did the rally engineers. However, I'd check the mounts annually (use a pry bar to check the stretch) and expect them to need replacing periodically. The rally car had modest amounts of torque compared to a big Type4 but the drivers did a lot of engine breaking as the brakes were cooked most of time (which stretches the mounts).
|
|
#86
November 23rd 2011, 16:06
|
||||
|
||||
|
Funny you should mention that Bruce. Ideally, I think the dual-universal joint system is the way to go. When I initially measured the drop I didn't think 3.75" was 'so big', but by the time you bend the rod and put it into the tunnel you realize just how tight it really is. When I was redoing the shift rod for the 3rd time on Sunday I actually pulled a steering shaft and it's joints out of a box to see if they might be useable in this application. Unfortunately too big, so I need to go and find some smaller ones.
For the moment I believe I have a well working shift system, but it's really hard to evaluate that while sitting on a bare pan! I've decided I will go with carpet or rubber floor mats, instead of a bare tunnel, so that leaves me the option of cutting into the tunnel down the road to improve on this. For now I've tack-welded my access hole shut, and will search out another VW shift rod and bushing support for improving it at a later date (if this doesn't work well as is). I've also been thinking a lot about the front bushing setup for the trans. If this were a typical street car where you build it, and then it's "done"...I'd probably be quite concerned. In fact, I think I'd be redoing the system since failure is likely to occur way down the road at an inopportune time. But, I'm not building a street car. With my race cars I have a system where before and after each event I go over the car from bumper to bumper. It's put up on axle stands and all fluids are flushed, all mounting points checked, major component (engine, tranny, suspension, brake) nuts and bolts are checked. I average one event every 3mo, so I think that is probably a good enough window to discover a problem. With my Audi, after the first season I had a good record of how long things like rod ends and upper suspension mounts lasted. So after the first year I just rotated those parts out on a shorter window...whether they needed it or not. At $20 for two mounts, I think I can afford that here! :-) The other thing I've been thinking about is the skid plate. I know I need to protect the nosecone / shift rod on the transmission, so there might be an opportunity to build in a 'failsafe' when we do the skid plate. I tossed this plate on just to see the coverage / get an idea. The real one will involve lots of trimming, etc. But for visuals, this will work as a start: 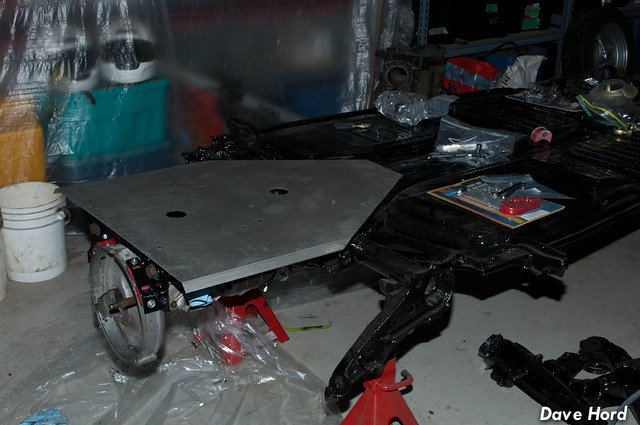 I'm thinking if I design the mounts for the skid plate well enough, I should be able to place this left over urethane piece I have in between the skid plate and the front transmission mount: If the mounts fail, the nose of the trans would drop and rest on the urethane and skid plate vs. hanging off the shift rod. I still need to think this through though. In order to be effective the Urethane mount needs to be within 15mm of the transmission...but that means the skid plate needs to be strong enough it won't bend up INTO the trans. So, maybe not a good idea...but a start! -Dave
__________________
'71 Type 1 - Rally Project '58 Type 1 - I bought an early!?! '73 Type 1 - Proper Germanlook project '68 Type 1 - Interm German 'look' project '75 Type 1 - Family Heirloom '93 Chevy 3500 pickup - Cummins Swap
|
|
#87
November 25th 2011, 00:22
|
||||
|
||||
|
Dave, the universal joints will help and you will need a second mounting point (as you have said) We had to go with the universal linkage on a build I helped with. I'm the one holding the TIG torch
Here's the link... http://www.thesamba.com/vw/forum/vie...224&highlight=
__________________
1970 T1 W/MassIVe 2913cc RAT/?EFI? w/direct fire (very soon) and 915 trans 1962 SC 1776cc SP 944NA brakes, 993 wheels VKG
|
|
#88
November 25th 2011, 06:10
|
||||
|
||||
|
After seeing that link...I'm going to have to do the universal joints! But, I'm waiting. It works now, must get car driveable...then upgrade the shifting later ;-)
----- After a few days of little to no work accomplished in the garage, it was time to get cracking and get something done! Started by making some pipe... 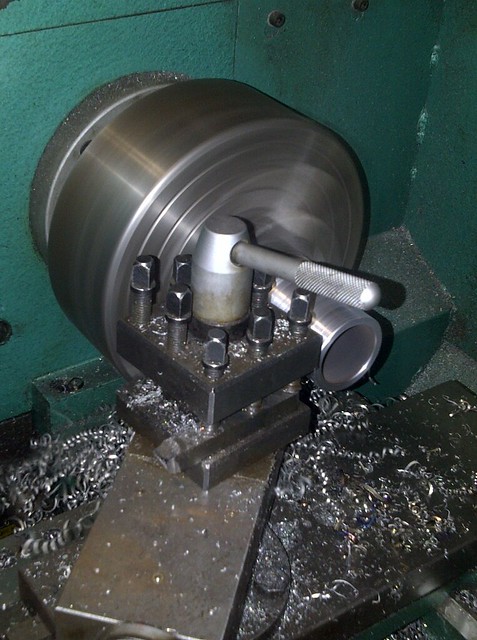 Then I made some holes...  ...made some modern art... 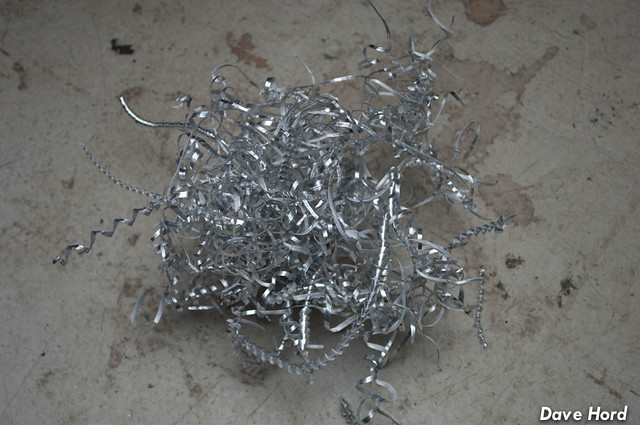 and finally started working on the car ;-) 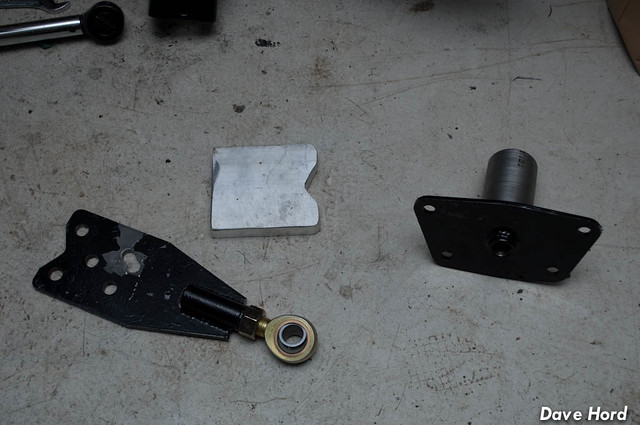 Having removed the torsion bars from the rear, I bought a rather simple "coil over conversion kit" which I knew I would be modifying for double-shear mounting of the rod-end. What I didn't realize is just how much modifying I'd be doing. For starters, the entire rear suspension was going going to be held on by 4 M10 bolts on each side, in single-shear fashion. I didn't think it was very strong, and the offroad Baja guys confirmed they shear the bolts off. The pipe we turned down on the lathe ended up being welded to the back of the mounting plates. These pipe sections are a tight fit into the torsion tube and should hopefully serve to transmit the load to the torsion tube instead of the mounting bolts. Once I lined up the plates to the suspension arm, it quickly became clear there were further issues. The plate sits a full 3/4" over from where the mounting surface is supposed to be. I considered cutting the welds and bending the plates, but for now have opted to make aluminum spacers to sandwich in between. The guys at the local rally shop are away for an event, so I had to cut some quick spacers in my garage. Eventually I'll go back and make some nice ones on the mill. Not pictured in the photo above are the extra plates I made for double-shear mounting of the rod end. But here is one side mocked up for testing: 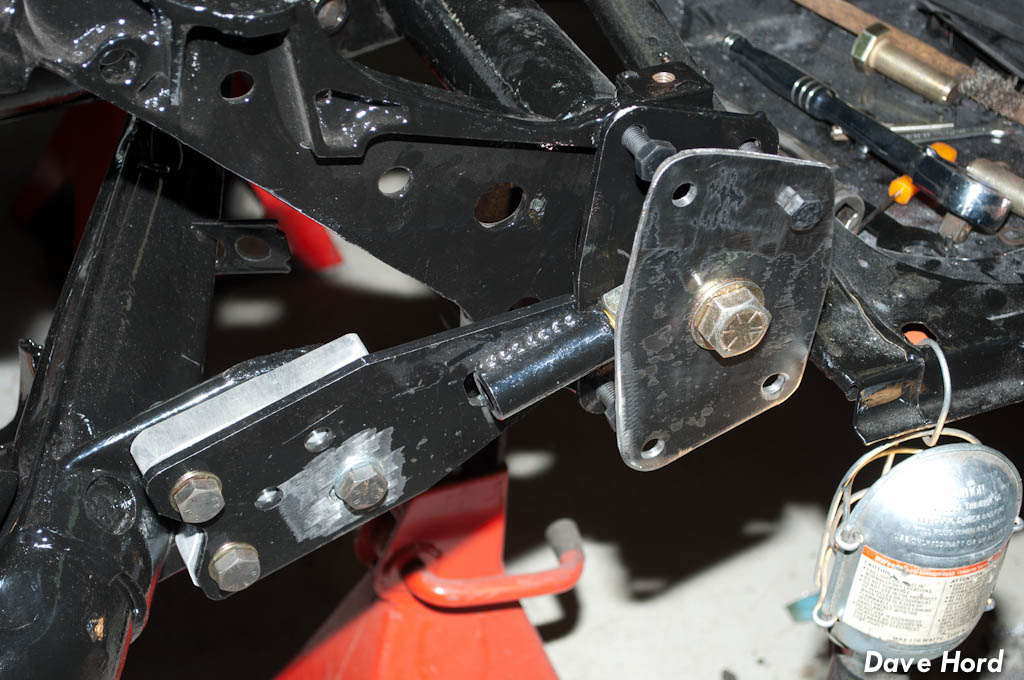 I'm going to order some grade 8 studs to thread into the torsion bar housing, and then the final step will be to make four spacers for the outside plate on the lathe. The studs will allow me to secure the inner plate with a nut, slide larger spacers over top and secure the outer plate with a second nut. This should, in theory, be stronger then just a long bolt with spacer. And hey, can't overbuild your suspension mounts! After a mockup of both sides to ensure everything fit, I tore it all down and gave it a coat of POR15...which is still drying.  Between the fab work and fitting that was pretty much all I accomplished today, outside of mounting the trailing arms. A good clean of the shop was in order...and then I remounted the shifter, having repainted the tunnel last night. Looking at the spindly little stock shifter, I couldn't help but miss portions of my prototype shifter. After a couple of cuts I think I've managed to keep the best of both worlds, eh? 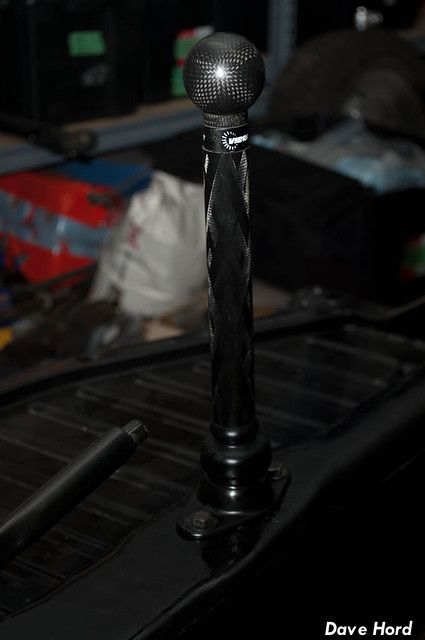 -Dave
__________________
'71 Type 1 - Rally Project '58 Type 1 - I bought an early!?! '73 Type 1 - Proper Germanlook project '68 Type 1 - Interm German 'look' project '75 Type 1 - Family Heirloom '93 Chevy 3500 pickup - Cummins Swap
|
|
#89
November 25th 2011, 15:58
|
|||
|
|||
|
Looks familiar
good work   Paul.
__________________
If some is good and more is better, then too much should be just about right!
|
|
#90
November 26th 2011, 21:37
|
||||
|
||||
|
Hey Dave,
I was also working on my rear spring plates this weekend. 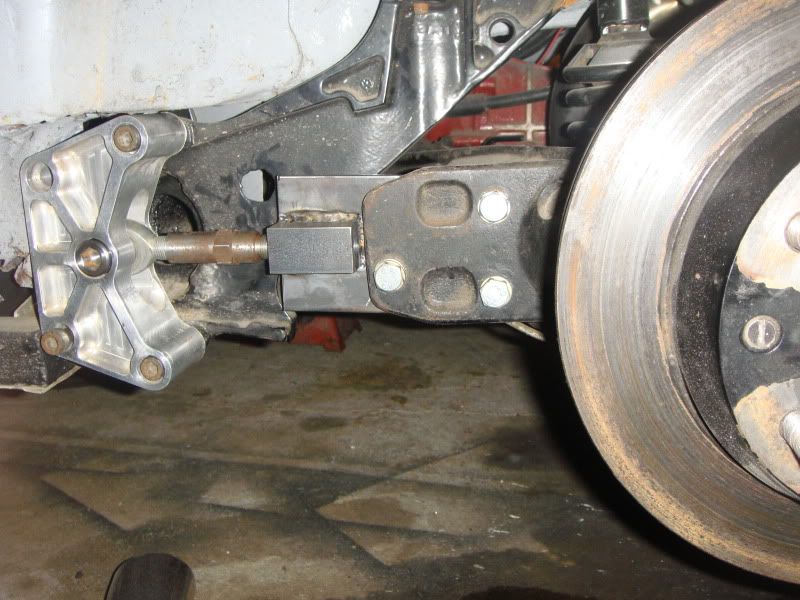 The double shear mod you did looks nice and strong. With the plates you put on your trailing arms is there going to be enough room for your wheels? Also what rear coilovers are you going to run?
|
 |
| Currently Active Users Viewing This Thread: 2 (0 members and 2 guests) | |
|
|


 Linear Mode

