
|
|
#316
 April 12th 2012, 14:19
|
|||
|
|||
|
Dave, well done on all you hard work, nearly there, congrats, but your proposed rear spring poundage is huge, i only ran 300lb for dry tarmac racing with a much heavier rear loading than you will have, and I'm an oversteer set up man, i love it, but 500 lb will handle so loose at the rear even on the tarmac, you wont wont a rear ARB connected, we've seen this a lot lately, with many posters on here talking up the spring rate, unresponsive setup changes usually indicate chassis flex, perhaps when you get some testing miles on it, things will become clearer. Regards Johnny.

|
|
#317
April 12th 2012, 21:20
|
||||
|
||||
|
Really, really sweet, congrats again!

__________________
If I could just get paid for my sleepless nights.... 1960 VW Bug UBRDUB Walkaround 1st Drag Run Dyno Run Oval Ragster-'57 Rag/'04 Boxster S
|
|
#318
April 13th 2012, 07:27
|
||||
|
||||
|
Nice Work dude can't wait to See it in Action... Nice that you went with the Red Mudflaps
 Chris.
__________________
74 Std. GL 08 Vw rabbit 18 WR250R 07 Chevy 3500 Dually
|
|
#319
April 13th 2012, 22:03
|
||||
|
||||
|
Thanks Guys. I'm super stoked to be driving it, though it's far from finished! I've just got to the "debugging stage". After that, it's finishing off the race-prep with things like skid plates and other necessary items. I'll be shooting vids soon enough, but have a coaching event this weekend so won't be posting until next week.
Quote:
I'm shocked to hear that you ran 300lb springs without issues. With the 300's and no damping my car sunk through most of it's travel. Even with the preload cranked I'm not sure I could get it up to ride height...though I admit to not trying it. The 550's hold the car at right height with just a slight touch of preload, but I will admit they are too stiff. You can feel the rear end wanting to go on dry tarmac, but it's fully predictable and I haven't actually slid it yet...in the dry. When the road is wet, however, it's a complete handful. Like, Porsche 930-widowmaker, handful. I'll be honest...it's a tonne of fun, until you suddenly find yourself looping it on a Vancouver city street without even trying...in traffic. Yeah, not my proudest moment :P My brain was screaming "don't lift!!!" ...but my foot had already started coming off the pedal. Now, keep in mind I'm on an older pair of 165 series tires, so that definitely adds to the problem. Bump compliance in corners isn't great though, so I do need to soften the springs a little. I'm going to try 450s next, and then from there move to progressive setup with tender & main. I probably should put the 300's back in and crank up the preload to see if it will support the car. Would certainly make it far closer to the front springs which are rather soft right now. -Dave
__________________
'71 Type 1 - Rally Project '58 Type 1 - I bought an early!?! '73 Type 1 - Proper Germanlook project '68 Type 1 - Interm German 'look' project '75 Type 1 - Family Heirloom '93 Chevy 3500 pickup - Cummins Swap Last edited by owdlvr; April 13th 2012 at 23:46.
|
|
#320
April 20th 2012, 15:06
|
||||
|
||||
|
Well, I haven't abandoned this thread...but it has been a week. At the rate I was going it sure feels like I've abandoned it!
I had a few days off from the car, while I was coaching, and have since just spent time enjoying the drive. There is much to be done still, and I have a couple of deadlines looming that require some fast hard work...but I figured for a few days I would enjoy it. At about the 500km mark I noticed I had a slight leak of oil out the front of the engine case. The cam seal always leaked on this engine, so I was less concerned then perhaps I should have been. At 700km I noticed a slight oil smell coming from the car when I stopped at a light, by 750km it was dripping oil consistently. Hmmm. Drove it back home (trailers are for wimps) and by the time I got there she was smoking oil off the muffler. Hard to see in this photo, but the 'fogginess' of the lower half of the photo is caused by oil smoke. 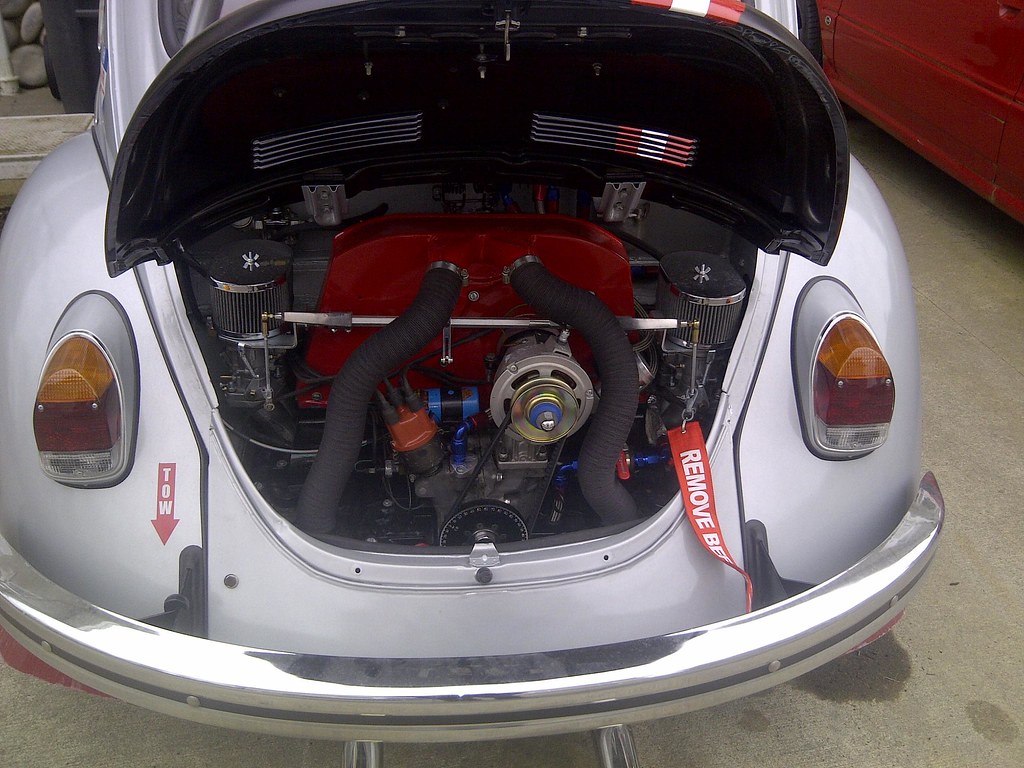 By now I knew that it wasn't the cam seal, but rather the flywheel seal. I have 5w40 all over the bottom of the car, or as I like to think of it "rust protection" :P Regardless, the motor needed to come out...so last night I popped it out. Took me two hours from the time I drove into the garage, which is long by bug standards but pretty short considering all the stuff I have to deal with. A good bit of that time was spent finding tools i have yet to put away properly! 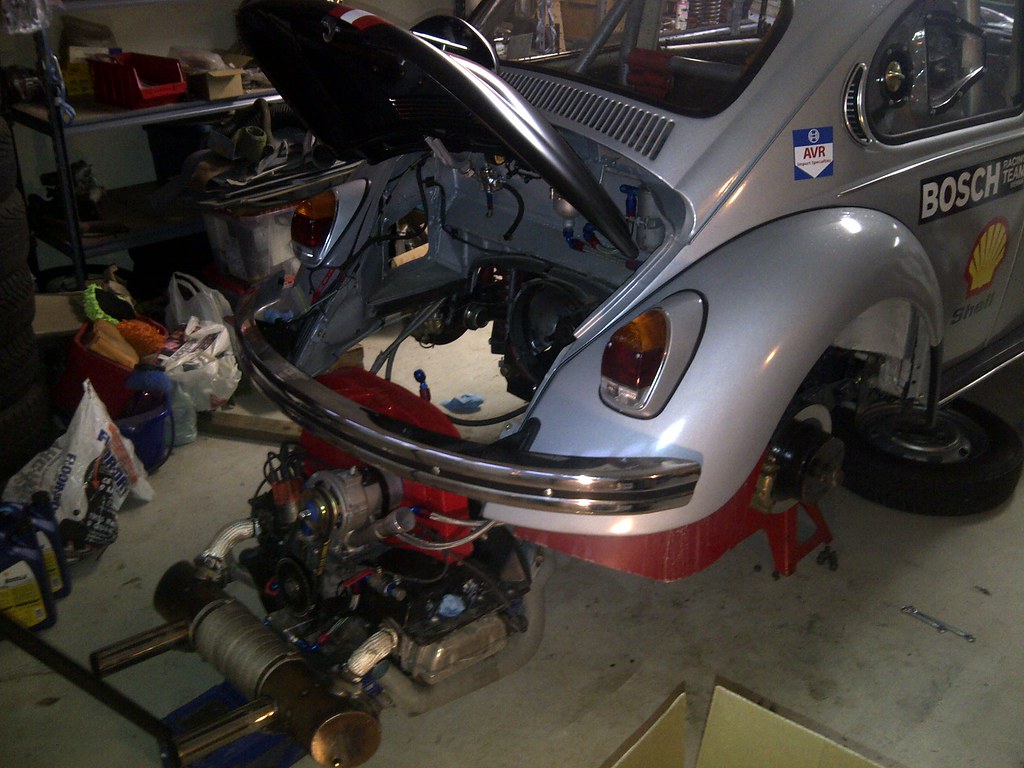 Hmmm, yes, it would seem we've found the problem. 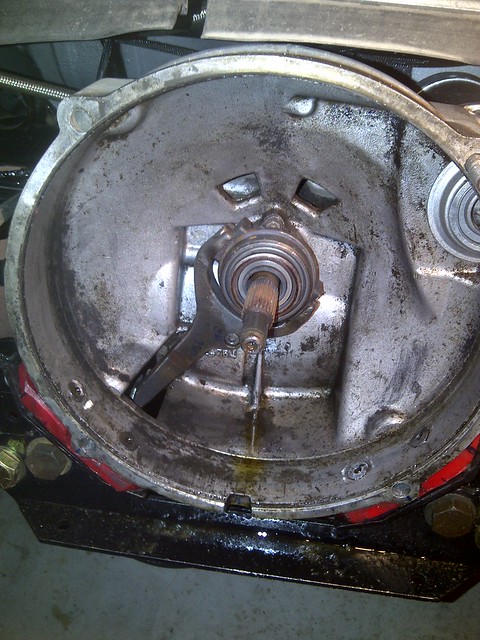  When I called my local parts store to see if they could get me a seal for the morning, she was surprised to find they not only stocked them...but she has sold one or two per year for the past few years. Doing some mental math, that pretty much sums up my engine pulls/flywheel seal sagas exactly. Thats when it hit me, I always install the first seal "flush with the case", and end up having a leak. I go back, put a new seal in to the step and it solves all my problems. Maybe this note will stay for next time?  All buttoned up by 12:30am and ready to go. I have a few other items I need to take care of while it's in the garage...but I could have driven it to work today if I wasn't working from home.  -Dave
__________________
'71 Type 1 - Rally Project '58 Type 1 - I bought an early!?! '73 Type 1 - Proper Germanlook project '68 Type 1 - Interm German 'look' project '75 Type 1 - Family Heirloom '93 Chevy 3500 pickup - Cummins Swap
|
|
#321
April 23rd 2012, 09:36
|
|||
|
|||
|
Is that a new flywheel or an old one? If the shoulder that the seal rests on is at all rough or grooved, it will kill the seal in no time.
Also, I source a genuine VW seal to put on the shelf for next time. The normal aftermarket ones don't last and I'm not a big fan of the silicon type. Bentley manual doesn't give an exact position for the seal but in the past I've gone for slightly under the face of the case. Looks the business by the way. Well done to you!!!
|
|
#322
April 23rd 2012, 15:20
|
||||
|
||||
|
The flywheel is used, but smooth and no grooves. There was a polish mark right up near the backside that told me the seal wasn't set in enough. I used to have a piece of steel I made up on the lathe for setting the seal, but I never remember I made it when the time comes!
Thanks, I have a few new additions to post up that I've made...just buried under Spring Thaw Classic Car Adventure planning and gear. Will post up as soon as I can. 1050km on the car now...starting to feel good  -Dave
__________________
'71 Type 1 - Rally Project '58 Type 1 - I bought an early!?! '73 Type 1 - Proper Germanlook project '68 Type 1 - Interm German 'look' project '75 Type 1 - Family Heirloom '93 Chevy 3500 pickup - Cummins Swap
|
|
#323
April 24th 2012, 07:06
|
|||
|
|||
|
Seals can be had from VW dealers directly in the UK - not sure how it is out there, but if you are struggling I'd be happy to procure/post them for you
Eagerly awaiting more updates!
|
|
#324
April 24th 2012, 09:39
|
||||
|
||||
|
I have used the orange seal with dual seal lips and had the "Dry" seal lip tear loose each time and leak like hell. I always look to make sure they only have 1 seal lip now.
__________________
NO_H2O 72 1302 Smack Black GL 73 Bus (2L CIS Powered) 66 Beetle, 73 Standard Beetle 72 Pinzgauer 710M Volksport Kafer Gruppe
|
|
#325
April 24th 2012, 15:14
|
||||
|
||||
|
Well, 300km on the new seal and holding fine (knocks on wood).
Drove the car down to a Vancouver Swap meet this weekend. Before heading down I needed to mount up the club badge onto the car: 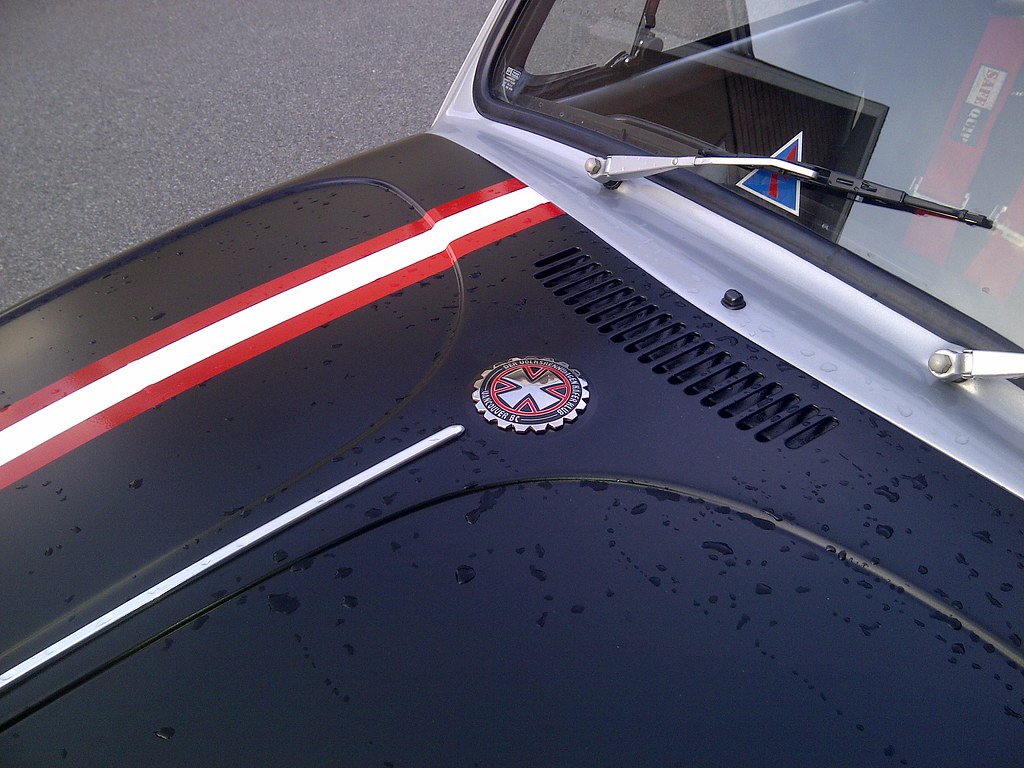 I had planned on just hanging out at the swap for a couple of hours, keeping my wallet firmly in my pocket. Sadly, that didn't last long. Geoff found me a 1302s badge, which I paid way too much (in my mind) for. Hard to negotiate when you so obviously have the car that needs it parked 100ft away! I'm such a cheapskate that $20 for a much needed badge seems like the worst spend I've had on the whole build. Forget the ridiculous spending I did on the wiring harness...this one hurts! haha.  I was picking up a set of 4.5" wheels from Rob, but then one of the guys rolled into the swap with a full set of 5.5" sport rims and tires in his stash. Two of the tires are dated 1980, and while all four have the molding nubs still installed they aren't exactly a set I would trust to drive on! A deal was made, and I soon found myself trying to figure out how to stack 4 rims with tires and 4 bare rims into a car which will has no storage space or room. Out came the passenger seat, in went the gear, and then I layed the passenger seat on top. Thankfully I still have my ratty old seats, so fear of dirt is non-existent! One more tire and wheel combo, and two rims are still go be loaded in:  I've managed to find time to mount up the rally intercom, into the only spot available in the car. Without the belts on I can easily reach the volume knob, but once strapped in the location is useless. Sort of a pain, but there is no room on the trans tunnel which is reachable, and I'd have to extend the wires by quite a bit to mount it under the dashboard. This will just have to do. I trimmed out the wire length and resoldered on the ends for a clean installation. Also wired in an output line for interior video, and and input line for the iPod. When cruising and not racing I can listen to tunes (mono, in one ear only), or while shooting video the camera gets a feed of what's being spoken between the two seats. (hopefully not "OH &^$%!!!!!" :P ) Last thing to do for the intercom system is repair/replace my headsets. The Peltor intercom requires dynamic microphones, and I have passive ones currently. 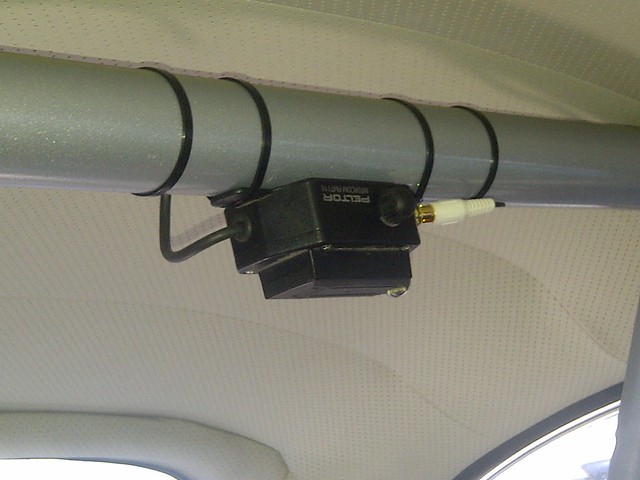  I keep tossing the GoPro in my laptop back to shoot some video, and then promptly forget that I have it until I'm down the road strapped in and unable to move. Speaking of which, I also welded in anti-submarine belt mounts this weekend. There was much debate over whether I should put my mounts to the floor or mounts to the seat mounts. The proper way to do it is with plates welded to the floor, and a bolt going through the floor and plate. But that assumes that you also have your seats properly mounted to the cage / floor. I've got my seats mounted to factory sliders...so, it's a bit of a grey area. Technically if the seat breaks free the belts should hold me and the seat in place. Eventually I decided that I'm in a '71 Volkswagen Beetle with just a 4pt roll bar. If I've managed to hit something hard enough that my seat mounts have broken free, I'm in a whole world-of-hurt that makes the anti-submarine strap mounting far less of a concern. With that, a 1" seamless tube was welded across the bottom of the seat mounts and the straps are now mounted to that. Even though the tires are old, and likely unsafe, I couldn't resist mounting up the wide sport rims to check out the look. They've got 205/70/15's on the back and 165/15s on the front. It's a terrible combo that rakes the front end of the car and just looks...wrong.  So now I'm in tire juggling mode between now and my Spring Thaw departure on Thursday. The 165's I had on 4" wide hub-cap rims are being mounted to the 4.5" sport-style rims today. They'll go onto the car tomorrow morning, and should have that "narrow period" look that match the rest of the car. The wide sport rims will have the 80's cal-look tire set removed and my 205/60/15 track tires will be mounted. Not 100% sure these are going to fit on the front of the car, but tomorrow night late I'll mount them up to see. They'll totally ruin the period look of the car, and it's probably far too sky-high for wide track meats (no adjustable suspension on the front yet)...but they will be safer and more fun for 1200km of pavement rally/touring. If I'm not sold on the look, the narrow sport-style wheels will get coat of poor-mans-chrome (silver spray paint) and get remounted on Thursday morning. Sleep, who needs sleep? -Dave
__________________
'71 Type 1 - Rally Project '58 Type 1 - I bought an early!?! '73 Type 1 - Proper Germanlook project '68 Type 1 - Interm German 'look' project '75 Type 1 - Family Heirloom '93 Chevy 3500 pickup - Cummins Swap
|
|
#326
April 24th 2012, 16:04
|
||||
|
||||
|
Quote:

__________________
www.vw1303s.com
|
|
#327
April 25th 2012, 08:54
|
||||
|
||||
|
The 1302S badge looks to be in great shape. I would call that a good find. I love a good swap meet.
__________________
NO_H2O 72 1302 Smack Black GL 73 Bus (2L CIS Powered) 66 Beetle, 73 Standard Beetle 72 Pinzgauer 710M Volksport Kafer Gruppe
|
|
#328
May 6th 2012, 01:05
|
||||
|
||||
|
Wow,
What a few weeks it has been. I'm sorry I haven't been updating the thread as frequently, but the moment the bug was "ready" I had to go into emergency car-prep and organizer mode for our Annual "Hagerty Spring Thaw Classic Car Adventure". This year Warwick, my business partner, and I were pushing the limits a little too closely. First up was the Bug, a whole brand new build which required three unplanned motor pulls and the unplanned tear down to replace the bearings. That set me back by at least a week, which meant helping Warwick out was becoming a problem. On Warwick's side we had his '66 Alfa Romeo Duetto which needed rear brake work. The left rear caliper was locking up so I tore it off and rebuilt it. Oddly enough the same problem continued. Alfas are famous for needing a flex line replaced to solve rear axle lock up, but the strange part was it was only the left side that was a problem. Never-the-less, the car was put up on axle stands again so I could do the rear flex line. Following that the brakes released properly (odd) but it had to come in a third time for a full brake bleed. I guess once we free'd up the rear the air in the front became apparent! 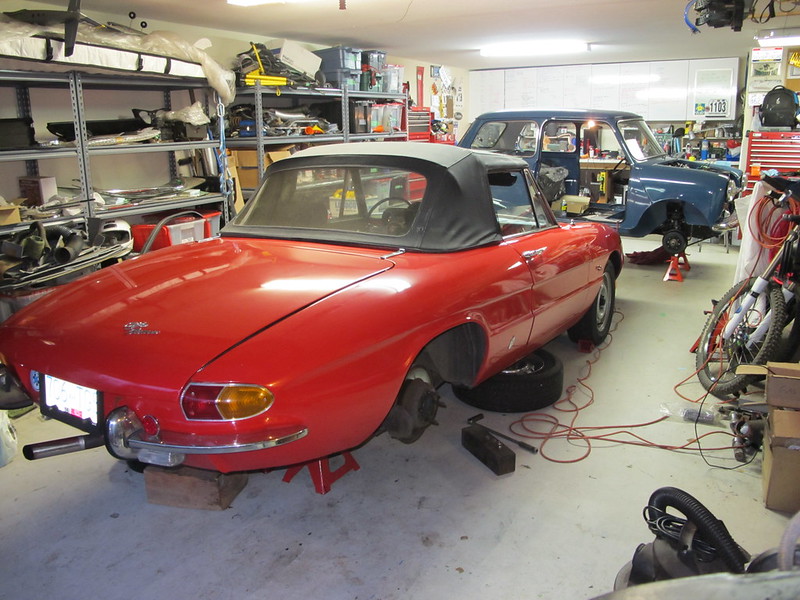 With the Alfa ready to go, we focused on Warwick's '66 Austin Mini. With just three days to go before our event it still had no interior, a new motor puking oil, no brakes, no doors, no hood and no engine lid. First up was fixing the motor. When the engine was built one of the oil-galley plugs was pulled to clean out the block from any machining. The galley was threaded and a bolt installed with gasket and sealant. Unfortunately the 75psi of break-in oil pressure was pushing oil past the threads at an alarming rate. Different sealants were tried, and then finally as a last-ditch effort before pulling the motor I pulled out the tubes of Permatex Cold Weld (JB-Weld's competitor). I hate to use cold-weld on a new motor, but with the event fast approaching we were running out of time. 12 hours later, Warwick and I both crossed our fingers as he hit the starter. Sweet! No oil leak! I then made him a temporary gauge holder to house an oil pressure gauge, Audi Voltmeter and coolant temperature gauge. A spare Stewart Warner tach was popped onto the dash so he could monitor his break-in and ensure he was running at different RPMs on the way to the start. Warwick was working on the car 18 hours a day. His buddy Martin was putting in daytime hours and I was working evenings. All along the two of us were pausing to do last-minute event items such as hotel changes, meal confirmations, cancellations and wait-list entries. It was a crazy blur! At some point I managed to have my buddy Gord swap the 165-series tires from my hubcap style rims over to the late-model super rims. Still 4.5" wide, but more in the style I prefer. There were plans to refinish them before the Spring Thaw event, but those were quickly shelved with all the other crazyness going on. 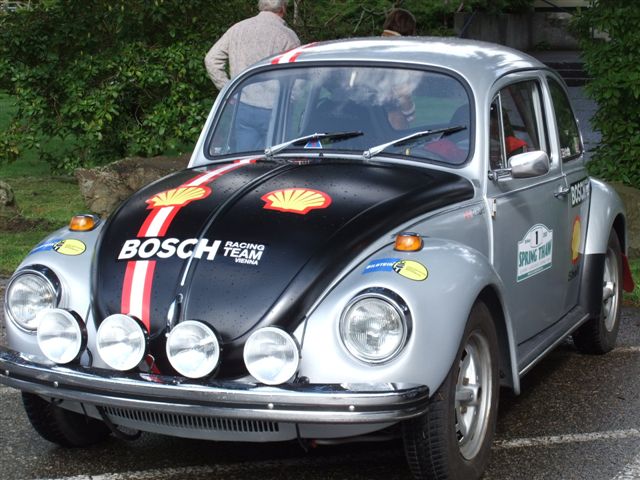 Thursday afternoon (April 26th) came, and while I worked on final changes with our entrants Warwick hit the road in the Mini to break it in on the way to our start location. He made it about 40min down the highway before calling me to say the car had died. Diagnosis procedures were relayed over the phone and via text as I loaded the car and raced down to help him out. In the rush to leave I managed to completely forget any tools, and thus planned to do the 1200km driving adventure with no jack, no wheel wrench, and no tools or spares! I did have a clutch cable, but that was going to be pretty useless without any way to install it By the time I had arrived Warwick had diagnosed the problem as the coil, and soon after a fellow Mini buddy dropped by with a spare. Off we went to prep the start! Well, actually I went to the hotel and started drinking beer with some of our Entrants while Warwick hit a buddies shop for a late night alignment, fuel pump repair and the manufacture of rear wheel spacers to stop the rubbing. Nothing like finishing the car at 11:30pm the night before!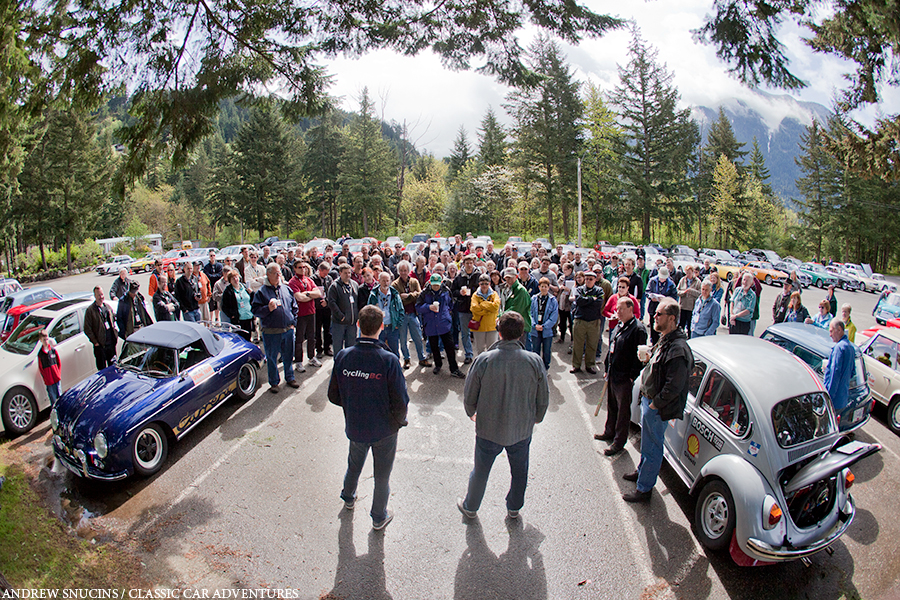 With the morning came 73 classic cars, 148 people and the start of what has turned into the fall event of the Pacific Northwest. Our Fourth Annual Spring Thaw started in Hope BC, travelled to Sun Peaks on night one, from Sun Peaks to Penticton BC on night two and then back to Hope for the finish. The event attracts everything from cars you wonder if they'll make it, all the way to very expensive and rare european machinery. Amazingly all entered vehicles managed to make it to the first night's hotel stop...which is a first for the event. The bug was running flawlessly, though I will admit to driving it much easier then I have in previous years. I decided that I really didn't want to be the "Hard Luck Award" winner, which is given to the team which has a catastrophic failure during the event. Much of the first day was spent playing on the roads with a friend's 356. Dave recently installed a new motor and was also "being easy" on the car with a self-imposed 4500rpm rev limit. By the end of the day it was clear both of us had to flip our mirrors if we were the one leading...the car in the back was clearly pushing the rev limits higher and higher! My co-driver had bailed for the Thaw with relatively short notice, and with the craziness of the weeks before I never got around to inviting a new one. So, Ernie jumped in the right seat to take care of map duties for the weekend. He was pretty quiet the whole time, but I have to say he was about as accurate and useful with the directions as my regular co-driver! 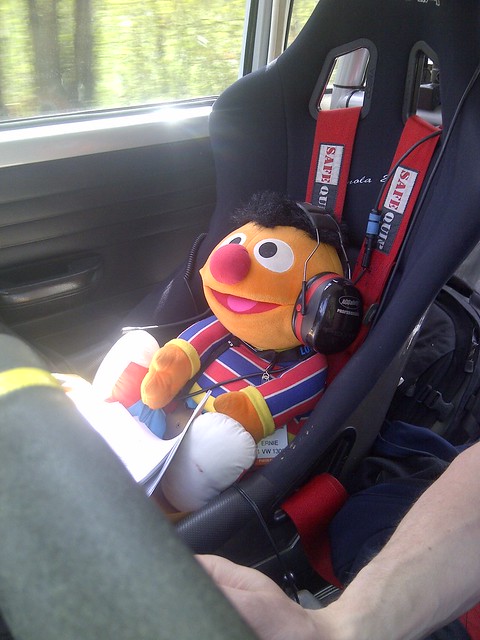 Day two was a day of swapping cars between myself and Duncan's TR7. I've always wanted one, as dad had a project TR7 when I was a kid, but have never had the opportunity to drive one. At first I realized you should never drive the cars you dream about...coming from the bug the TR felt like it was floating all over the road...but soon settled into reviewing the car on it's own, instead of comparing it, and came to enjoy it quite a bit! Duncan and I also worked on tuning the dampening for the rear suspension on the beetle. Having a second set of eyes to see what the car was doing and comparing it to what I was feeling inside was a huge help. We've dialed out much of the widowmaker handling and the car is becoming quite predictable under throttle and when sliding. 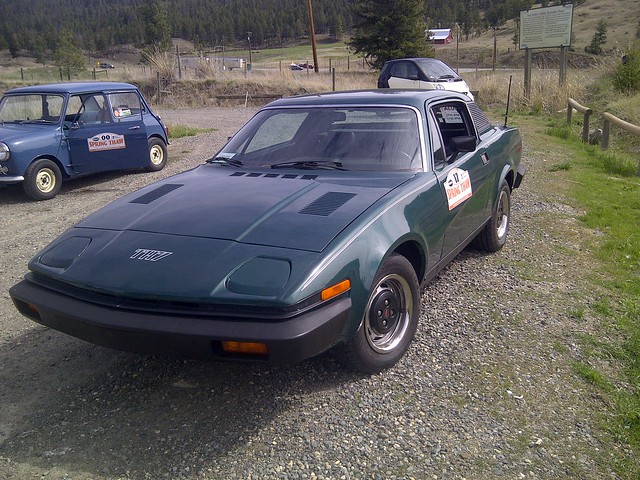 Day two also saw our first catastrophic failures. Warwick's Alfa blew out it's centre driveshaft bearing while his mom was driving, and was the only fully-terminal issue for the whole event. The car was towed to a local town, where one of our entrants offered the use of their enclosed garage for as long as required. Tucked away safely, Sue and Lorrie began jumping into the back seats of whatever classic cars they could. On the Spring Thaw, no one is left behind! Gerry Frose, who painted my bug, also had a big failure on day two. His 1980 Rabbit decided that the inner CV balls would look far better bouncing down the highway as opposed to inside the joint where they could be useful. Parts and tools were acquired from 2 hours away, and while rather sunburned, they managed to get it together and even beat me to the hotel (via a shortcut) for night #2. 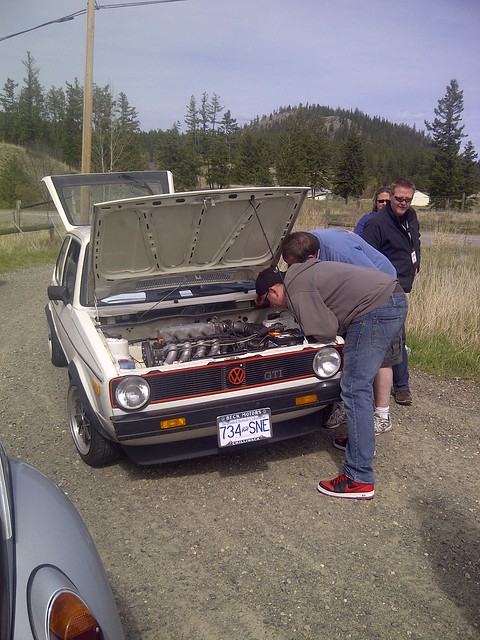 Day three for me was rather short. Someone on the organizing team had to skip ahead to greet guests at the finish, and since I haven't done it on the other three years it was my turn! I left 15-30min before the first cars were out, but that didn't keep me from watching my rear view mirror the entire time on the first road. I always warn guests on the day three driver's meeting that the brake pedal is going to be a little longer today, and my car was no exception. Going deep into the corners had double meaning on this run! Ultimately, however, the car performed flawlessly and it was a short while later that my co-driver and I were able to enjoy our first meal of the weekend. It didn't last long though, like all my other meals on the weekend it was quickly interrupted by organizing duties. Cold food taken in bites over a period of hours...that's the eating habits of an organizer!  Following the Thaw the week has been a whirlwind. I wrote down a 34-point list of things I needed to prep by Friday night. Connor spent much of the week crossing the items off the list with me each evening...and the local Rally Shop, Rocket Rally, filled in the blanks during the day for me. I think we un-mounted and mounted the equivalent of 20 tires over a three day period! Some of the major highlights of the week: Rally Tire rims painted, Pirelli tires mounted.  Hand Brake lever handle completed by my buddy Scott.  Spare tire strap was sewn, and finally installed. 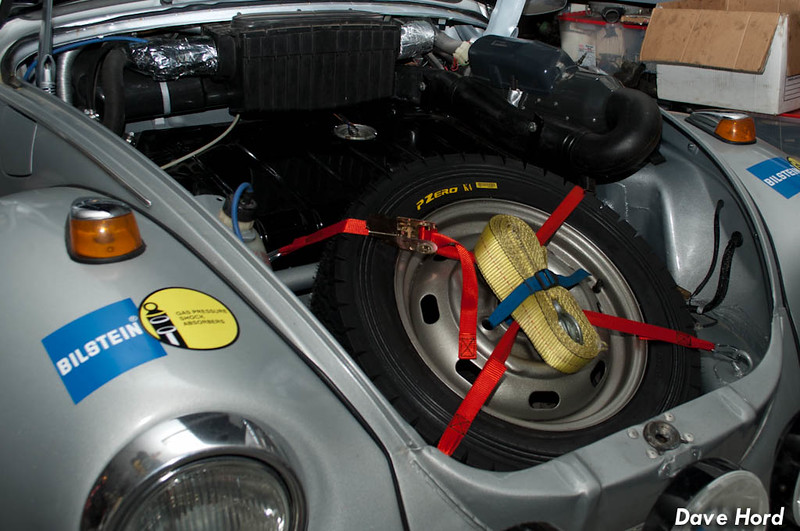 I fixed the stripe on the engine lid. It took 4 tries to lay without bubbles or tears...but then promptly split the next morning!  And the big one was seats and belts. I needed a non-ratty set for the weekend, and time was running short to work out some options. I ended up calling another ralliest in town, Brandon, and asked to borrow his seats and belts. Took two nights to modify my seat mounts to fit the wider seats...but the interior is looking far better. Sorry the photo is so dark, meant to take another in the morning and forgot. 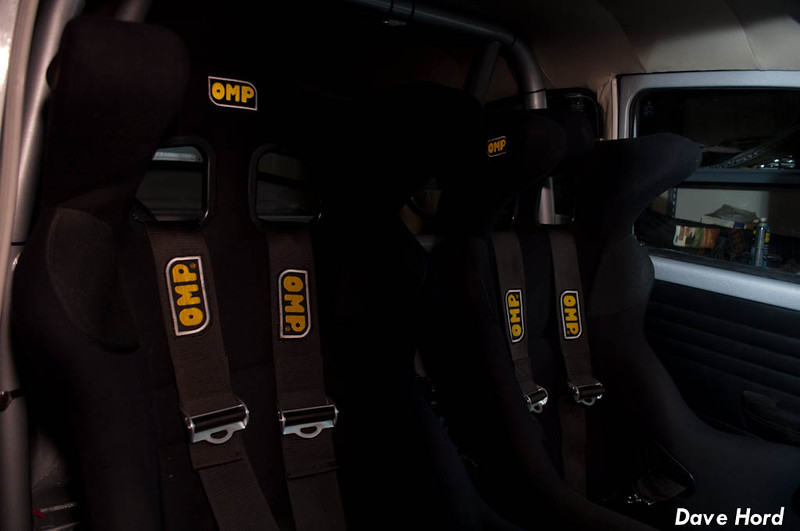 With that, I packed the car and prepared myself for waking up at 3am...
__________________
'71 Type 1 - Rally Project '58 Type 1 - I bought an early!?! '73 Type 1 - Proper Germanlook project '68 Type 1 - Interm German 'look' project '75 Type 1 - Family Heirloom '93 Chevy 3500 pickup - Cummins Swap
|
|
#329
May 6th 2012, 01:48
|
||||
|
||||
|
My alarm went off at 3:00am this morning. It took until 3:30 before I finally shut snooze off for good, and by 4:00 I was on the highway south of my hometown. Crossing the US border was shockingly easy this time around. The guard didn't even open my passport, simply asking "do you race this thing!?!" I replied with a "not yet, but after the photos are done I will be." She didn't even ask me where I was going, or for how long, just a "have fun" and I was in the U.S. The drive down was through the rain, and when I arrived in Lynnwood it was off to find a do-it-yourself coin wash to clean the car for the second time in 13 hours.
Now, I suppose I should pause for a moment to explain that "washing the car" to me usually means some dish soap, a sponge and the hose...and done as quickly as possible. About a year ago I switched to proper car washing soap, only because it was on sale, but drying to me has always been either air-dry or with a beach towel. Quite frankly I've never owned a vehicle with a finish nice enough to care. But here I was, bringing my car to Northwest Auto Salon, a buddy Blake's detailing shop. NWAS is regularly voted Washington's top detailing shop, and every time I'm there its jammed with Lamborghinis, Ferraris, Porsches and Classics. Blake's shop, especially the back storage shops, and his neighbour Cat Exotics are the places to be to find the weird, rare and wonderful. LM002? Two colors to choose from. Diablo? pick your model, flavour and color...they are all here. Countach? Do you prefer early no-wings, or late crazy 80's style? It doesn't really matter, as they are all represented in multiple choices. That's just the Lambo selection! Anyways, you can imagine that bringing the lowly beetle is a bit humbling. Not to mention that any vehicle I've ever driven there has been embarrassing...at least on Blake's scale. Now, he did start off with cheap Audi 4000's and rust bucket Audi-90's, so he's paid his dues. But take his Riviera for instance, you can't find a flaw on the entire car...and trust me, I tried! 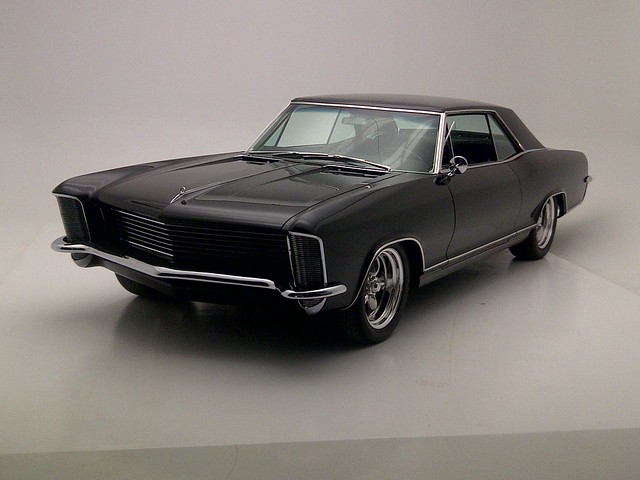 Before Blake arrived I washed the car, polished the bumpers and tail pipes, cleaned the wheel-wells and swapped the street tires over for the rally tires.   When Blake did arrive, he was quite impressed with the build...which, for me, is like getting approval from someone like Jay Leno. To have Blake, who deals with insane cars on a daily basis, check the car out and show genuine enthusiasm was pretty rad. My wash job was even determined to be acceptable, though apparently the Chamois I used is no longer "in style" and I need to switch to microfibre cloths for drying. My windows, however, were a complete and utter failure. I own seven different metric wrench sets, but seem to think that blue-shop-towels are all you need for detailing a car. Blake whipped me through window-detailing 101 and taught me the techniques for crystal clear windows, right to the edge of the rubber. I had no idea that one would need three cloths, special steel wool and the eyes of a hawk to do the job right...but after seeing the finished product I'm totally sold. There was no time to move onto other lessons, so Blake matte-waxed the hood and engine lid to remove water spots, and I vacuumed out the inside of the car. Another friend, Andrew Holliday, showed up...and the car was rolled back into Northwest Auto Salon's photo studio. Blake gave the car one final check under the lights...  ...the curtains were closed and Andrew went to work. 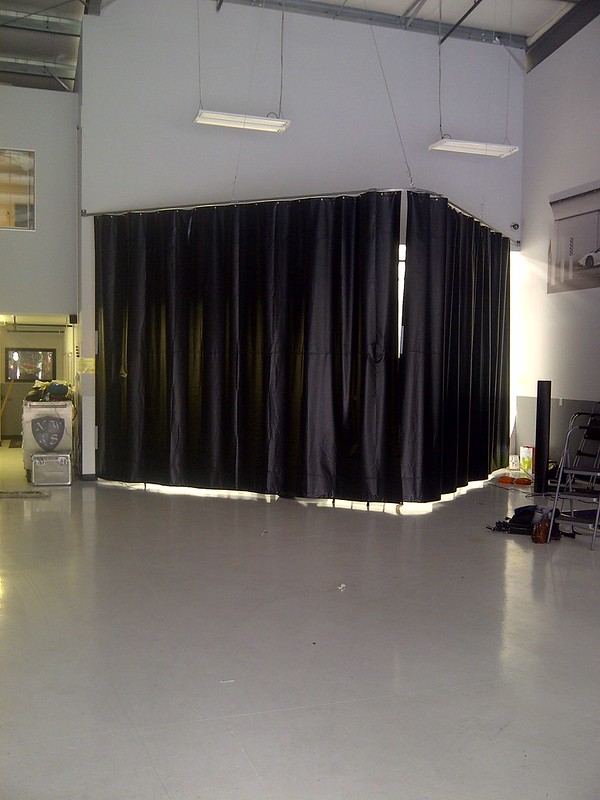 The rest of today's story will need to be told at a later date, but the important part for now is that "the studio shots" have been done. I no longer need to worry about stone chips, thus the gravel tires will be used this week! Not quite sure where yet, but I am definitely getting out for some testing :-) For now, however, I'm completely bagged. 17 hours after I left this morning, I am back home. Almost fell asleep on the highway, had to pull off and sleep at a Starbucks for an hour. Following the nap I had a double shot of Espresso followed by a double-shot Mocha while driving. Needless to say, it's sleepy time. -Dave
__________________
'71 Type 1 - Rally Project '58 Type 1 - I bought an early!?! '73 Type 1 - Proper Germanlook project '68 Type 1 - Interm German 'look' project '75 Type 1 - Family Heirloom '93 Chevy 3500 pickup - Cummins Swap
|
 |
| Currently Active Users Viewing This Thread: 1 (0 members and 1 guests) | |
|
|


 Linear Mode

